Difference between revisions of "Content Dev:IC Avatar Collision Shapes"
Chuck (RL) (Talk | contribs) m (→Production Notes) |
Chuck (RL) (Talk | contribs) m (→Production Notes) |
||
| Line 68: | Line 68: | ||
We recommend you download the [[Media:Collision_Shape_ini_Data.zip|CC3+ Neutral ini file]] to start off the adjustment process. | We recommend you download the [[Media:Collision_Shape_ini_Data.zip|CC3+ Neutral ini file]] to start off the adjustment process. | ||
| − | == Production | + | == Production Tips == |
The collision shape for the upper chest to the shoulders should be embedded into the neck. | The collision shape for the upper chest to the shoulders should be embedded into the neck. | ||
| Line 117: | Line 117: | ||
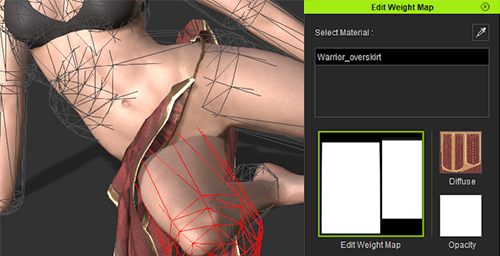
<li style="display: inline-block;"> [[File:cc33_collision_shapes_15.png|frame|A completely white weight map will rely 100% on the physics engine to conform around the colliders.]] </li> | <li style="display: inline-block;"> [[File:cc33_collision_shapes_15.png|frame|A completely white weight map will rely 100% on the physics engine to conform around the colliders.]] </li> | ||
</ul> | </ul> | ||
| + | |||
| + | For high fidelity simulation of the cloth physics, make sure to use the '''By Frame''' setting in the timeline: | ||
| + | |||
| + | [[File:Cc33_collision_shapes_16.png]] | ||
| + | |||
| + | Don't put too much detailing into the weight map for the clothe. The complete dark areas must also cover the included vertices completely. You can visualize the weight map coverage by saving it out as a diffuse map for the clothe (with wire-framing and shaded mode on). | ||
| + | |||
| + | [[File:Cc33_collision_shapes_17.png]] | ||
Revision as of 22:04, 19 August 2020
- Main article: CC Content Development.
Production Instructions and Restrictions
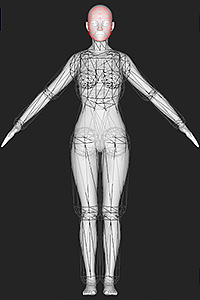
- The number of Collision Shapes in the whole body of each character cannot exceed 16 (there is an upper limit for calculating collisions).
- Do not use Box for Collision Shape when Create New.
- Try not to circle the Collision Shape beyond the scope of the Mesh, especially the head.
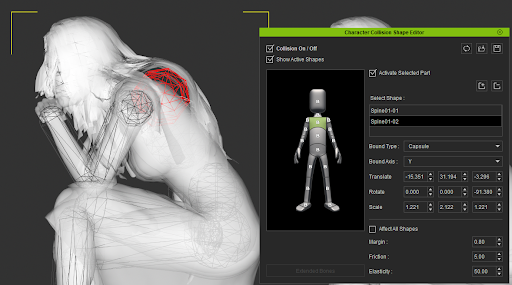
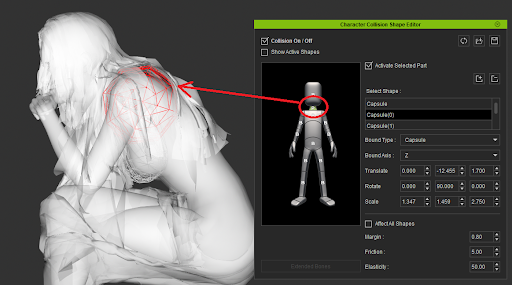
- Collision Shape from the upper edge of the chest to the shoulders, placed in the area of the neck.
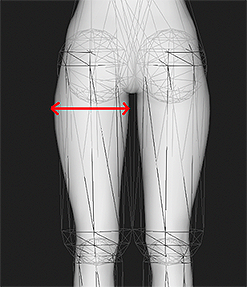
- The limbs try to use the widest area of the Mesh as the diameter of the Collision Shape, especially the thighs.
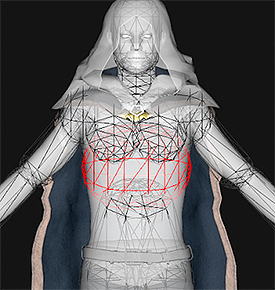
- The Collision Shape of the torso must be coherent, without gaps.
- Be sure to weigh the ass and chest to avoid side leakage.
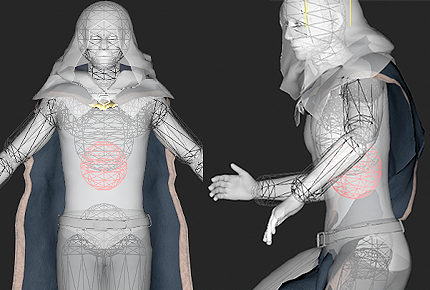
- Recommendation: Try to use Capsule shape for the chest to prop up the sloped area between the clavicle to chest.
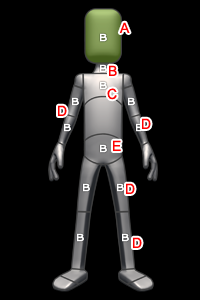
CC3+ Basic Collision Shape Structure
The collision shapes below are all capsules:
We recommend you download the CC3+ Neutral ini file to start off the adjustment process.
Production Tips
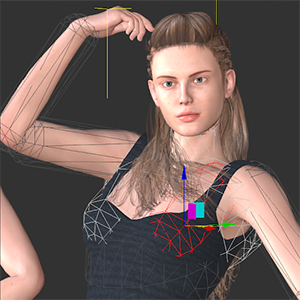
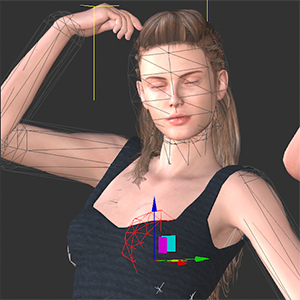
The collision shape for the upper chest to the shoulders should be embedded into the neck.
When setting the size of the collision shape, factor in the widest width of the limbs, especially for the thighs.
The colliders for the trunk of the body must be connected, without any gaps in between.
Make sure the colliders for the buttocks are properly sized to cover the region.
It's recommended to use the capsule collider instead of the sphere shape to support the shape of the breasts.
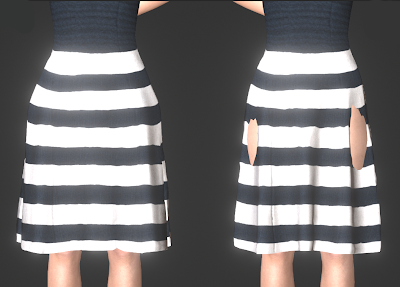
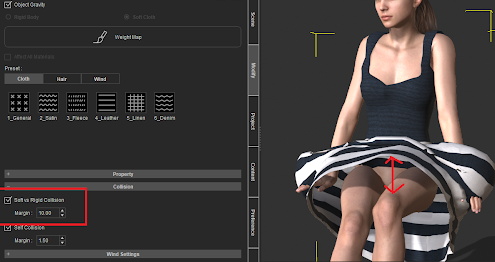
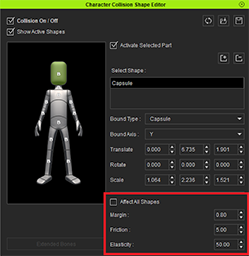
Situations where certain clothes forms a wide gap from the body due to the collision shapes can be fixed with a simple setting:
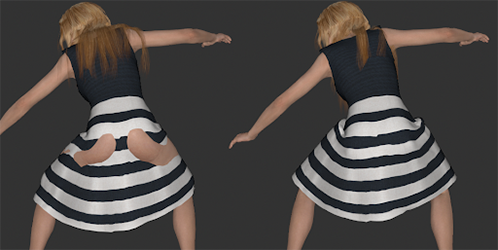
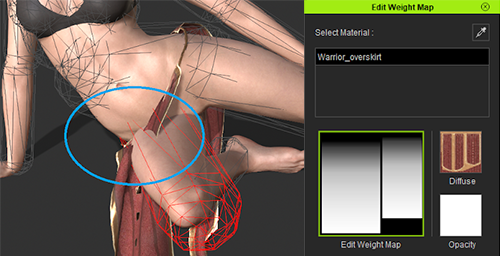
Certain cloth may cut right into the colliders because the physics weight map might have grey-scale data or gradients. Consider editing the weight map to fix this issue.
For high fidelity simulation of the cloth physics, make sure to use the By Frame setting in the timeline:
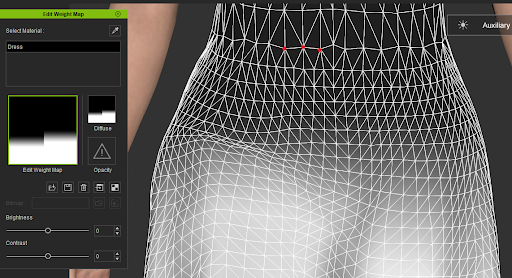
Don't put too much detailing into the weight map for the clothe. The complete dark areas must also cover the included vertices completely. You can visualize the weight map coverage by saving it out as a diffuse map for the clothe (with wire-framing and shaded mode on).
