Content Dev:CTA Uploader
- Main article: Content Development.
General Process
- Finish your content with Reallusion approval.
- Finish your commercialization images with Reallusion approval.
- Upload the final content.
- Assemble the pack in the Marketplace.
- Download your own content for testing.
The Uploader
You can download the "Uploader" from https://city.reallusion.com/upload.html
The instructions are on the same download page.
Uploader User Interface
|
|
A) Required information section. B) Optional informations section. 1) Login: Enter your account name and password to begin the upload process. 2) Add: choose the iContent that you want to upload, or drag the iContent onto this button. 3) Item name: is the name on the website. Changing this value doesn't effect the actual content that is uploaded. 4) Assign Subfolder: The installation directory for this content. Best practice is to use your brand name first and pack name second, for example: "Sappan Designs \ Speech Bubbles". |
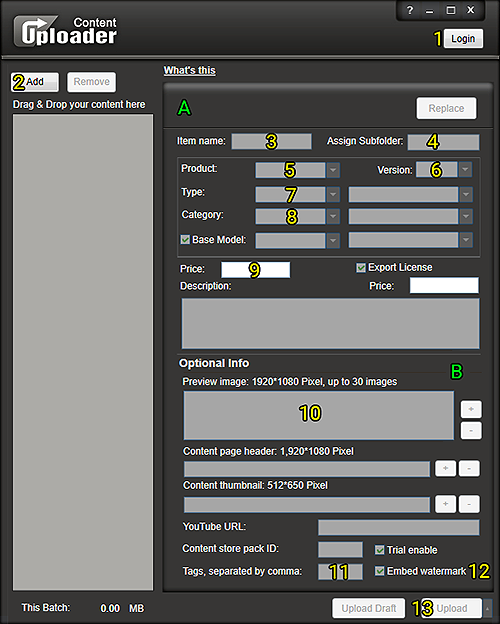
When you start to upload content, please make sure you check "Upload and hide from my store." If you don't check this and upload the content, the item will be published on your store and can not be removed.