Difference between revisions of "Content Dev:CC Normals Bake"
Chuck (RL) (Talk | contribs) m (→Test Cases) |
m |
||
| (32 intermediate revisions by one other user not shown) | |||
| Line 1: | Line 1: | ||
{{TOC}} | {{TOC}} | ||
| − | {{Parent| | + | {{Parent|Content_Dev:CC_Asset_Production_Precautions#Normal_Map_Baking|CC Asset Production Precautions}} |
== The Current Problem == | == The Current Problem == | ||
| Line 135: | Line 135: | ||
6) Right click on the low poly model input and select '''Browse external cage file''' to load in the exported cage file.<br> | 6) Right click on the low poly model input and select '''Browse external cage file''' to load in the exported cage file.<br> | ||
7) Double check the export directory and texture size and proceed to bake the textures. | 7) Double check the export directory and texture size and proceed to bake the textures. | ||
| + | |||
| + | == Common Production Issues == | ||
| + | |||
| + | === Hard vs Soft Edge Comparison === | ||
| + | |||
| + | There are significant shading differences between a hard-edged low poly geometry and a soft-edged low poly geometry. | ||
| + | |||
| + | {{Quintuple_Illustration | ||
| + | |Hard_Soft_Edge_Comparison_01.png|Soft-edged 120° ∠| | ||
| + | |Hard_Soft_Edge_Comparison_03.png|Soft-edged 110° ∠| | ||
| + | |Hard_Soft_Edge_Comparison_05.png|Soft-edged 90° ∠| | ||
| + | |Hard_Soft_Edge_Comparison_07.png|Soft-edged 70° ∠| | ||
| + | |Hard_Soft_Edge_Comparison_09.png|Soft-edged 60° ∠| | ||
| + | }} | ||
| + | {{Quintuple_Illustration | ||
| + | |Hard_Soft_Edge_Comparison_02.png|Hard-edged 120° ∠| | ||
| + | |Hard_Soft_Edge_Comparison_04.png|Hard-edged 110° ∠| | ||
| + | |Hard_Soft_Edge_Comparison_06.png|Hard-edged 90° ∠| | ||
| + | |Hard_Soft_Edge_Comparison_08.png|Hard-edged 70° ∠| | ||
| + | |Hard_Soft_Edge_Comparison_10.png|Hard-edged 60° ∠| | ||
| + | }} | ||
| + | |||
| + | From the test cases above, we can deduce that shading artefacts on the soft-edged low poly is not very obvious when the angles are blunt or obtuse (greater than 90°). However, once the angle is sharp or acute (less than 90°) then the problems in the shading become obvious. In comparison, in all cases where the hard-edged low poly was used, there is no practical visual disparity between the high and low poly shading. The differences are even more evident when looking at the normal textures below. | ||
| + | |||
| + | {{Duo_Illustration | ||
| + | |Hard_soft_edge_normal_map_02.png|Soft-edged 90° ∠ low-poly normal map.| | ||
| + | |Hard_soft_edge_normal_map_01.png|Hard-edged 90° ∠ low-poly normal map.| | ||
| + | }} | ||
| + | |||
| + | From the test case above, it is obvious that the normal map for the soft-edged low poly geometry has to work a lot harder to create the illusion of hard edges. It does this by compensating for the smoothness of the low poly geometry by countering the shading with vast swaths of gradients. If the destination 3D application can not rework the shading, then attaining proper smoothness is impossible. In contrast, the hard-edged low poly mesh already possesses the proper hard edged shading. Therefore, it does not have to compensate with gradients in order to render smooth, flat surfaces. | ||
| + | |||
| + | The results does not mean that one should use hard-edged surfaces at all costs and avoid the use of soft-edged surfaces. In fact, both have their specific use cases. We recommend the use of soft-edged meshes for blunt angles and soft objects such as cloth, and hard-edged meshes for sharp angles and hard surfaces like metals. | ||
| + | |||
| + | === Connected vs Split UV Comparison === | ||
| + | |||
| + | The following example uses a low poly mesh with smooth edges along with a projection cage. | ||
| + | |||
| + | {{Duo_Illustration | ||
| + | |Connected_split_uv_01.png|Connected UV edges.| | ||
| + | |Connected_split_uv_02.png|Split UV edges.| | ||
| + | }} | ||
| + | |||
| + | {{Triple_Illustration | ||
| + | |Hard_edged_UV_merged_and_split_01.png|Connected UV edges 120° ∠| | ||
| + | |Hard_edged_UV_merged_and_split_02.png|Connected UV edges 110° ∠| | ||
| + | |Hard_edged_UV_merged_and_split_03.png|Connected UV edges 90° ∠| | ||
| + | }} | ||
| + | {{Duo_Illustration | ||
| + | |Hard_edged_UV_merged_and_split_04.png|Connected UV edges 70° ∠| | ||
| + | |Hard_edged_UV_merged_and_split_05.png|Connected UV edges 60° ∠| | ||
| + | }} | ||
| + | |||
| + | {{Triple_Illustration | ||
| + | |Hard_edged_UV_merged_and_split_06.png|Split UV edges 120° ∠| | ||
| + | |Hard_edged_UV_merged_and_split_07.png|Split UV edges 110° ∠| | ||
| + | |Hard_edged_UV_merged_and_split_08.png|Split UV edges 90° ∠| | ||
| + | }} | ||
| + | {{Duo_Illustration | ||
| + | |Hard_edged_UV_merged_and_split_09.png|Split UV edges 70° ∠| | ||
| + | |Hard_edged_UV_merged_and_split_10.png|Split UV edges 60° ∠| | ||
| + | }} | ||
| + | |||
| + | According to the test cases above, edge seams result from baking hard-edged low-poly surfaces without first splitting its UVs. This problem exists for all angles with only a slight difference in the severity. | ||
| + | |||
| + | {{Duo_Illustration | ||
| + | |Normal_map_merged_split_01.png|Connected UV at 90° ∠| | ||
| + | |Normal_map_merged_split_02.png |Split UV at 90° ∠| | ||
| + | }} | ||
| + | |||
| + | This problem arises from the inability of the merged UVs to grab the right sampling pixel during the baking process. The confusion between whether to grab the inside or outside pixel causes normals to have a noticeable seam. However, simply splitting the UVs is not enough. One would also have to separate the UV shells with a buffer distance, otherwise the same problem will still occur. | ||
| + | |||
| + | === Baking With vs Without Cage === | ||
| + | |||
| + | In all of the cases below, the model is set to hard-edged with split and separated UVs. The only difference is that one set uses a cage to bake, the other does not. | ||
| + | |||
| + | {{Duo_Illustration | ||
| + | |Cage_no_cage_01.png|Cage bake 90° ∠| | ||
| + | |Cage_no_cage_02.png|Cageless bake 90° ∠| | ||
| + | }} | ||
| + | |||
| + | {{Duo_Illustration | ||
| + | |Cage_no_cage_03.png|Cage bake close up| | ||
| + | |Cage_no_cage_04.png|Cageless bake close up| | ||
| + | }} | ||
| + | |||
| + | {{Duo_Illustration | ||
| + | |Cage_no_cage_05.png|Cage bake normal map is softer and smoother around the edges.| | ||
| + | |Cage_no_cage_06.png|Cageless bake normal map is excessive around the edges.| | ||
| + | }} | ||
| + | |||
| + | From the test cases above, it is safe to say that baking with a cage will usually yield a better result compared with the cageless procedure. | ||
| + | |||
| + | === Beveled Edges === | ||
| + | |||
| + | All of the test cases below use cage projection baking. | ||
| + | |||
| + | {{Duo_Illustration | ||
| + | |Beveled_edges_with_cage_01.png|Soft-edged 90° UV merged.| | ||
| + | |Beveled_edges_with_cage_02.png|Results in shading errors.| | ||
| + | }} | ||
| + | |||
| + | {{Duo_Illustration | ||
| + | |Beveled_edges_with_cage_03.png|Hard-edged 90° UV merged.| | ||
| + | |Beveled_edges_with_cage_04.png|Results in edge artefacts.| | ||
| + | }} | ||
| + | |||
| + | {{Duo_Illustration | ||
| + | |Beveled_edges_with_cage_05.png|Hard-edged 90° UV split.| | ||
| + | |Beveled_edges_with_cage_06.png|Results are quite good.| | ||
| + | }} | ||
| + | |||
| + | Even though the last example has a faint seam on the edges, it is virtually unseeable from a certain distance. If one is making making mechanical surfaces, then using hard-edge along with UV split and separation is recommended; Otherwise, use the soft-edged technique for pliable surfaces such as cloth fabric and skin. | ||
| + | |||
| + | === Influence of the Low-poly Subdivisions === | ||
| + | |||
| + | All of the test cases below are soft-edged with merged UVs using cage projection. The difference between subdivided and non-subdivided are illustrated below. | ||
| + | |||
| + | {{Duo_Illustration | ||
| + | |Lowpoly_subdivision_influence_01.png|UVs of the undivided low-poly mesh.| | ||
| + | |Lowpoly_subdivision_influence_02.png|UVs of the subdivided low-poly mesh.| | ||
| + | }} | ||
| + | |||
| + | {{Quintuple_Illustration | ||
| + | |Lowpoly_subdivision_influence_03.png|120°∠ Undivided| | ||
| + | |Lowpoly_subdivision_influence_05.png|110°∠ Undivided| | ||
| + | |Lowpoly_subdivision_influence_07.png|90°∠ Undivided| | ||
| + | |Lowpoly_subdivision_influence_09.png|70°∠ Undivided| | ||
| + | |Lowpoly_subdivision_influence_11.png|60°∠ Undivided| | ||
| + | }} | ||
| + | |||
| + | {{Quintuple_Illustration | ||
| + | |Lowpoly_subdivision_influence_04.png|120°∠ Subdivided| | ||
| + | |Lowpoly_subdivision_influence_06.png|110°∠ Subdivided| | ||
| + | |Lowpoly_subdivision_influence_08.png|90°∠ Subdivided| | ||
| + | |Lowpoly_subdivision_influence_10.png|70°∠ Subdivided| | ||
| + | |Lowpoly_subdivision_influence_12.png|60°∠ Subdivided| | ||
| + | }} | ||
| + | |||
| + | {{Duo_Illustration | ||
| + | |Lowpoly_subdivision_influence_13.png|Normals of the undivided low-poly mesh.| | ||
| + | |Lowpoly_subdivision_influence_14.png|Normals of the subdivided low-poly mesh.| | ||
| + | }} | ||
| + | |||
| + | According to the test cases above, undivided mesh has large swathes of normal compensation in the form of gradients that span over the entire face. With subdivided versions, the problem still occurs, only that it is pushed to peripheries where the subdivided faces form the corners of the mesh edges. In both cases, the results are unsatisfactory and goes to show that subdividing the mesh is not an adequate solution to the normal bake problem. | ||
| + | |||
| + | === Influence of the Low-poly Wrap Accuracy === | ||
| + | |||
| + | Under normal circumstance, the low poly mesh is derived directly from the high poly mesh and should match quite well. However due to externalities due to problems with tools or polygonal limitations, the low poly may resemble less and less of the high poly geometry. | ||
| + | |||
| + | {{Single_Illustration|Lowpoly_wrap_accuracy.png|Parts in red highlight regions that have the greatest amount of disparity between the high and low poly meshes.|}} | ||
| + | |||
| + | Sometimes, the disparities can not be fixed due to the number of faces available for the low poly mesh. However, by adjusting the positioning of the vertices, one can at least mitigate the negative effects of unmatched low poly wrap. | ||
== Cautionary Points == | == Cautionary Points == | ||
=== Inter-application Mesh Transfer === | === Inter-application Mesh Transfer === | ||
| + | |||
| + | When working in a team, each member should make sure the surface normals are consistent across different applications, if unifying the application tools is not possible. Take the following Maya to 3DS Max exchange as an example: | ||
| + | |||
| + | {{Triple_Illustration | ||
| + | |Max_to_maya_normals_01.png|The original mesh inside 3DS Max.| | ||
| + | |Max_to_maya_normals_02.png|The same mesh from 3DS Max to Maya.| | ||
| + | |Max_to_maya_normals_03.png|The mesh back again from Maya to Max.| | ||
| + | }} | ||
| + | |||
| + | As illustrated above, the normals become inconsistent when the mesh is brought from 3DS max into Maya and brought back into 3DS max. This problem is caused by the discrepancy with how Max and Maya handles surface normals whereas 3DS Max uses Smooth Groups and Maya utilizes edge hardness. When a model changes hands between different applications, pay special attention to preserving the surface normals. | ||
| + | |||
| + | {{Duo_Illustration | ||
| + | |Preserve_edge_orientation_01.png|With '''Preserve edge orientation''' checked.| | ||
| + | |Preserve_edge_orientation_02.png|With '''Preserve edge orientation''' unchecked.| | ||
| + | }} | ||
| + | |||
| + | As an aside, be careful not to enable '''Preserve edge orientation''' when exporting out of Max, otherwise, the quads will split into triangular faces. | ||
=== Issues with Under Optimized Mesh === | === Issues with Under Optimized Mesh === | ||
| + | |||
| + | After the modeling process, the mesh must go through a clean up process that involves the likes of eliminating NGons and overlapping vertices. This will get the mesh ready for the painting process with third party software such as Substance Painter and 3D Coat. | ||
| + | |||
| + | {{Duo_Illustration | ||
| + | |Unoptimized_mesh_with_Substance_Painter_01.png|3DS Max preview.| | ||
| + | |Unoptimized_mesh_with_Substance_Painter_02.png|Substance Painter preview.| | ||
| + | }} | ||
| + | |||
| + | One can see from the illustrations above that once a mesh is brought into Substance Painter, the faces triangulate because of overlapping vertices which were now carefully welded together. | ||
| + | |||
| + | {{Duo_Illustration | ||
| + | |Unoptimized_mesh_with_Substance_Painter_03.png|Overlapping vertex in 3DS Max.| | ||
| + | |Unoptimized_mesh_with_Substance_Painter_04.png|The same vertex inside Substance.| | ||
| + | }} | ||
| + | |||
| + | Once the overlapping vertices are welded together, the preview inside Substance Painter shows the correct result. | ||
| + | |||
| + | {{Single_Illustration | ||
| + | |Unoptimized_mesh_with_Substance_Painter_05.png|The fixed mesh inside Substance Painter.| | ||
| + | }} | ||
=== Subdivisions for Substance Material === | === Subdivisions for Substance Material === | ||
| − | + | Texture discontinuity can occur when using the split UV method for normals baking. This is particularly common when it comes to fabric meshes that utilize Substance materials in iClone and CC. | |
| − | + | {{Duo_Illustration | |
| + | |Fabrication_for_Substance_material_01.png|High-poly untextured.| | ||
| + | |Fabrication_for_Substance_material_02.png|Unfixed low-poly with normal map.| | ||
| + | }} | ||
| − | + | {{Duo_Illustration | |
| + | |Fabrication_for_Substance_material_03.png|High-poly textured.| | ||
| + | |Fabrication_for_Substance_material_04.png|Unfixed low-poly with diffuse map.| | ||
| + | }} | ||
| − | + | For meshes of this type, it is suggested that one should add bevel edges and keep the UVs connected in order to preserve texture continuity. | |
| − | {{ | + | {{Duo_Illustration |
| − | | | + | |Fabrication_for_Substance_material_05.png|Fixed low-poly with normal map.| |
| − | + | |Fabrication_for_Substance_material_06.png|Fixed low-poly with material.| | |
| − | | | + | |
| − | + | ||
| − | + | ||
}} | }} | ||
| − | {{ | + | |
| − | | | + | More comparisons between beveled and non-beveled surfaces: |
| − | + | ||
| − | | | + | {{Triple_Illustration |
| − | + | |Fabrication_for_Substance_material_07.png|Unfixed low-poly.| | |
| − | | | + | |Fabrication_for_Substance_material_08.png|Unfixed split UVs.| |
| + | |Fabrication_for_Substance_material_09.png|Unfixed (Smooth group 1)| | ||
}} | }} | ||
| − | + | {{Triple_Illustration | |
| + | |Fabrication_for_Substance_material_10.png|Fixed low-poly.| | ||
| + | |Fabrication_for_Substance_material_11.png|Fixed beveled UVs.| | ||
| + | |Fabrication_for_Substance_material_12.png|Fixed result.| | ||
| + | }} | ||
| + | |||
| + | === Issues with Quadrifying Triangular Faces === | ||
| + | |||
| + | There are several ways to turn a quad into a tri: | ||
| + | #Simply delete the diagonal line joining two triangular faces. | ||
| + | #Use the Poly tools available in 3DS Max to automatically convert the triangles to quad faces. | ||
| + | #Hide the diagonal line in the Mesh mode. | ||
| + | The first method is the simplest and does not need to be elaborated on. | ||
| + | |||
| + | ==== Using the Poly Tools in 3DS Max ==== | ||
| + | |||
| + | {{Single_Illustration | ||
| + | |Quadrangulation_issue_01.png|| | ||
| + | }} | ||
| + | |||
| + | Using the '''Qaudrify All''' tool in 3DS Max has several disadvantages: | ||
| + | *Every single triangulated faces, even the ones that were purposely made so, will be quadrified. | ||
| + | *Some lines that were meant to be kept will also be removed without discretion. | ||
| + | *The shading angles of the lines will also be destroyed, unless one goes about removing them, manually, one piece at a time. | ||
| + | |||
| + | {{Quad_Illustration | ||
| + | |Quadrangulation_issue_02.png|Before conversion.| | ||
| + | |Quadrangulation_issue_03.png|Before conversion.| | ||
| + | |Quadrangulation_issue_04.png|After conversion.| | ||
| + | |Quadrangulation_issue_05.png|After conversion.| | ||
| + | }} | ||
| + | |||
| + | One can see from the illustrations above that the auto-conversion function removes the triangular lines and their associated UVs, causing significant deviations from the original mesh structure. | ||
| + | |||
| + | ==== Hiding the Auxiliary Line in Mesh Mode ==== | ||
| + | |||
| + | {{Single_Illustration | ||
| + | |Quadrangulation_issue_06.png|| | ||
| + | }} | ||
| + | |||
| + | This function has an advantage in that it is not destructive with the original mesh. If the wrong line was hidden, simply show it again. The disadvantage is that this method can be slow, because one will have to select the lines one by one to perform this utility. | ||
| + | |||
| + | {{Duo_Illustration | ||
| + | |Quadrangulation_issue_07.png|Clicking on the position of the hidden line will virtually reveal it.| | ||
| + | |Quadrangulation_issue_08.png|The hidden line still exists as it is only hidden in the meanwhile.| | ||
| + | }} | ||
| + | |||
| + | {{Quad_Illustration | ||
| + | |Quadrangulation_issue_09.png|Mesh hidden.| | ||
| + | |Quadrangulation_issue_10.png|Mesh hidden.| | ||
| + | |Quadrangulation_issue_11.png|Poly conversion.| | ||
| + | |Quadrangulation_issue_12.png|Poly conversion.| | ||
| + | }} | ||
| + | |||
| + | As one can see, deleting the auxiliary line also deletes the relevant UV information which becomes problematic when a texture is applied. | ||
| + | |||
| + | {{Notice|Incorrectly hidden lines is not recoverable if the Mesh is converted to a Poly!}} | ||
| + | |||
| + | If the Mesh needs to be converted to Poly, then apply an '''Edit Poly''' modifier instead. Hiding mesh lines can be time-consuming, so one must weigh the trade off between time and convenience when it comes to quadrifying the geometry. | ||
| + | |||
| + | == Additional Video Resources == | ||
| + | |||
| + | {| | ||
| + | |{{#evt: | ||
| + | service=youtube | ||
| + | |id=https://www.youtube.com/watch?v=kGszEIT4Kww&t=2s | ||
| + | |dimensions=350 | ||
| + | }} | ||
| + | |||
| + | |{{#evt: | ||
| + | service=youtube | ||
| + | |id=https://www.youtube.com/watch?v=ciXTyOOnBZQ | ||
| + | |dimensions=350 | ||
| + | }} | ||
| + | |- | ||
| + | |{{#evt: | ||
| + | service=youtube | ||
| + | |id=https://www.youtube.com/watch?v=Z_YIHLcpwMU&t=1s | ||
| + | |dimensions=350 | ||
| + | }} | ||
| + | |||
| + | |{{#evt: | ||
| + | service=youtube | ||
| + | |id=https://www.youtube.com/watch?v=fiBCh7gMg9Q | ||
| + | |dimensions=350 | ||
| + | }} | ||
| + | |} | ||
Latest revision as of 22:00, 4 February 2018
- Main article: CC Asset Production Precautions.
The Current Problem
Lax normal implementation for general props in iClone will have no problems. However, when the same normals implementation is applied to a skinned mesh and brought into iClone, problems do occur. This is because normal recalculations inside iClone will result in shading artefacts.
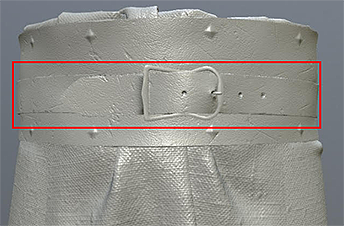 Before the application of skin weights.
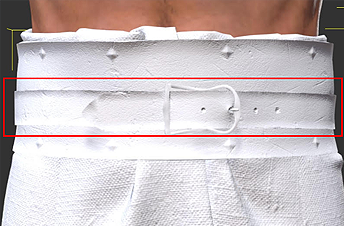 After the application of skin weights.
Particularly obvious are the concave shading effects on the skinned mesh. Working backwards to fix the normals for the skinned mesh will, in turn, cause shading problems when applied to a prop. Continue reading this article to acquire the know-how for creating normal maps that is compatible with both props and characters inside CC and iClone along with any other major third party 3D software.
Normals Baking Process
Basic Workflow
Prior Problematic Workflow
- Align the high and low poly geometries.
- Completely smooth the surface normals for the low poly geometry as a single smoothing group.
- Create the offset cage.
- Bake the normal map from high to low poly.
Latter Improved Workflow
- Align the high and low poly geometries.
- Apply appropriate smoothing groups to the low poly mesh.
- Split UV seams along hard edges according to the smoothing groups.
- Create the offset cage.
- Bake the normal map from high to low poly.
- ⚠ Most drastic changes in the new workflow is in the handling of smoothing groups, UV splitting and bake cage creation.
Important Points
Smoothing Groups
The point of smoothing groups is to create hard and soft surface shading. This relieves the normal map from having to change a smooth look to a hard look for broad surfaces, and vice versa. Instead, the normal map can be left to its strengths, which lies in the rendering of fine details.
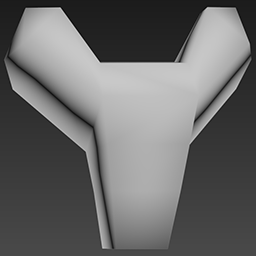 Smoothing group set to soft for the low poly baking geometry.
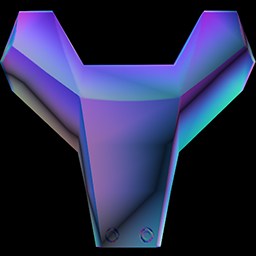 Results in shading artefacts for hard edged surfaces.
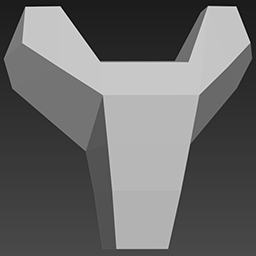 Smoothing group set to hard for the low poly baking geometry.
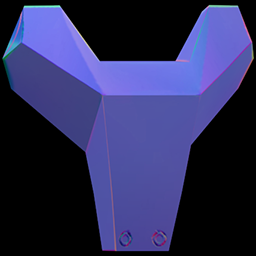 Results in correct shading for hard edged surfaces.
As illustrated, when a hard surface object does not have proper smoothing groups, then the baked normal map will create a gradient effect across mesh faces of large surface angles. This also has a slight effect on the lighting of object. Smoothing groups should be set when dealing with hard surfaces with acute surface angles.
UV Seams Separation
Black edges often appears in the normal map that is produced from a low poly mesh with smoothing group set to hard. Which, can be fixed by using UV split and separation. This problem is the result of the inability of the UV line to sample the appropriate side of a hard edge, resulting in a gap where nothing is sampled.
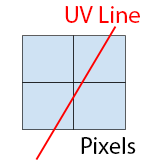 A UV line sampling across several pixels.
 During the bake, the UV edge erroneously samples from both sides of the hard edge, creating a black line.
Creating the Bake Cage
The use of a projection cage can prevent bake artefacts from ray mis-direction by providing a target for the ray to point toward. Ray mis-directions can result in strange shading on the mesh, particularly around hard edges.
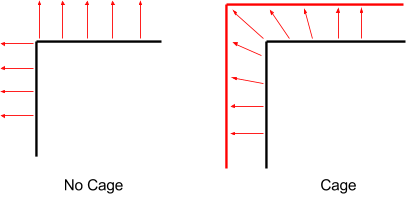 A cage can control the shooting direction of the projection rays during the baking process.
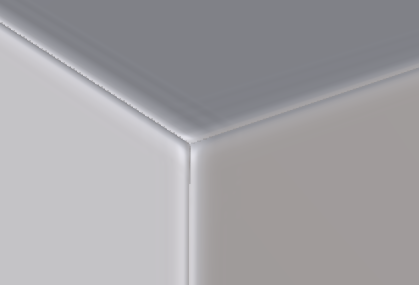 Normal artefacts due to cageless projection.
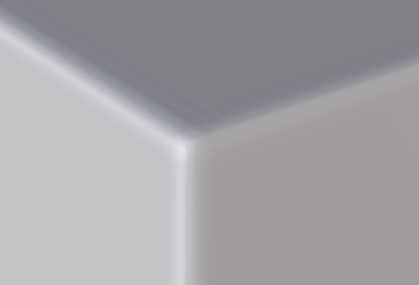 Good results from the implementation of a cage.
Using xNormal's SBM Format
3DS Max SBM plugin
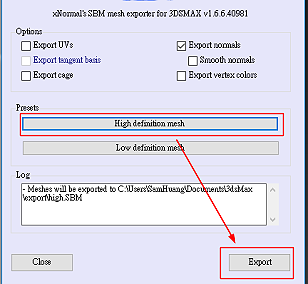
1) Select the high poly model for export and select xNormal SBM Exporter (*.SBM) in the dropdown menu.
2) Click on the High definition mesh and press on the Export button.
- Some things must be done to the low poly model before it can be exported.
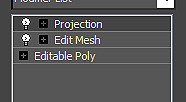
3) On the Editable Poly apply an Edit Mesh modifier or change the model type to Mesh. This step is needed because xNormal can not create a cage from Poly or Path.
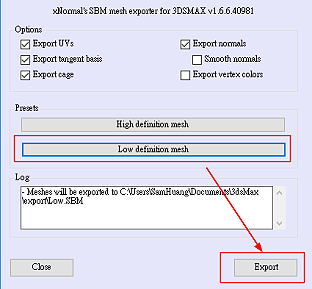
4) Apply a Projection modifier on top of the modifier stack and export the low poly in (*.SBM) format.
5) Select Low definition mesh and press the Export button.
6) Pay attention to the Log message and adjust the export process when necessary to export the mesh successfully.
 Message for successful export.
 Message for unsuccessful export.
7) Launch xNormal and drag the mesh files into their respective low and high poly slots.
8) Make sure to enable Use cage option for the low poly file.
9) Set the export directory and image sizes then bake the textures.
Creating the Projection Cage in 3DS Max
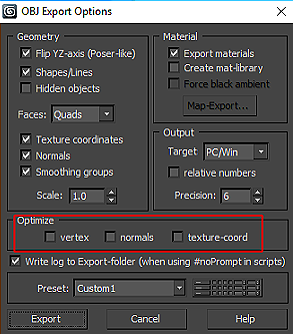
1) Select the high poly mesh and export it in OBJ format. Make sure to not check any of the Optimize settings to prevent the software from changing aspects of the mesh.
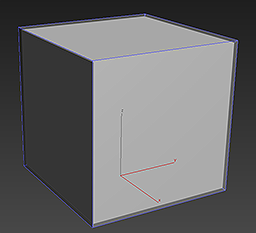
2) Select the low poly mesh and apply a Projection modifier to create a semi-transparent cage.
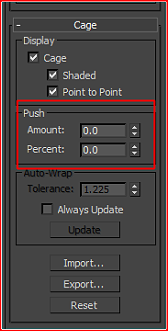
3) Adjust the size of the cage for the Projection modifier then click the Export... button to save a cage that is slightly larger than the base model.
4) Open xNormal and import both the high and low poly model.
5) Check Use cage for the low poly model.
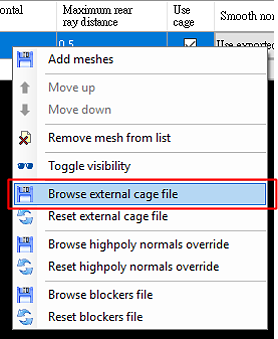
6) Right click on the low poly model input and select Browse external cage file to load in the exported cage file.
7) Double check the export directory and texture size and proceed to bake the textures.
Common Production Issues
Hard vs Soft Edge Comparison
There are significant shading differences between a hard-edged low poly geometry and a soft-edged low poly geometry.
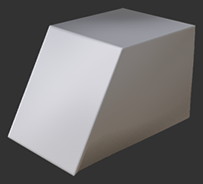 Soft-edged 120° ∠
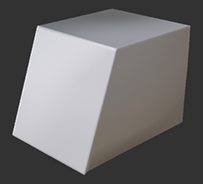 Soft-edged 110° ∠
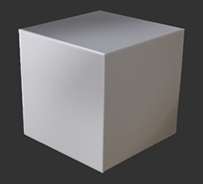 Soft-edged 90° ∠
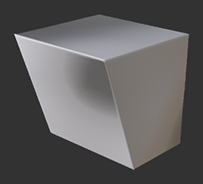 Soft-edged 70° ∠
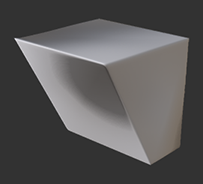 Soft-edged 60° ∠
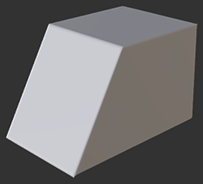 Hard-edged 120° ∠
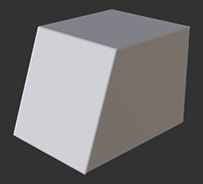 Hard-edged 110° ∠
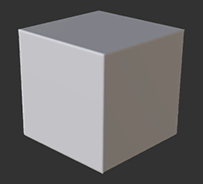 Hard-edged 90° ∠
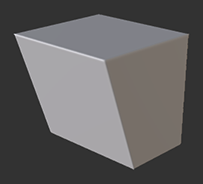 Hard-edged 70° ∠
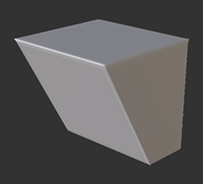 Hard-edged 60° ∠
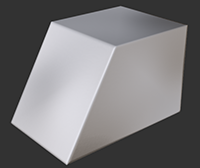
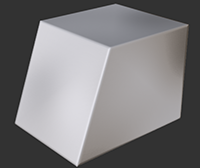
From the test cases above, we can deduce that shading artefacts on the soft-edged low poly is not very obvious when the angles are blunt or obtuse (greater than 90°). However, once the angle is sharp or acute (less than 90°) then the problems in the shading become obvious. In comparison, in all cases where the hard-edged low poly was used, there is no practical visual disparity between the high and low poly shading. The differences are even more evident when looking at the normal textures below.
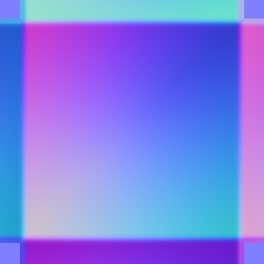 Soft-edged 90° ∠ low-poly normal map.
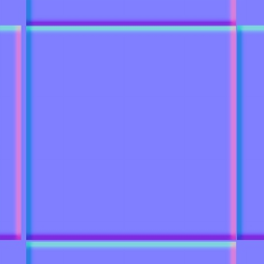 Hard-edged 90° ∠ low-poly normal map.
From the test case above, it is obvious that the normal map for the soft-edged low poly geometry has to work a lot harder to create the illusion of hard edges. It does this by compensating for the smoothness of the low poly geometry by countering the shading with vast swaths of gradients. If the destination 3D application can not rework the shading, then attaining proper smoothness is impossible. In contrast, the hard-edged low poly mesh already possesses the proper hard edged shading. Therefore, it does not have to compensate with gradients in order to render smooth, flat surfaces.
The results does not mean that one should use hard-edged surfaces at all costs and avoid the use of soft-edged surfaces. In fact, both have their specific use cases. We recommend the use of soft-edged meshes for blunt angles and soft objects such as cloth, and hard-edged meshes for sharp angles and hard surfaces like metals.
Connected vs Split UV Comparison
The following example uses a low poly mesh with smooth edges along with a projection cage.
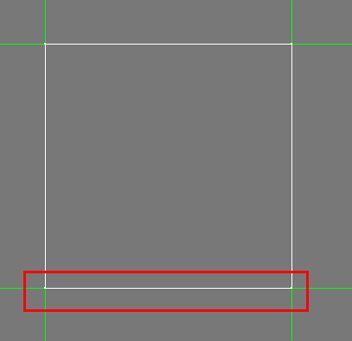 Connected UV edges.
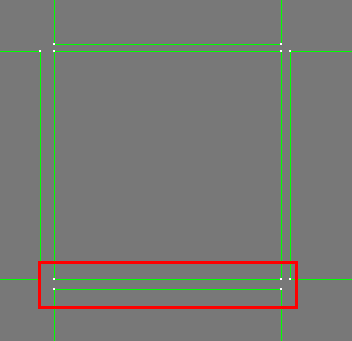 Split UV edges.
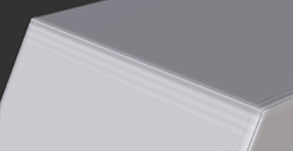 Connected UV edges 120° ∠
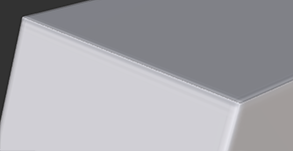 Connected UV edges 110° ∠
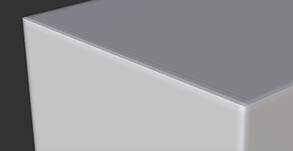 Connected UV edges 90° ∠
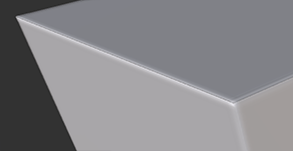 Connected UV edges 70° ∠
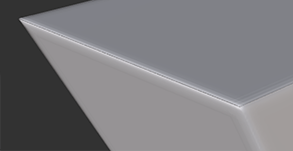 Connected UV edges 60° ∠
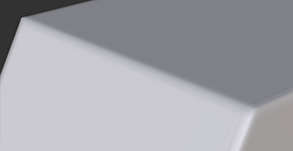 Split UV edges 120° ∠
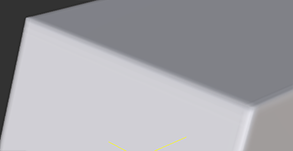 Split UV edges 110° ∠
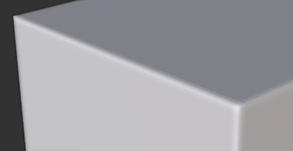 Split UV edges 90° ∠
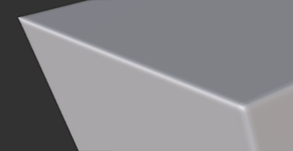 Split UV edges 70° ∠
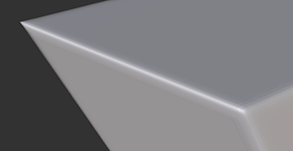 Split UV edges 60° ∠
According to the test cases above, edge seams result from baking hard-edged low-poly surfaces without first splitting its UVs. This problem exists for all angles with only a slight difference in the severity.
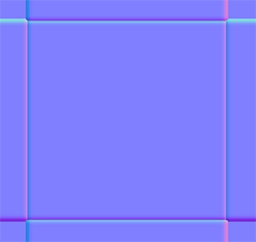 Connected UV at 90° ∠
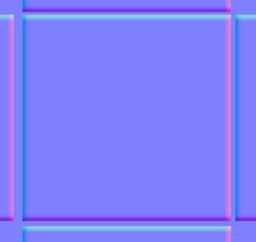 Split UV at 90° ∠
This problem arises from the inability of the merged UVs to grab the right sampling pixel during the baking process. The confusion between whether to grab the inside or outside pixel causes normals to have a noticeable seam. However, simply splitting the UVs is not enough. One would also have to separate the UV shells with a buffer distance, otherwise the same problem will still occur.
Baking With vs Without Cage
In all of the cases below, the model is set to hard-edged with split and separated UVs. The only difference is that one set uses a cage to bake, the other does not.
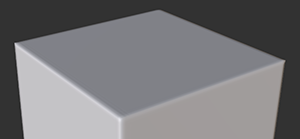 Cage bake 90° ∠
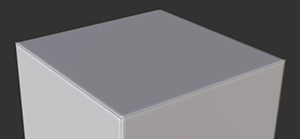 Cageless bake 90° ∠
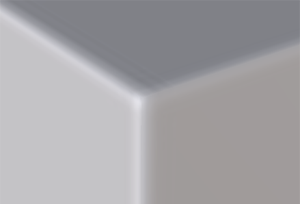 Cage bake close up
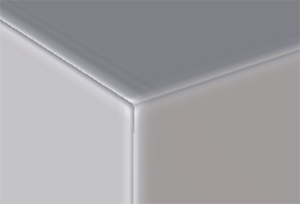 Cageless bake close up
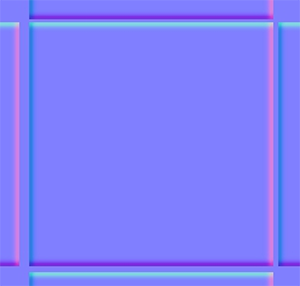 Cage bake normal map is softer and smoother around the edges.
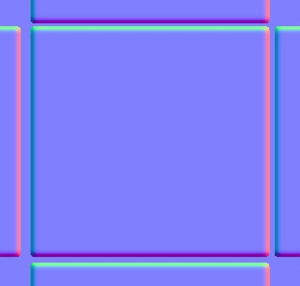 Cageless bake normal map is excessive around the edges.
From the test cases above, it is safe to say that baking with a cage will usually yield a better result compared with the cageless procedure.
Beveled Edges
All of the test cases below use cage projection baking.
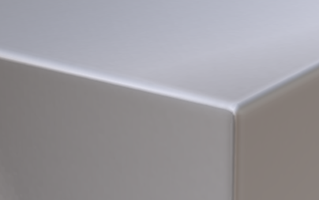 Soft-edged 90° UV merged.
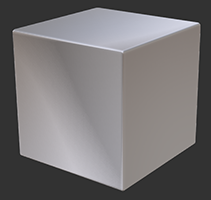 Results in shading errors.
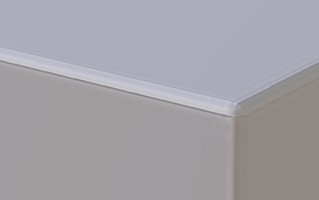 Hard-edged 90° UV merged.
 Results in edge artefacts.
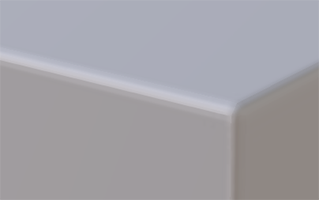 Hard-edged 90° UV split.
 Results are quite good.
Even though the last example has a faint seam on the edges, it is virtually unseeable from a certain distance. If one is making making mechanical surfaces, then using hard-edge along with UV split and separation is recommended; Otherwise, use the soft-edged technique for pliable surfaces such as cloth fabric and skin.
Influence of the Low-poly Subdivisions
All of the test cases below are soft-edged with merged UVs using cage projection. The difference between subdivided and non-subdivided are illustrated below.
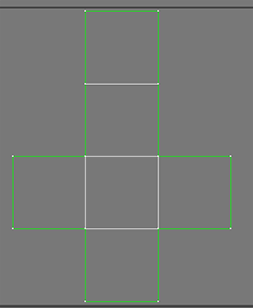 UVs of the undivided low-poly mesh.
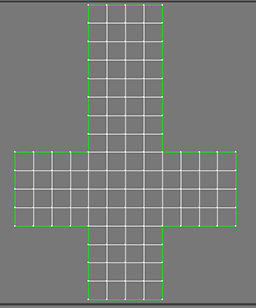 UVs of the subdivided low-poly mesh.
 120°∠ Undivided
 110°∠ Undivided
 90°∠ Undivided
 70°∠ Undivided
 60°∠ Undivided
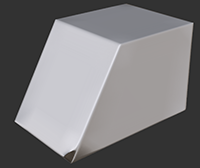 120°∠ Subdivided
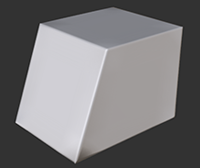 110°∠ Subdivided
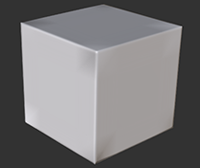 90°∠ Subdivided
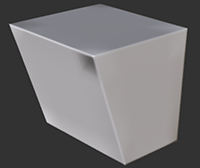 70°∠ Subdivided
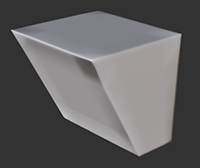 60°∠ Subdivided
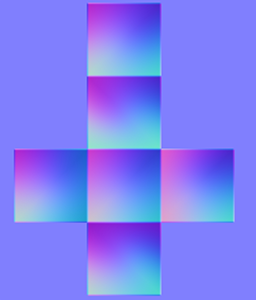 Normals of the undivided low-poly mesh.
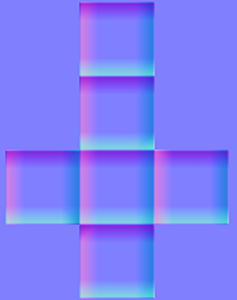 Normals of the subdivided low-poly mesh.
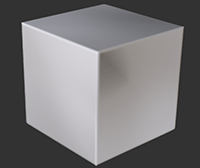
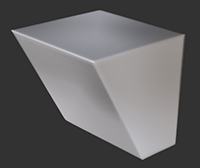
According to the test cases above, undivided mesh has large swathes of normal compensation in the form of gradients that span over the entire face. With subdivided versions, the problem still occurs, only that it is pushed to peripheries where the subdivided faces form the corners of the mesh edges. In both cases, the results are unsatisfactory and goes to show that subdividing the mesh is not an adequate solution to the normal bake problem.
Influence of the Low-poly Wrap Accuracy
Under normal circumstance, the low poly mesh is derived directly from the high poly mesh and should match quite well. However due to externalities due to problems with tools or polygonal limitations, the low poly may resemble less and less of the high poly geometry.
 Parts in red highlight regions that have the greatest amount of disparity between the high and low poly meshes.
Sometimes, the disparities can not be fixed due to the number of faces available for the low poly mesh. However, by adjusting the positioning of the vertices, one can at least mitigate the negative effects of unmatched low poly wrap.
Cautionary Points
Inter-application Mesh Transfer
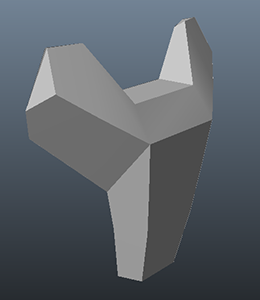
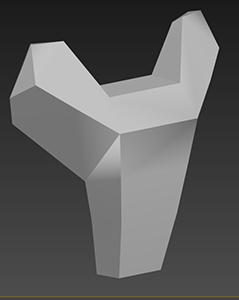
When working in a team, each member should make sure the surface normals are consistent across different applications, if unifying the application tools is not possible. Take the following Maya to 3DS Max exchange as an example:
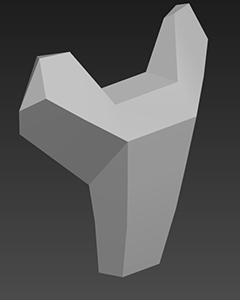 The original mesh inside 3DS Max.
 The same mesh from 3DS Max to Maya.
 The mesh back again from Maya to Max.
As illustrated above, the normals become inconsistent when the mesh is brought from 3DS max into Maya and brought back into 3DS max. This problem is caused by the discrepancy with how Max and Maya handles surface normals whereas 3DS Max uses Smooth Groups and Maya utilizes edge hardness. When a model changes hands between different applications, pay special attention to preserving the surface normals.
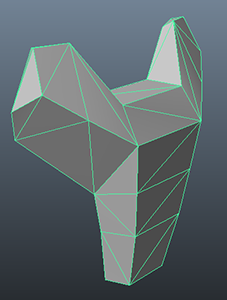 With Preserve edge orientation checked.
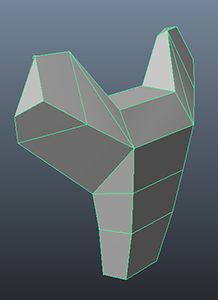 With Preserve edge orientation unchecked.
As an aside, be careful not to enable Preserve edge orientation when exporting out of Max, otherwise, the quads will split into triangular faces.
Issues with Under Optimized Mesh
After the modeling process, the mesh must go through a clean up process that involves the likes of eliminating NGons and overlapping vertices. This will get the mesh ready for the painting process with third party software such as Substance Painter and 3D Coat.
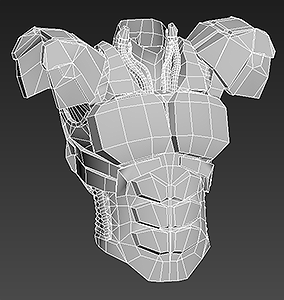 3DS Max preview.
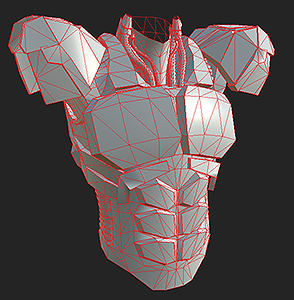 Substance Painter preview.
One can see from the illustrations above that once a mesh is brought into Substance Painter, the faces triangulate because of overlapping vertices which were now carefully welded together.
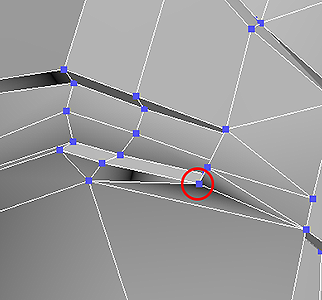 Overlapping vertex in 3DS Max.
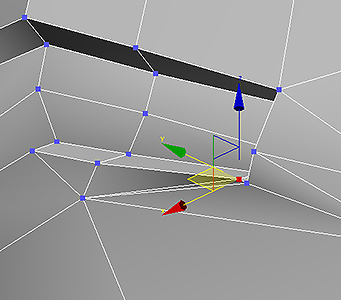 The same vertex inside Substance.
Once the overlapping vertices are welded together, the preview inside Substance Painter shows the correct result.
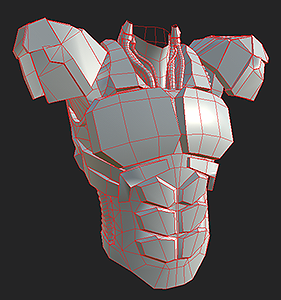 The fixed mesh inside Substance Painter.
Subdivisions for Substance Material
Texture discontinuity can occur when using the split UV method for normals baking. This is particularly common when it comes to fabric meshes that utilize Substance materials in iClone and CC.
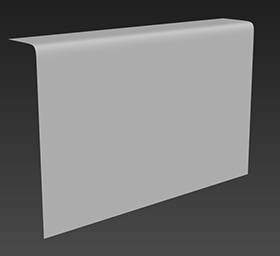 High-poly untextured.
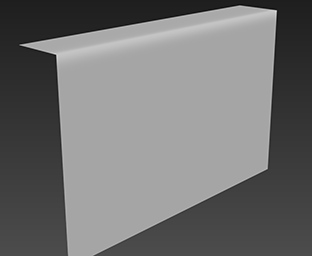 Unfixed low-poly with normal map.
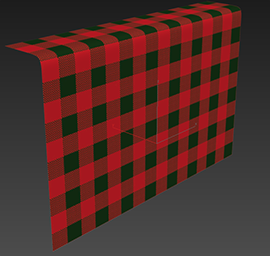 High-poly textured.
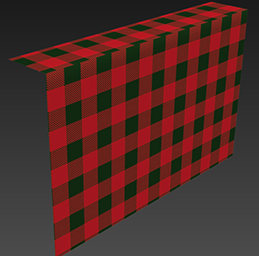 Unfixed low-poly with diffuse map.
For meshes of this type, it is suggested that one should add bevel edges and keep the UVs connected in order to preserve texture continuity.
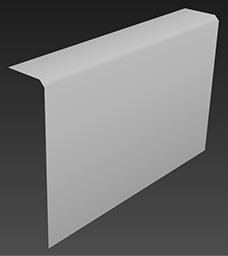 Fixed low-poly with normal map.
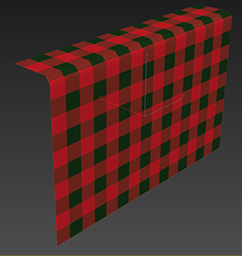 Fixed low-poly with material.
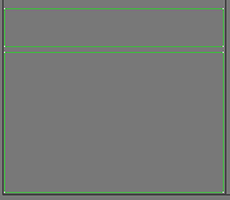
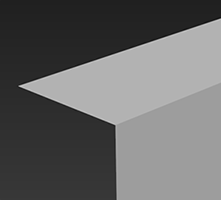
More comparisons between beveled and non-beveled surfaces:
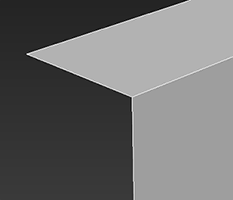 Unfixed low-poly.
 Unfixed split UVs.
 Unfixed (Smooth group 1)
 Fixed low-poly.
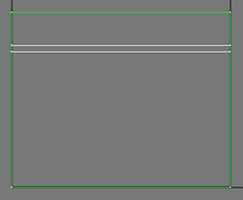 Fixed beveled UVs.
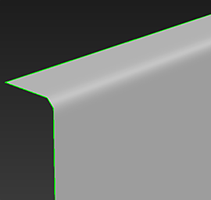 Fixed result.
Issues with Quadrifying Triangular Faces
There are several ways to turn a quad into a tri:
- Simply delete the diagonal line joining two triangular faces.
- Use the Poly tools available in 3DS Max to automatically convert the triangles to quad faces.
- Hide the diagonal line in the Mesh mode.
The first method is the simplest and does not need to be elaborated on.
Using the Poly Tools in 3DS Max
Using the Qaudrify All tool in 3DS Max has several disadvantages:
- Every single triangulated faces, even the ones that were purposely made so, will be quadrified.
- Some lines that were meant to be kept will also be removed without discretion.
- The shading angles of the lines will also be destroyed, unless one goes about removing them, manually, one piece at a time.
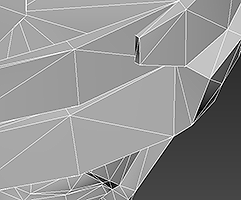 Before conversion.
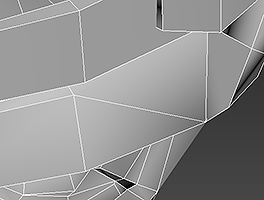 Before conversion.
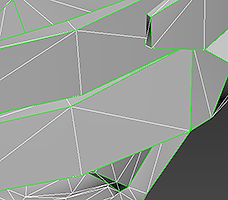 After conversion.
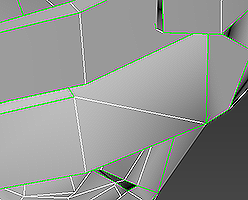 After conversion.
One can see from the illustrations above that the auto-conversion function removes the triangular lines and their associated UVs, causing significant deviations from the original mesh structure.
Hiding the Auxiliary Line in Mesh Mode
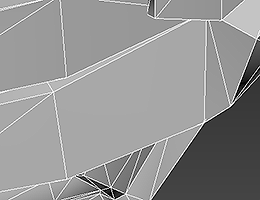
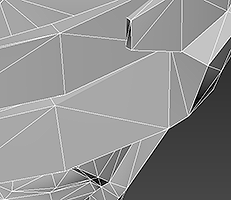
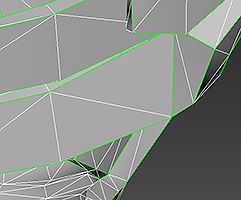
This function has an advantage in that it is not destructive with the original mesh. If the wrong line was hidden, simply show it again. The disadvantage is that this method can be slow, because one will have to select the lines one by one to perform this utility.
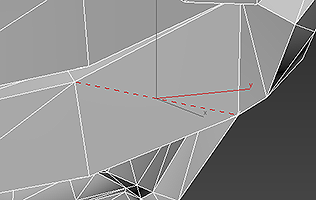 Clicking on the position of the hidden line will virtually reveal it.
 The hidden line still exists as it is only hidden in the meanwhile.
 Mesh hidden.
 Mesh hidden.
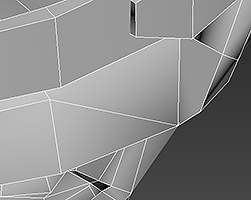 Poly conversion.
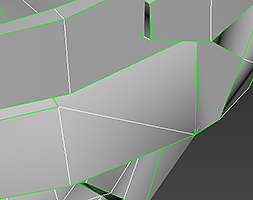 Poly conversion.
As one can see, deleting the auxiliary line also deletes the relevant UV information which becomes problematic when a texture is applied.
- ⚠ Incorrectly hidden lines is not recoverable if the Mesh is converted to a Poly!
If the Mesh needs to be converted to Poly, then apply an Edit Poly modifier instead. Hiding mesh lines can be time-consuming, so one must weigh the trade off between time and convenience when it comes to quadrifying the geometry.

