Difference between revisions of "IC Python API:List All Props"
Chuck (RL) (Talk | contribs) m (→Populating the Prop List) |
Chuck (RL) (Talk | contribs) m |
||
| (13 intermediate revisions by the same user not shown) | |||
| Line 1: | Line 1: | ||
{{TOC}} | {{TOC}} | ||
| − | {{Parent|IC_Python_API | + | {{Parent|IC_Python_API#Python_of_the_Month|Python of the Month}} |
| + | |||
| + | [[File:Python_API_List_All_Props_04.png|frame|left|Mock-up of the prop list UI.]] | ||
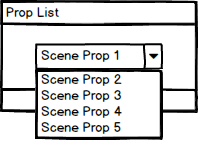
This article will focus on creating a drop down list for all of the existing props in the current iClone scene. | This article will focus on creating a drop down list for all of the existing props in the current iClone scene. | ||
| + | |||
| + | {{Clear}} | ||
== Necessary Modules == | == Necessary Modules == | ||
| Line 20: | Line 24: | ||
=== Qt Widgets === | === Qt Widgets === | ||
| − | The Qt Widgets module extends Qt GUI with C++ widget functionality. This is the building blocks for composing the user interface. | + | The Qt Widgets module extends Qt GUI with C++ widget functionality. This is the building blocks for composing the user interface. To learn more about Qt user interface creation with Pyside2, see [https://doc.qt.io/qtforpython/PySide2/QtWidgets/index.html# Pyside2 QtWidgets] |
| − | + | ||
| − | + | ||
=== Shiboken2 === | === Shiboken2 === | ||
| − | '''Shiboken''' is the Python binding generator that Qt for Python uses to create the PySide module, in other words, its the system used to expose the Qt C++ API to Python. The name '''Shiboken2''' and '''Pyside2''' make reference to the Qt5 compatibility, since the previous versions (without the '''2''') refer to Qt4. | + | '''Shiboken''' is the Python binding generator that Qt for Python uses to create the PySide module, in other words, its the system used to expose the Qt C++ API to Python. The name '''Shiboken2''' and '''Pyside2''' make reference to the Qt5 compatibility, since the previous versions (without the '''2''') refer to Qt4. For more information, see the [https://doc.qt.io/qtforpython/shiboken2/index.html Shiboken documentation] |
| − | + | ||
| − | For more information, see the [https://doc.qt.io/qtforpython/shiboken2/index.html Shiboken documentation] | + | |
== Building the UI == | == Building the UI == | ||
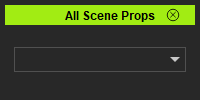
| − | + | [[File:Python_API_List_All_Props_01.png|frame|If you run this script, you'll receive an combo-box that is not useful until it is filled.]] | |
| + | |||
| + | Next, create the dock-able window and add the combo-box widget. | ||
<syntaxhighlight lang="Python"> | <syntaxhighlight lang="Python"> | ||
| Line 52: | Line 54: | ||
</syntaxhighlight> | </syntaxhighlight> | ||
| − | + | == Populating the Prop List == | |
| − | + | [[File:Python_API_List_All_Props_02.png|frame|Now when we run the script again, we get something that is much more useful.]] | |
| − | + | ||
| − | + | ||
We'll need some additional lines of code to populate the props list. We do this by adding entries into the QComboBox widget, for more information see [https://doc-snapshots.qt.io/qtforpython/PySide2/QtWidgets/QComboBox.html QComboBox.html] | We'll need some additional lines of code to populate the props list. We do this by adding entries into the QComboBox widget, for more information see [https://doc-snapshots.qt.io/qtforpython/PySide2/QtWidgets/QComboBox.html QComboBox.html] | ||
| Line 67: | Line 67: | ||
combo_box.addItem(all_props[i].GetName()) | combo_box.addItem(all_props[i].GetName()) | ||
</syntaxhighlight> | </syntaxhighlight> | ||
| − | |||
| − | |||
| − | |||
| − | |||
You can also grab other asset types like avatars, cameras, lights, etc. For example: | You can also grab other asset types like avatars, cameras, lights, etc. For example: | ||
| Line 79: | Line 75: | ||
all_lights = RLPy.RScene.FindObject(RLPy.EObjectType_Light) | all_lights = RLPy.RScene.FindObject(RLPy.EObjectType_Light) | ||
</syntaxhighlight> | </syntaxhighlight> | ||
| + | |||
| + | To learn more about finding objects in the current scene, see [[ IC_Python_API:RLPy_RScene#FindObjects | RLPy.RScene.FindObjects() ]]. | ||
== Everything Put Together == | == Everything Put Together == | ||
| + | |||
| + | [[File:IClone_API_List_All_Props_03.gif|frame|This script loaded into a scene that is heavily populated with props.]] | ||
You can copy and paste the following code into a PY file and load it into iClone via '''Script > Load Python'''. | You can copy and paste the following code into a PY file and load it into iClone via '''Script > Load Python'''. | ||
| Line 114: | Line 114: | ||
</syntaxhighlight> | </syntaxhighlight> | ||
| − | + | === APIs Used === | |
| − | + | You can research the following references for the iClone APIs deployed in this code. | |
| − | + | ||
| − | + | ||
| − | === | + | |
| − | You can research the following references for the | + | |
| − | + | ||
<div style="column-count:4; -moz-column-count:4; -webkit-column-count:4"> | <div style="column-count:4; -moz-column-count:4; -webkit-column-count:4"> | ||
* [[ IC_Python_API:RLPy_RUi#CreateRDockWidget | RLPy.RUi.CreateRDockWidget() ]] | * [[ IC_Python_API:RLPy_RUi#CreateRDockWidget | RLPy.RUi.CreateRDockWidget() ]] | ||
* [[ IC_Python_API:RLPy_RScene#FindObjects | RLPy.RScene.FindObjects() ]] | * [[ IC_Python_API:RLPy_RScene#FindObjects | RLPy.RScene.FindObjects() ]] | ||
</div> | </div> | ||
Latest revision as of 19:34, 18 October 2020
- Main article: Python of the Month.
This article will focus on creating a drop down list for all of the existing props in the current iClone scene.
Necessary Modules
Get started by loading the required modules for the script.
import RLPy
from PySide2 import QtWidgets
from PySide2.shiboken2 import wrapInstance
We'll need RLPy to access iClone's Python API and Pyside2 related modules to create a functional interface.
Qt Widgets
The Qt Widgets module extends Qt GUI with C++ widget functionality. This is the building blocks for composing the user interface. To learn more about Qt user interface creation with Pyside2, see Pyside2 QtWidgets
Shiboken2
Shiboken is the Python binding generator that Qt for Python uses to create the PySide module, in other words, its the system used to expose the Qt C++ API to Python. The name Shiboken2 and Pyside2 make reference to the Qt5 compatibility, since the previous versions (without the 2) refer to Qt4. For more information, see the Shiboken documentation
Building the UI
Next, create the dock-able window and add the combo-box widget.
# Create an iClone Dock Widget
dockable_window = RLPy.RUi.CreateRDockWidget()
dockable_window.SetWindowTitle("All Scene Props")
# Use wrapInstance to convert the dockable window to something that Python can understand, in this case a Dock Widget
dock = wrapInstance(int(dockable_window.GetWindow()),
                    QtWidgets.QDockWidget)
main_widget = QtWidgets.QWidget()
dock.setWidget(main_widget)

main_widget_layout = QtWidgets.QVBoxLayout()
main_widget.setLayout(main_widget_layout)

combo_box = QtWidgets.QComboBox()

main_widget_layout.addWidget(combo_box)
Populating the Prop List
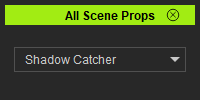
We'll need some additional lines of code to populate the props list. We do this by adding entries into the QComboBox widget, for more information see QComboBox.html
# Grab all props in the scene
all_props = RLPy.RScene.FindObjects(RLPy.EObjectType_Prop)
# Add an entry into the combo-box for every prop found
for i in range(len(all_props)):
    combo_box.addItem(all_props[i].GetName())
You can also grab other asset types like avatars, cameras, lights, etc. For example:
all_avatars = RLPy.RScene.FindObject(RLPy.EObjectType_Avatar)
all_cameras = RLPy.RScene.FindObject(RLPy.EObjectType_Camera)
all_lights = RLPy.RScene.FindObject(RLPy.EObjectType_Light)
To learn more about finding objects in the current scene, see RLPy.RScene.FindObjects() .
Everything Put Together
You can copy and paste the following code into a PY file and load it into iClone via Script > Load Python.
import RLPy
from PySide2 import QtWidgets
from PySide2.shiboken2 import wrapInstance

# Create an iClone Dock Widget
dockable_window = RLPy.RUi.CreateRDockWidget()
dockable_window.SetWindowTitle("All Scene Props")
# Use wrapInstance to convert the dockable window to something that Python can understand, in this case a Dock Widget
dock = wrapInstance(int(dockable_window.GetWindow()),
                    QtWidgets.QDockWidget)
main_widget = QtWidgets.QWidget()
dock.setWidget(main_widget)

main_widget_layout = QtWidgets.QVBoxLayout()
main_widget.setLayout(main_widget_layout)

combo_box = QtWidgets.QComboBox()

main_widget_layout.addWidget(combo_box)

# Grab all props in the scene
all_props = RLPy.RScene.FindObjects(RLPy.EObjectType_Prop)
# Add an entry into the combo-box for every prop found
for i in range(len(all_props)):
    combo_box.addItem(all_props[i].GetName())

dockable_window.Show()
APIs Used
You can research the following references for the iClone APIs deployed in this code.


