Difference between revisions of "IC Python API:Transformation Key"
Chuck (RL) (Talk | contribs) m (→Animating the Basic Way) |
Chuck (RL) (Talk | contribs) m |
||
| (5 intermediate revisions by the same user not shown) | |||
| Line 1: | Line 1: | ||
{{TOC}} | {{TOC}} | ||
| − | {{Parent|IC_Python_API | + | {{Parent|IC_Python_API#Python_of_the_Month|Python of the Month}} |
This article focuses on animating a prop by keying its transformation as more powerful alternative method. | This article focuses on animating a prop by keying its transformation as more powerful alternative method. | ||
| Line 51: | Line 51: | ||
== Loading a Test Prop == | == Loading a Test Prop == | ||
| + | |||
| + | [[File:IClone_API_Transform_Key_01.png|frame|Box created from this code.]] | ||
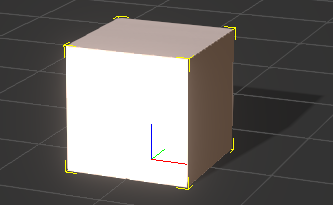
Let's start by loading in a box object for the purpose of animation. | Let's start by loading in a box object for the purpose of animation. | ||
| Line 65: | Line 67: | ||
ic_template_path + "//iClone Template//Props//3D Blocks//Box_001.iProp") | ic_template_path + "//iClone Template//Props//3D Blocks//Box_001.iProp") | ||
</syntaxhighlight> | </syntaxhighlight> | ||
| − | |||
| − | |||
| − | |||
| − | |||
== Creating a Transformation Matrix == | == Creating a Transformation Matrix == | ||
| Line 92: | Line 90: | ||
== Animating the Box == | == Animating the Box == | ||
| − | Finally we'll need to set a key | + | [[File:IClone_API_Transform_Key_02.gif|frame]] |
| + | |||
| + | Finally we'll need to set a key for the transform controller at the 3 second mark, and playback the timeline from the beginning to test the animation. | ||
<syntaxhighlight lang="Python"> | <syntaxhighlight lang="Python"> | ||
| Line 105: | Line 105: | ||
</syntaxhighlight> | </syntaxhighlight> | ||
| − | + | Notice that '''RLPy.RTime''' is set using milliseconds; 3,000 milliseconds is 3 seconds in length. For more information on using the time class, see [[ IC_Python_API:RLPy_RTime | RLPy.RTime() ]]. | |
| − | + | ||
| − | + | ||
== Everything Put Together == | == Everything Put Together == | ||
Latest revision as of 19:36, 18 October 2020
- Main article: Python of the Month.
This article focuses on animating a prop by keying its transformation as more powerful alternative method.
Animating the Basic Way
The usual method of animating objects is by setting component data on transform data-block like below:
data_block = prop.GetControl("Transform").GetDataBlock()

data_block.SetData("Position/PositionX", RLPy.RTime(0), RLPy.RVariant(100))
data_block.SetData("Position/PositionY", RLPy.RTime(0), RLPy.RVariant(50))
data_block.SetData("Position/PositionZ", RLPy.RTime(0), RLPy.RVariant(50))

data_block.SetData("Rotation/RotationX", RLPy.RTime(0), RLPy.RVariant(45 * RLPy.RMath.CONST_DEG_TO_RAD))
data_block.SetData("Rotation/RotationY", RLPy.RTime(0), RLPy.RVariant(90 * RLPy.RMath.CONST_DEG_TO_RAD))
data_block.SetData("Rotation/RotationZ", RLPy.RTime(0), RLPy.RVariant(45 * RLPy.RMath.CONST_DEG_TO_RAD))

data_block.SetData("Scale/ScaleX", RLPy.RTime(0), RLPy.RVariant(2))
data_block.SetData("Scale/ScaleY", RLPy.RTime(0), RLPy.RVariant(2))
data_block.SetData("Scale/ScaleZ", RLPy.RTime(0), RLPy.RVariant(2))
In the case above, the prop is moved by [x: 100, y: 50, z: 50], rotated by [x: 45°, y: 90°, z: 45°], and scaled by [x: 2, y: 2, z: 2].
- ⚠ Rotations are conducted in radians, not in degrees.
Animating the Powerful Way
If you are setting multiple values with position, rotation, and scale then the lines of code can become quite hefty, as you have witnessed from the example above. You may be better off with setting a transform matrix for the object to adopt, and therefore, make the entire code more manageable.
Necessary Modules
Besides the RLPy standard module, we'll need two system based modules to load a prop from a directory with the likes of os and winreg
import RLPy
import os
import winreg
os
The os module provides a portable way of using operating system dependent functionality. For more information, see os.html
winreg
winreg offers functions that exposes the Windows registry API to Python. For more information, see winreg.html
Loading a Test Prop
Let's start by loading in a box object for the purpose of animation.
# Get the iClone 7 default template path
registry = winreg.ConnectRegistry(None, winreg.HKEY_LOCAL_MACHINE)
rawKey = winreg.OpenKey(registry, r"SOFTWARE\Reallusion\iClone\7.0")
ic_template_path = os.path.abspath(
    winreg.QueryValueEx(rawKey, "Template Data")[0])

# Load Box_001.iProp
RLPy.RFileIO.LoadFile(
    ic_template_path + "//iClone Template//Props//3D Blocks//Box_001.iProp")
Creating a Transformation Matrix
Next, we'll need to create a transform object and fill it with scale, rotation, and translation information. The transform object is simply a 3x3 matrix where each transformational component occupies a row.
# Create a quaternion from euler angles
m3 = RLPy.RMatrix3().FromEulerAngle(RLPy.EEulerOrder_XYZ, 0,
                                    45 * RLPy.RMath.CONST_DEG_TO_RAD, 0)[0]
q_rotation = RLPy.RQuaternion().FromRotationMatrix(m3)

# Create a transform matrix
xform = RLPy.RTransform(
    RLPy.RVector3(0.25, 0.25, 0.25),    # Scale
    q_rotation,                         # Rotation
    RLPy.RVector3(100, 0, 100)          # Translation
)
Notice that the second row of the transform matrix is occupied with a quaternion rotation. In order to input euler values, which is easier to understand by the layman, we must convert the eular angles to a rotational 3x3 matrix and convert that to a quaternion rotation.
Animating the Box
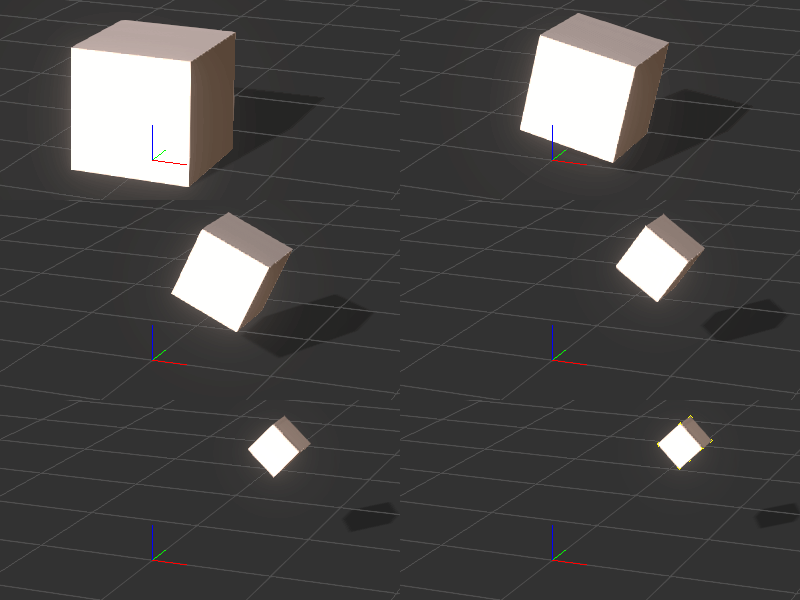
Finally we'll need to set a key for the transform controller at the 3 second mark, and playback the timeline from the beginning to test the animation.
# Get the imported box
prop = RLPy.RScene.FindObject(RLPy.EObjectType_Prop, "Box_001")

# Set the transform matrix values for the 3 second mark
prop.GetControl("Transform").SetValue(RLPy.RTime(3000), xform)

# Playback the scene for test
RLPy.RGlobal.Play(RLPy.RTime(0), RLPy.RTime(3000))
Notice that RLPy.RTime is set using milliseconds; 3,000 milliseconds is 3 seconds in length. For more information on using the time class, see RLPy.RTime() .
Everything Put Together
You can copy and paste the following code into a PY file and load it into iClone via Script > Load Python.
import RLPy
import os
import winreg

# Get the iClone 7 default template path
registry = winreg.ConnectRegistry(None, winreg.HKEY_LOCAL_MACHINE)
rawKey = winreg.OpenKey(registry, r"SOFTWARE\Reallusion\iClone\7.0")
ic_template_path = os.path.abspath(
    winreg.QueryValueEx(rawKey, "Template Data")[0])

# Load Box_001.iProp
RLPy.RFileIO.LoadFile(
    ic_template_path + "//iClone Template//Props//3D Blocks//Box_001.iProp")

# Create a quaternion from euler angles
m3 = RLPy.RMatrix3().FromEulerAngle(RLPy.EEulerOrder_XYZ, 0,
                                    45 * RLPy.RMath.CONST_DEG_TO_RAD, 0)[0]
q_rotation = RLPy.RQuaternion().FromRotationMatrix(m3)

# Create a transform matrix
xform = RLPy.RTransform(
    RLPy.RVector3(0.25, 0.25, 0.25),    # Scale
    q_rotation,                         # Rotation
    RLPy.RVector3(100, 0, 100)          # Translation
)

# Get the imported box
prop = RLPy.RScene.FindObject(RLPy.EObjectType_Prop, "Box_001")

# Set the transform matrix values for the 3 second mark
prop.GetControl("Transform").SetValue(RLPy.RTime(3000), xform)

# Playback the scene for test
RLPy.RGlobal.Play(RLPy.RTime(0), RLPy.RTime(3000))
APIs Used
You can research the following references for the APIs deployed in this code.


