Difference between revisions of "Content Dev:IC Avatar Collision Shapes"
From Reallusion Wiki!
Chuck (RL) (Talk | contribs) m (→CC3+ Basic Collision Shape Structure) |
Chuck (RL) (Talk | contribs) m (→Production Instructions and Restrictions) |
||
| Line 11: | Line 11: | ||
*The Collision Shape of the torso must be coherent, without gaps. | *The Collision Shape of the torso must be coherent, without gaps. | ||
*Be sure to weigh the ass and chest to avoid side leakage. | *Be sure to weigh the ass and chest to avoid side leakage. | ||
| − | *Recommendation: Try to use Capsule shape for the chest to prop up the | + | *Recommendation: Try to use Capsule shape for the chest to prop up the sloped area between the clavicle to chest. |
== CC3+ Basic Collision Shape Structure == | == CC3+ Basic Collision Shape Structure == | ||
Revision as of 22:14, 17 August 2020
- Main article: CC Content Development.
Production Instructions and Restrictions
- The number of Collision Shapes in the whole body of each character cannot exceed 16 (there is an upper limit for calculating collisions).
- Do not use Box for Collision Shape when Create New.
- Try not to circle the Collision Shape beyond the scope of the Mesh, especially the head.
- Collision Shape from the upper edge of the chest to the shoulders, placed in the area of the neck.
- The limbs try to use the widest area of the Mesh as the diameter of the Collision Shape, especially the thighs.
- The Collision Shape of the torso must be coherent, without gaps.
- Be sure to weigh the ass and chest to avoid side leakage.
- Recommendation: Try to use Capsule shape for the chest to prop up the sloped area between the clavicle to chest.
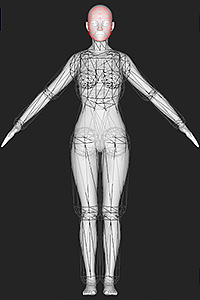
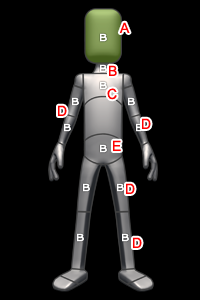
CC3+ Basic Collision Shape Structure
The collision shapes below are all capsules:
We recommend you download the CC3+ Neutral ini file to start off the adjustment process.


