IC Python API:Screenshotting
- Main article: RL Python Samples.
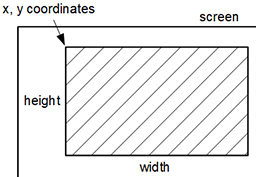
Qt provides QtCore.QScreen.grabWindow() function which has the ability to create and return a pixmap constructed by grabbing the contents of a given window within an area (x, y, width, height).
A pixmap is one of four classes provided by Qt for handling image data. It is designed and optimized for showing images on screen by using a QLabel or one of QAbstractButton's sub-classes such as QPushbutton and QToolButton.
Necessary Modules and Global Variables
Besides the fundamental Reallusion Python module, we'll also need PySide2 an os to read and implement a .ui onto a custom window interface. We'll also need a global variable to house the ID for the screen that is currently selected.
import RLPy
import os
from PySide2 import *
from PySide2 import shiboken2


# Global variables
current_screen = None
User Interface
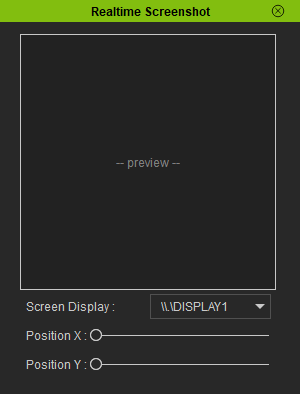
Next, create a user interface for switching between the available screen displays and specify the x and y coordinates for screenshotting. The capture will exists in a 256x256 area which is a QLabel with a pixmap background. You can download the Screenshot.ui file from here.
# Create a dialog window
window = RLPy.RUi.CreateRDialog()
window.SetWindowTitle("Realtime Screenshot")

# Create Pyside layout for RDialog
dialog = shiboken2.wrapInstance(int(window.GetWindow()), QtWidgets.QDialog)
dialog.setFixedWidth(300)

# Read and set the QT ui file from the script location
qt_ui_file = QtCore.QFile(os.path.dirname(__file__) + "/Screenshot.ui")
qt_ui_file.open(QtCore.QFile.ReadOnly)
widget = QtUiTools.QUiLoader().load(qt_ui_file)
qt_ui_file.close()
dialog.layout().addWidget(widget)


for screen in QtWidgets.QApplication.screens():
    widget.screens.addItem(screen.name())

window.Show()
Noticed that the available screen monitors are added to the Screen Display list.
Switching Screens
We'll need a function for switching between the available screen monitors and assigning it to the global variable. The screen switch event will also reset the screen coordinates to (0, 0).
def change_screen():
    global current_screen

    index = widget.screens.currentIndex()
    current_screen = QtWidgets.QApplication.screens()[index]
    rect = current_screen.availableGeometry()

    # Set the maximum position values to the screen size minus the grab size
    widget.positionX.setMaximum(rect.width() - 256)
    widget.positionY.setMaximum(rect.height() - 256)

    widget.positionX.setValue(0)
    widget.positionY.setValue(0)
    screenshot()
Screenshotting
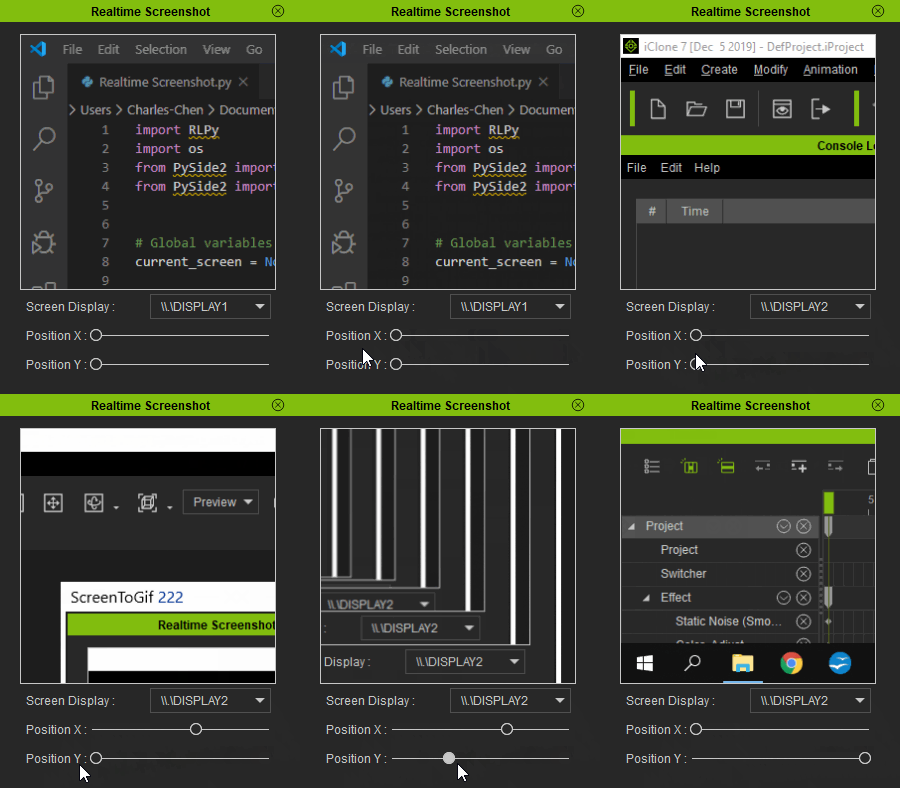
We'll also need a function for taking the actual screenshot as a 256x256 pixmap and assign it to the QLabel in the center of the interface window.
def screenshot():
    global current_screen

    rect = current_screen.availableGeometry()
    main_window_address = RLPy.RUi.GetMainWindow()
    main_window = shiboken2.wrapInstance(int(main_window_address), QtWidgets.QWidget)
    pixmap = current_screen.grabWindow(0, widget.positionX.value() + rect.x(), widget.positionY.value() + rect.y(), 256, 256)
    widget.image.setPixmap(pixmap)
Button Assignments
Finally, we'll assign the aforementioned functions to their respective buttons, and call the screenshot() command to initialize the first screenshot.
# Connect functions to UI signals
widget.positionX.valueChanged.connect(screenshot)
widget.positionY.valueChanged.connect(screenshot)
widget.screens.currentIndexChanged.connect(change_screen)

change_screen()  # Take the first screenshot to get started
Everything Put Together
You can copy and paste the following code into a PY file and load it into iClone via Script > Load Python. Make sure to download the Screenshot.ui file that accompanies this lesson and place it in the same directory as the script file. You can find this file under under the User Interface section.
import RLPy
import os
from PySide2 import *
from PySide2 import shiboken2


# Global variables
current_screen = None

# Create a dialog window
window = RLPy.RUi.CreateRDialog()
window.SetWindowTitle("Realtime Screenshot")

# Create Pyside layout for RDialog
dialog = shiboken2.wrapInstance(int(window.GetWindow()), QtWidgets.QDialog)
dialog.setFixedWidth(300)

# Read and set the QT ui file from the script location
qt_ui_file = QtCore.QFile(os.path.dirname(__file__) + "/Screenshot.ui")
qt_ui_file.open(QtCore.QFile.ReadOnly)
widget = QtUiTools.QUiLoader().load(qt_ui_file)
qt_ui_file.close()
dialog.layout().addWidget(widget)


for screen in QtWidgets.QApplication.screens():
    widget.screens.addItem(screen.name())

window.Show()


def change_screen():
    global current_screen

    index = widget.screens.currentIndex()
    current_screen = QtWidgets.QApplication.screens()[index]
    rect = current_screen.availableGeometry()

    # Set the maximum position values to the screen size minus the grab size
    widget.positionX.setMaximum(rect.width() - 256)
    widget.positionY.setMaximum(rect.height() - 256)

    widget.positionX.setValue(0)
    widget.positionY.setValue(0)
    screenshot()


def screenshot():
    global current_screen

    rect = current_screen.availableGeometry()
    main_window_address = RLPy.RUi.GetMainWindow()
    main_window = shiboken2.wrapInstance(int(main_window_address), QtWidgets.QWidget)
    pixmap = current_screen.grabWindow(0, widget.positionX.value() + rect.x(), widget.positionY.value() + rect.y(), 256, 256)
    widget.image.setPixmap(pixmap)


# Connect functions to UI signals
widget.positionX.valueChanged.connect(screenshot)
widget.positionY.valueChanged.connect(screenshot)
widget.screens.currentIndexChanged.connect(change_screen)

change_screen()  # Take the first screenshot to get started
APIs Used
You can research the following references for the APIs deployed in this code.


