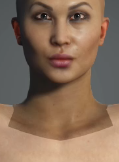
Content Dev:Scan to CC3+ Completion in CC
- Main article: CC Avatar Content Production.
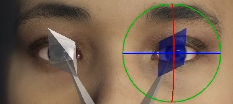
Slight adjustments will still have to be made once the character returns to CC. The goal here is to:
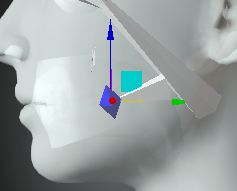
- Fix the positions of the eyeballs and jaws.
- Recreate the eye occlusion and tear-lines.
- Adjust the cornea size and positioning.
- Modify the look of the teeth to match reference.
Items to pay attention to:
- If auto-creation places the tear-line in the wrong area, then it is likely that the eyelids did not conform correctly to the CC base in the Wrap software. You can either manually adjust the tear-line geometry or return to Wrap to fix the eyelid topology.
- If possible, use Headshot morphs for adjusting the cornea. On the other hand, modifying the cornea by adjusting the shader settings can lead to unexpected results when the character is exported to other software. Contact Reallusion for additional assistance if needed.
Setup in CC
1) Import the FBX character mentioned in the previous Scan to CC3+ Preparation in Maya article.
2) Input the FbxKey file in the subsequent Create Asset(s) prompt and click OK.
3) In the next Asset Import Status Report make sure all of the item States have a Pass and click OK.
4) Go to the Materials tab and select the head material.
5) Change out all of the channel maps that have their baked equivalents like Diffuse, Normal, Roughness, etc.
For now, ignore additional maps that don't have an equivalent channel for assignment, i.e. Thickness map.
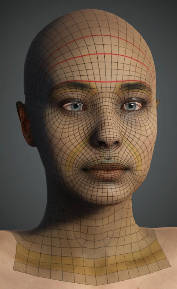
6) Input the UV guide map for the head into the Blend channel.
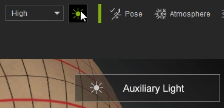
You can turn on Auxiliary Light and adjust the Strength slider for the blend channel to clearly visualize the wire-frame.
7) Delete the eye occlusion and tear-line via the Scene docking window.
8) Go to Modify > Attribute and click on Enhance Eyes button.
9) Make sure Tear Line and Eye Occlusion are checked and clicked on Create in the subsequent prompt. You'll notice that new tear-line and eye occlusion geometries have been deployed.
10) Make sure the caruncles lie behind the tear-line geometry. You can do this by selecting the caruncle geometries and use Modify > Modify > Edit Mesh > Element to move them into position.
11) Go to Content > Base > Eyeball and double-click on the desired eyeball asset to replace the original set.
You can apply various test poses from Content > Pose > Body.
Adjusting the Eyes
1) Select the character and click on Modify > Modify > Adjust Bones button.
2) Rotate/translate the eye bones for more natural looking eyes and click Auto-Position when finished.
3) Select the eyes of the character and both of the cornea materials under Modify > Material.
4) Adjust the settings to the likeness of the reference material, i.e. Sclera UV Radius, Limbus Dark Scale, etc.
5) Select the eye occlusion mesh and both of its materials.
7) Adjust the settings to the likeness of the reference material, i.e. Blur Strength, Top Blur Range, Bottom Blur Range, Expand, Tear Duct Position, etc.
8) Test eye animations with the Modify > Motion Pose > Edit Facial tool.
9) Pull on the morph sliders under Modify > Eye settings.
10) If the eyes do not come to a complete close, perform Modify > Correct Eyeblink.
Adjusting the Teeth
1) Under the Edit Facial panel, switch to the Mouth section and maximize the Mouth Open slider.
2) Go to Content > Base > Teeth > Template > Teeth and apply a desired teeth asset.
3) Zero out the Mouth Open morph slider.
4) Select the character and change the mesh display to X-Ray under Modify > Attribute > Display section.
5) Click on Modify > Adjust Bones and change the Bone Type: to Face.
6) Adjust the upper and lower jawbones to move the teeth to their ideal positions and click on Auto-Position when finished.
7) Adjust the teeth materials to the likeness of the reference material.
You can now test out various expressions in the Edit Facial window and backtrack to fix any of the remaining issues.
Matching the Body Textures to the Head
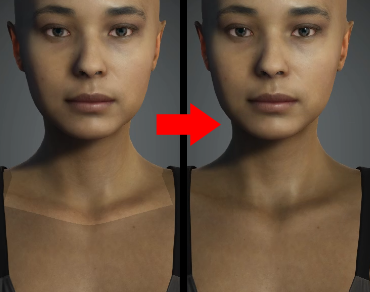
The baked scan to CC3+ textures will not match the CC3+ base body textures at the outset. Follow the steps below to create a unified look for the entire body while getting rid of the shoulders seams.
Up-sizing Body Textures to 4K
It's often the case that head textures were processed in 4K resolution with the body textures still at 2K. We'll need to take some steps in order to match the body textures to the 4k resolution of the head textures:
1) With the scan CC3+ character loaded in CC, select the body.
2) Go to Create > Head & Body Morph Sliders and select Head and press OK in the subsequent window.
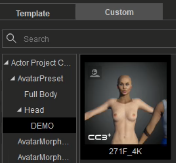
3) Add a skin and morph preset by pressing the + button after navigating to Content > Base > Skin & Morph.
4) Download and unzip 4K Skin and Textures.rar.
5) Drag in either 4K Neutral Female.ccSkin or 4K Neutral Male.ccSkin according to the character's gender, select Replace All in the subsequent window, and press the OK button to replace the entire character with a 4K base character.
6) Once replaced, navigate back to where the skin and morph preset was saved and drag it back into the scene.
7) In the following window enable Apply Morphs, Eye Elements, Teeth, Facial Profile and Apply Materials and Textures. Disable Apply Head Color to Body and click Apply.
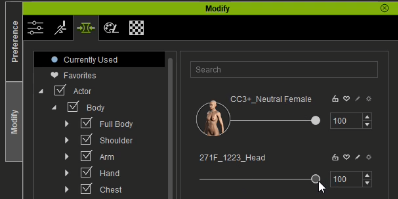
You will notice that there are now two morph sliders under Modify > Morphs > Currently Used. You can use these sliders to blend the scan body with the neutral base body.
Check the body material and notice that the textures have been up-sized to 4K.
Quick Material & Lighting Setup
1) Make sure Auxiliary Light is off.
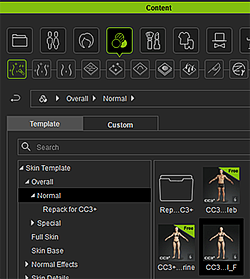
2)Go to Content > Skin > Overall > Template > Normal.
3) Drag in either CC3+_Neutral_F.ccSkin or CC3+_Neutral_M.ccSkin depending on the gender or you character.
4) Make sure all of the settings are checked and click Apply to deploy the preset skin material settings.
5) Reapply the baked scan texture maps onto the head material.
6) Go to Content > Stage Elements > Atmosphere > Template > Atmosphere.
7) Load a lit atmosphere of your choice, i.e. +DH_Full_Body_Epic_Warm.
8) Once lit, save the custom project.
Returning to Wrap for Mesh Fixes
Some problems that may have occurred in Wrap may not be evident until the character is brought into CC. You can follow the steps below to bring the character back to Wrap for corrections:
1) Export the character from CC in FBX format.
2) Export the same character in OBJ format (File > Export > OBJ > Nude Character in Bind-Pose).
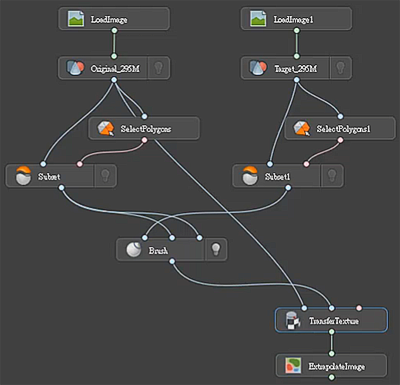
3) Inside Wrap, create a LoadGeom node and load the exported character OBJ file. Rename this node as Original as this will be our original model.
4) Create a LoadImage node and connect it to the LoadGeom node, and load the diffuse map for the scan head.
5) Create another set of connected LoadImage and LoadGeom nodes. Rename the new LoadGeom as Target as this will be our target model.
6) Load the face wire-frame guide map for the target LoadImage node and the same character OBJ for the down-graph LoadGeom node.
7) Create two SelectPolygons nodes and connect them to the original and target LoadGeom nodes.
8) Create two Subset nodes and connect the first sockets to the original and target LoadGeom nodes and the second to their respective down-graph SelectPolygons node.
9) Create a Brush node and connect the first socket to the target Subset node and the other two to the original Subset node.
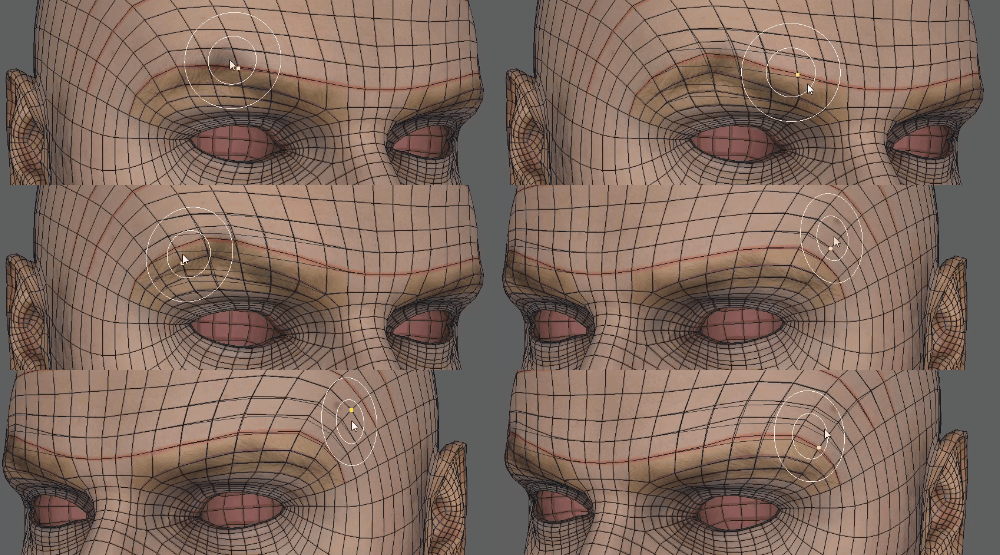
10) With the new Brush node selected switch the view-port to Visual editor and use a combination of available brushes to rectify the topology.
You can dial down the Opacity parameter to see through the wire-frame overlay.
11) Create a TransferTexture node and connect the first socket to the original LoadGeom node and the second to the Brush node.
12) Change the Width and Height attribute to 4096.
13) Create an ExtrapolateImage node and connect it to the TransferTexture node.
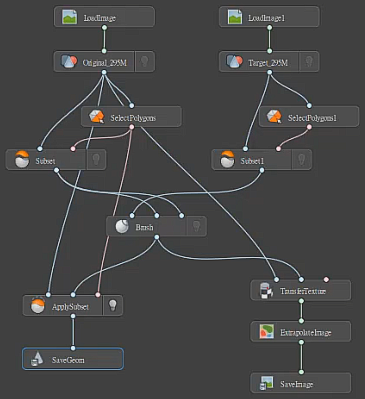
14) Create a SaveImage node and connect it to the ExtrapolateImage node. Set the Quality attribute to 100.
15) Pick a location for the File Name along with a name for the fixed diffuse texture.
16) Click on the Computer Current Frame button to render a new diffuse map.
17) Click on the original LoadImage node and load another texture for the character (normal, roughness, etc.) and repeat steps 15 to 16. Repeat this step until all of the textures are processed.
18) Create a ApplySubset node and connect the original LoadGeom node into the first socket, the Brush node to the second, and SelectPolygon node to the third.
19) Create a SaveGeom node and attach it to the new ApplySubset node.
20) Select a File Name location for the corrected OBJ mesh and press the Compute current frame button to export the model.
21) Reprocess the character for CC by following the steps mentioned in the previous Scan to CC3+ Preparation in Maya article,
Fixing Texture Maps
There may be a need to adjust or fix the textures of the character, in which case, you'll need to export the body textures to an image editor like Photoshop.
Exporting Texture Maps
Make sure you have upsized the body textures to 4k: Matching Body Textures to the Head.
1) Select the material of the head (Modify > Material > Material List).
2) Select the Base Color texture channel (Modify > Material > Texture Settings (Y) > Base Color) and click on the save button below: Save Textures > Save Texture to save a texture file in PNG format.
3) Do the same for the rest of the character with the body, arms, and legs - depending on what will be exposed while clothed.
4) Drag in either 4K Neutral Female.ccSkin or 4K Neutral Male.ccSkin according to the character's gender, select Replace All in the subsequent window, and press the OK button to replace the entire character with a 4K base character. If you don't have these files then make sure to have completed the section on Matching Body Textures to the Head.
5) Select the head Base Color channel again and export another texture file in PNG format.
Color Matching for the Limbs and Head
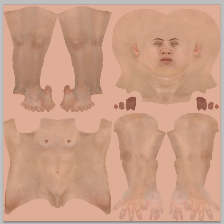
1) Inside Photoshop, create a new 8k document (8192x8192 pixels).
2) Drag all of the non-scan 4k texture textures into the document exported from the previous section and lay them out to fill the entire document.
3) Drag in the scanned 4k head texture into the document and expand to the borders of the document.
4) Use a brush to fill in the blank spaces of the map with the same color tone as the rest of the head.
5) Hide the head texture layer and take note of the layer name.
6) Go to Image > Adjustments > Match Color....
7) In the subsequent Match Color window, select the current document for Source: and the head texture layer for Layer: under Image Statistics.
8) You can also adjust other settings such as Luminance and Color Intensity and toggle Preview to compare the results.
9) With the body textures matching the tone of the head texture, use guides to divide the document into 4 equal parts.
10) Crop a quarter section of the texture and save out a texture in PNG format. Repeat this for the other three parts by going back in history to start again.
Fixing Shoulder Seams
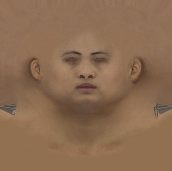
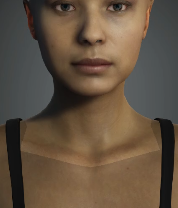
11) With the character loaded in Character Creator, drag and drop the processed textures into their respective texture channels, and notice that a very obvious shoulder seams still exist.
12) Back in Photoshop, create a new 4K document (4096x4906 pixels).
13) Drag the scanned head texture and the toned CC base head texture into the document, with the scanned texture as the top layer.
14) Create a mask for the scanned head texture layer and fill it with pure white.
15) Take a soft brush with feathered falloff and brush a black mask around the borders of the neck. This will blend the CC base head texture with the scanned texture.
16) Save a new Base Color texture file and load it back onto the character in CC.
17) Keep adjusting the border mask in Photoshop until the shoulder seam is completely gone.
