Content Dev:CC Asset Publication
- Main article: CC Asset Development.
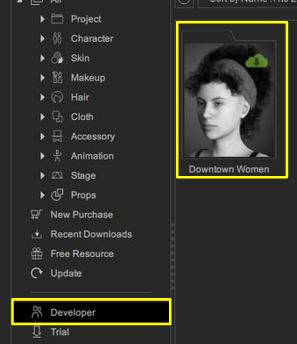
Using Smart Gallery
As of 2020, the Smart Gallery is the preferred way to upload user content. For more information visit https://www.reallusion.com/smartgallery/.
The benefits include:
- The upload speed is faster.
- The file path only needs to be sorted once, and the path downloaded by the user is the same as the path in Developer.
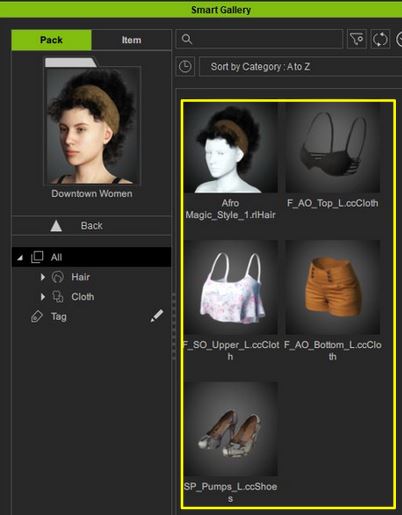
- Previously, Uploader was uploaded in the form of an item, and SmartGallery was uploaded in the form of Pack, so the Pack will be created automatically.
- Easy to update (Replace) files, no need to enter Content ID yourself
- Some information in the entity file is automatically filled in the Marketplace form, reducing human errors.
- After uploading, you can download and check from SmartGalley immediately, the process is more smooth
New for Smart Gallery 1.3
Tutorial video:
File Save Enhancements
The new Smart Gallery 1.3 allows you to directly store a completed item by pressing the Save button.

In the subsequent Save Options window, users can fill out the File Name, File Format and Category, and Target Pack to conveniently save the pack. The Smart Gallery will automatically detect the file type and select the appropriate category for you, which you can change anytime at your discretion. The default save path is within the Custom Pack directory and can also be changed by clicking on the drop-down button or you can choose to create a new directory by pressing the plus button.

Dropping Content to Create Sub-directories
Inside Smart Gallery 1.3, users can change sub-directories within the Custom Pack directory. Once you drill down into the sub-directory, you can press the plus button to the right-hand side to create a new subfolder. Give it a name in the Create Subfolder window to set up the directory. Once the directory is set up, you can drag items into it or you can right-click on any existing item and designate a sub-directory for relocation.

Developers can also choose to show or hide subfolder items. When checked all subfolder items will be visible from the parent folders. When unchecked, only items that belong to the subfolder will show.

Developers can also modify packs within Window's File Manager and then drag them into the Smart Gallery to create a complete package from the data folder. You will be able to give the package a Pack Name when it is dragged over.

The Smart Gallery will inquire about the storage type for the package. Duplicate will store a new separate file in the Smart Gallery, while Link will maintain the original location of the package and create a link for it.

Prior to Smart Gallery 1.3 (Legacy Workflow)
1. After pressing the + sign from the Content Manager to archive, the data will be automatically recorded in the SG Custom Pack. 2. The relevant paths in the Custom folder will be recorded inside, and these paths will also be regarded as the install path after uploading, so it is recommended to organize the folder paths first.


3. To start uploading files, you can right-click in the Custom Pack (Custom Pack itself cannot upload files), and move the file to the Pack to be uploaded.
The Pack Name established now is the Pack Name you will see later on the Marketplace.
4. Like Cloth or Accessory, if it is saved in the Arm folder, Category will automatically be displayed as Arm, and when saved to Others, Others will appear; it is the same as the one displayed on the left of SmartGallery.
5. After the files are organized, right-click on the Pack > Edit Metadata, you can edit the Pack information; including Pack Name, Thumbnail, Description.


6. Right-click Upload Pack to start uploading files.
7. After uploading, press the Refresh button to find the Pack that has just been uploaded to the Developer Node. After Double Click, you can download the file for inspection to confirm whether there is any problem with the installation path or file.
Replacing Files

1. When re-saving the file, please use the method of overwriting the original file, do not save a new file, else, it will be regarded as a new content.
2. If you want to remove the item in the Pack and replace it with another one, please right-click the item and perform Move to into a Custom Pack; then move the item you want to change into the Pack. The new item will display insert, and the old item will display Remove.
3. After the adjustments are made, press Upload Pack to make changes to the Pack; and all users who have bought this pack will receive an update message in the Smart Gallery.
Packaging in the Marketplace


After logging in to the Marketplace, go to Edit Content Pack and you can see the Pack just uploaded. Because the Pack may contain many types of Content (Accessory, Hair, Character...etc), the Pack is not filled in by default; please select Product, Type (recommended to choose the most type), Category (you can choose 3 types), Price and related videos or Tag fill in. Before uploading files with Uploader, you need to select a lot of items before uploading, or you may accidentally select the wrong one, resulting in install path, type, category, or version errors. Now if you use Smart Gallery to upload files, just put the correct extension in the corresponding folder, and SG will automatically help you determine the Category, Type, and Version.
Creating a Marketplace Item
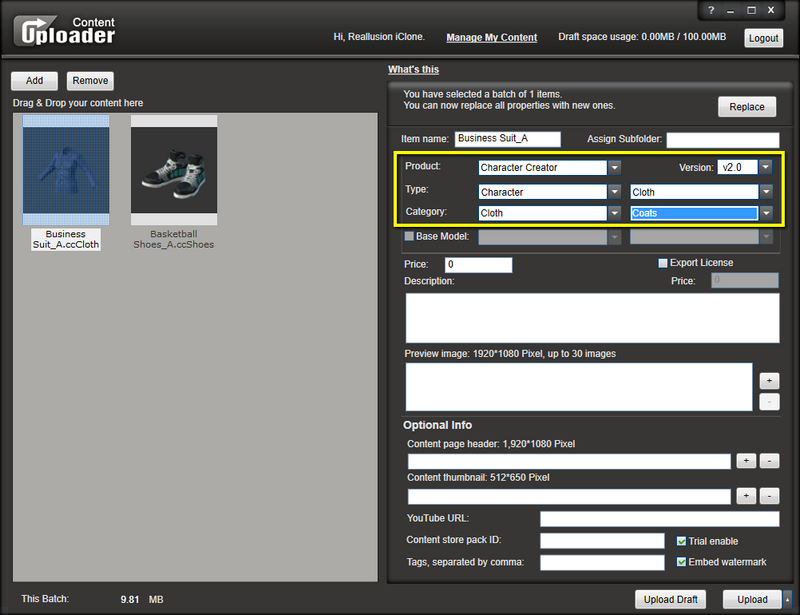
1. If you want to sell items, you need to set the price and Preview image. 2. Click "Edit Plugin/Content item". 3. Edit the item just uploaded.

4. The gray part has been directly filled in by SmartGallery. Currently, only Category, Price, Descrption, Preview image are required. 5. The Subfolder has also been filled in, which is the same as the folder when uploading. You can modify it if necessary.
Batch Item Correction
1. Check the item to be modified, click Batch Edit Selected.

2. After entering the information into the first item, press the icon behind each information; the information will be copied to all the items below. This can reduce the time required to modify item information.


Using the Content Uploader
The following information will help you save content in CC and iClone format and use the Uploader to bring it into the Marketplace.
Create Content via Character Creator
CC Content

To export CC Content from Character Creator, select the content in the viewport and press the "+" icon on the right category of Content Manager. Once the content is successfully saved under the "Custom" section, right click on the content to find the file.

Sending Content to the Marketplace via the Uploader
Currently, any content that is to be sold on the Marketplace needs to be sent via the Content Uploader. You can edit and save your content information before uploading, and once you upload the content, it will be accessible from your Marketplace account backend so you don’t have to wait for approval before you begin selling. Aside from the content files, you can set the name, description and price of the specific content, and upload all the promotional materials at the same time.
Step 1) Start the Uploader.
Step 2) Add the content you are going to upload by drag-and-drop or clicking the "Add" button.
Step 3) Assign the Subfolder, which will be the categorical placement of the asset inside CC's Content Manager to your local disk.
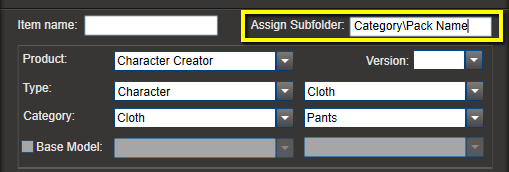
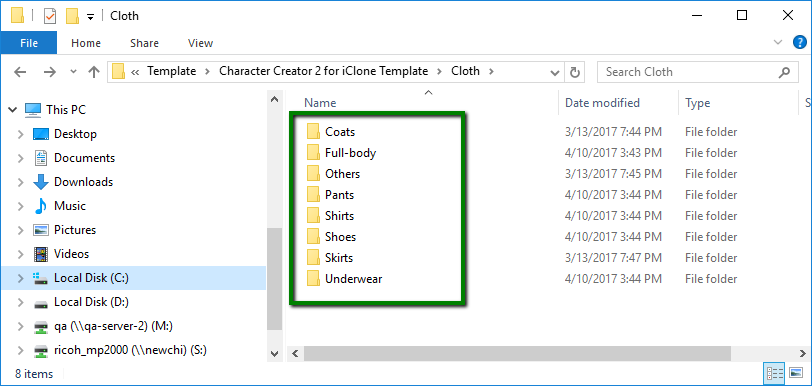
Category: Coats, Full-body, Others, Pants, Shirts, Shoes, Skirts, Underwear.
Pack Name: You can designate the item as part of a pack.
Step 4) Select the right category when uploading.
Adding DRM (Digital Rights Management) to your content
What is DRM?
Digital rights management (DRM) is a type of data file access control technology, usually applied to digital goods and devices after they are sold. DRM is often referred to as copy protection, duplication control, technology protection measures, etc.
DRM Deployment Overview

1. First upload every single item, which will automatically trigger DRM assignment.
2. Content uploaded via Smart Gallery (SG) will also show up in SG and can be downloaded with DRM data added.
3. Take the downloaded DRM protected content to compose item packs.
Important Aspects of Reallusion DRM
Reallusion uses DRM to protect developers' digital assets. One would just need to upload their content to the Reallusion Market Place to have the DRM automatically applied according to the content type by the system. This means that DRM will be applied to the entire character when uploaded to the Market Place and for every separate accessory that is also uploaded.

If you would like to upload a character or project and would like to have DRM applied to every piece of item that comes with them, then you'll need to upload every separate item to the Market Place to deploy DRM protection on a per-item basis. You can refresh the Smart Gallery to view your DRM protected content pack, once they are uploaded. You can access the DRM protected content by downloading the uploaded content pack. Items within this content pack can then be assembled to form composite assets with DRM protection for every single component that make up the whole.
-
 Uploaded content packs can be viewed in the Smart Gallery.
 -
 By downloading the content pack, the developer will have access to each DRM protected component within.

