Content Dev:CC Hair Creation Guide
- Main article: CC Asset Development.
iClone currently does not have a real fur and hair solution, so all hair is made of geometry. There are two types of hair systems in iClone, the Conforming and Spring type (using Spring and Cloth dynamics together on the same mesh is often problematic). This guide will focus only on Conforming Hair.
Conforming Hair
- Will conform to the shape of the head.
- Can use Soft-cloth physics.
Spring Hair
- Will not conform to the shape of the head.
- Carries its own bones.
- Relies on Spring bone dynamics.
The hair mesh consist of the scalp and hair strips around it and they each have their own materials with their set of UVs and textures. The hair mesh is designated as such in CC by its name, therefore always have it named RL_HairMesh. For the sake of clarity prefix the two hair materials with Hair, for instance, 'Hair_Scalp' and 'Hair_Strips'.
- ⚠ Always name the hair mesh as RL_HairMesh else CC will fail to recognize it.
General Workflow
- Select either, male, female, or new character base model as a guide.
- Create the hair strips and scalp mesh as separate geometries.
- Apply separate material to each geometry e.g. 'hair_scalp' and 'hair_strips'.
- Input the diffuse, bump, specular, and opacity textures for each material.
- Combine scalp to hair strips into one single mesh and name it RL_HairMesh.
- Bind the hair to skeleton starting from CC_Base_Hair bone.
- Export the entire character as FBX to Character Creator.
- Adjust the material and load in the RGB Mask into Appearance Editor.
- Set the material to 2-sided. Adjust the Appearance Editor if necessary.
- Input the cloth dynamics weight map via Modify > PhysX > Edit Weight Map.
- Select the hair and save in (*.ccHair) format.
Modeling Process
Model the scalp first by copying portions of the Base Model head mesh and scaling outwards to cover the base mesh. Keep a few things in mind while creating the hair strips:
- Plan out the hair strips in layer groupings, for instance inner, middle, and outer groupings.
- Always plug the hair strip into the scalp mesh, do not 'float' the strips.
- Leave a small gap between each strip as to prevent problems with dynamic collisions.
- Create a unique strip for a grouping. UV and duplicated it around the head to save time.
- Work from the inside to the outside layer while keeping a small space between the layers.
- The inside layers should have thicker strips while the outer layers have thinner strips.
- The root of the hair strip can have more divisions to support a nice rounded bend.
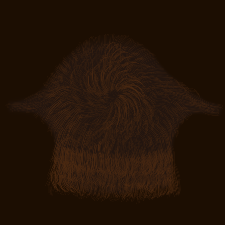
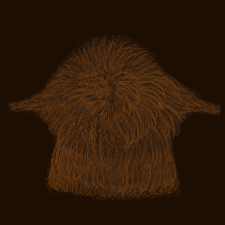
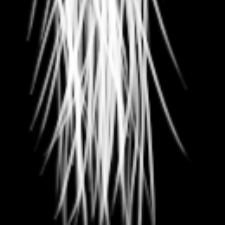
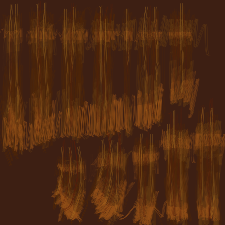
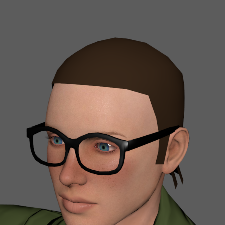 The scalp serves as a backdrop for the hair.
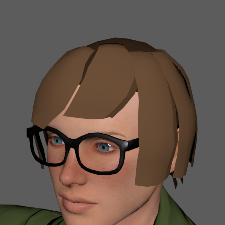 Hair strips should be added in a layered fashion.
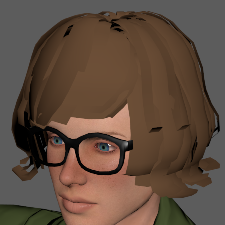 There are a total of 6 layers in this example making a 'fuller' look.
Once the scalp and the hair strips are made combine the pieces together starting from the scalp and attaching one layer at a time from the inside to the outside. This is so to prevent opacity layer disorder in DirectX 9 (this visual phenomenon does not occur in DirectX 11 and above).
- ⚠ Avoid exceeding 10,000 quad poly count, otherwise performance may suffer.
Texturing Process
Painting Hair
The rightly configured paint brushes will greatly enhance and ease the work-flow when it comes to texturing the hair and scalp. Generally one would need at least two types of brushes, one for the hair strips and one for the hair scalp. The hair strips need very thin stringy brush while the hair scalp needs a fan brush capable of feathering out several short strands at a time.
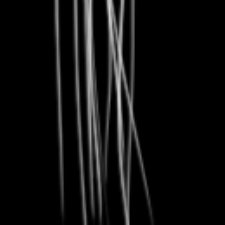
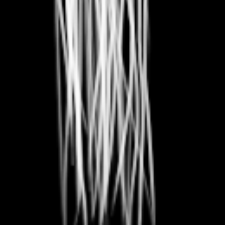
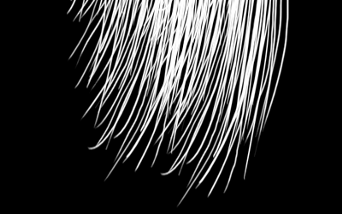 Hair strip strands are crisp and sharp.
 Hair scalp is feathered and blurred.
The hair scalp is a build up of different layers, starting from a shaded fuzzy base:
 ➠
➠
 ➠
➠
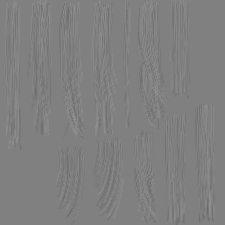
Inner layer of hair strips can be more dense while the outer layers can have a more sparse opacity. For the hair strands build up the layers towards a balance between orderly and erratic:
 ➠
➠
 ➠
➠
Scalp Textures
Scalp UV should be evenly laid out. The scalp should not have soft-cloth dynamics. Hair strips material has diffuse, bump, specular, opacity, RGB mask, and Physics map input. Hair scalp material has diffuse, bump, specular, opacity, and RGB mask input.
 Diffuse map should be darker than the diffuse map for the hair strips creating an occluded effect.
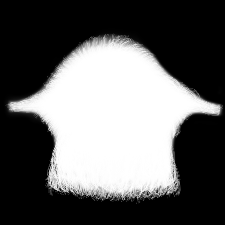 Opacity map should have slightly blurred edges to smoothly blend into the head underneath.
 Specular map needs the same black cutout as the opacity map to prevent shiny edges.
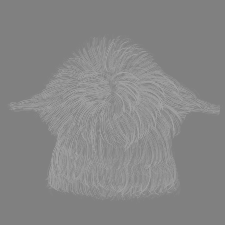 Bump map should not have values less than gray RGB(128,128,128) as the hair do not 'dig' in.
 In this example the scalp has a pure red color so it will always match the HSL of the primary hair layer.
 Pay attention to how the scalp blends in with the rest of the head for a smooth natural look.
Hairstrip Textures
Hair strip UVs should be laid out in a orderly fashion, vertically upright, and with at least 10 pixels buffer distance between each UV island. Overlay similar strips together in the same area to reuse the texture space and soft-cloth gradient. Hair strips material has diffuse, bump, specular, opacity, RGB mask, and physics weight input.
 Diffuse map should have a colored backdrop to provide a matte color for transparency.
 Opacity map should have sharp outlines and high contrast for better performance and crisper look.
 Specular map should have the same opacity background cutout to prevent shiny edges.
 Bump map should be derived from a gray RGB(128,128,128) backdrop as the starting value.
 RGB mask separates the hair into color regions useful for adjusting hue, saturation, and lightness.
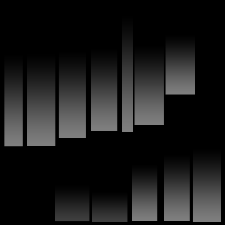 Physics weight map should have at least 10 pixels of pure black RGB(0,0,0) from the hair root.
 Hair strips are grouped according to look and physics settings to economize on UV spacing.
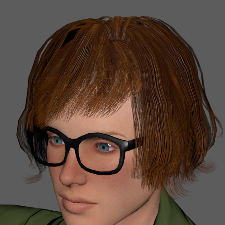 Here the 12 different hair strip appearances combine together for one coherent look.
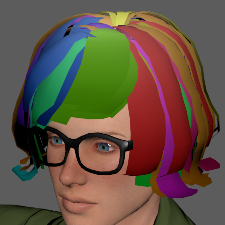
 The final look with every input texture and material adjusted inside Character Creator.
Map Resolution
Because the hair can have upwards of 11 texture maps, the performance inside iClone can be negatively impacted. Therefore, do control the resolution and color space of the hair textures:
| Texture | Colorspace | Hair Strip Resolution | Scalp Resolution |
|---|---|---|---|
| Diffuse | 8-bit RGB | 256x256 to 1024x1024 | 128x128 to 512x512 |
| Specular | 8-bit Grayscale | 256x256 to 512x512 | 128x128 to 512x512 |
| Bump | 8-bit Grayscale | 512x512 to 1024x1024 | 256x256 to 1024x1024 |
| Opacity | 8-bit Grayscale | 512x512 to 1024x1024 | 256x256 to 1024x1024 |
| Color ID | 4-bit RGB | 256x256 | 8x8 to 256x256 |
| Physics mask | 8-bit Grayscale | 512x512 | N/A |
Skin Binding
Once the hair mesh is completed, make sure the hair mesh pivot is aligned with the CC_Base_Head bone. Try to have the hair mesh skin bound to as few bones as possible. In the case of hair shorter than shoulder length, having the entire mesh skinned to the CC_Base_Head bone is sufficient. Normally the skin weights will not exceed beyond the CC_Base_Head, CC_Base_Spine01, and CC_Base_Spine02 bones. Not all bones in the skeleton is appropriate for the hair, below is a list of the compatible bones:
| Leftside Bones | Center Bones | Rightside Bones |
|---|---|---|
| CC_Base_L_Clavicle | CC_Base_Head | CC_Base_R_Clavicle |
| CC_Base_L_Upperarm | CC_Base_Spine01 | CC_Base_R_Upperarm |
| CC_Base_L_Forearm | CC_Base_Spine02 | CC_Base_R_Forearm |
| CC_Base_L_Hand | CC_Base_Waist | CC_Base_R_Hand |
| CC_Base_L_Thigh | CC_Base_Hip | CC_Base_R_Thigh |
| CC_Base_L_Calf | CC_Base_R_Calf | |
| CC_Base_L_Foot | CC_Base_R_Foot |
Various 3D applications will have their way of pruning skin weights to zero such as Maya's Component Editor and Max's Weight Table. Having soft-cloth physics with collision shapes to override the skin binding is highly recommended for long hair.
Hair Appearance Editor (AE)
The most compatible CC hair rely on AE for texturing. Hair AE breaks down into five main parts including four adjustment layers:
| Input | Only has input for diffuse, specular, and RGB mask. The Color / RGB mask demarcate the regions for the base, primary, secondary, and tertiary values. |
|---|---|
| Base (Black) | This layer is always on by default and its regions are set by any color that is not pure red, green, or blue. Only the Base layer does not have opacity or blending options. |
| Primary (Red) | This layer will only render on pure red regions of the Color ID RGB(255,0,0). The red layer will cover the base layer. |
| Secondary (Green) | This layer will only render on pure green regions of the Color ID RGB(0,255,0). The green layer will cover the base and red layers. |
| Tertiary (Blue) | This layer will only render on pure blue regions of the Color ID RGB(0,0,255). The blue layer will cover all of the other layers. |
Hair can support up to four different regions.
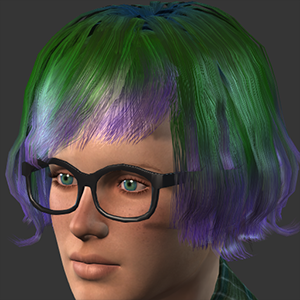 RGB layers can be used to dye regions of the hair up to four different colors.
 If the RGB Mask is left empty then the hair rendering is controlled by the base layer.
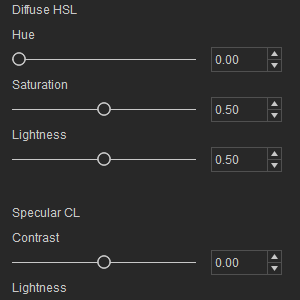 Each RGB layer can be used to adjust the diffuse and specular appearance.
The myriad of settings and their usage for Hair Appearance Editor is beyond the scope of this guide. Developers are encouraged to experiment with all aspects of the editor to get a handle on all its offerings.
Soft-cloth Physics
Remember that portions of the hair with strong soft-cloth influence will become 'limp', exaggerating the hair style at the points where the physics has the strongest influence can mitigate this effect to an extent. The hair strip should not intersect with the body mesh, otherwise the collisions will miscalculate.
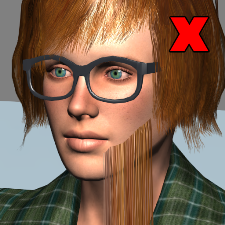 ✘ Wrong: Hair pieces can 'fall through' if the soft-cloth weight map is not rooted.
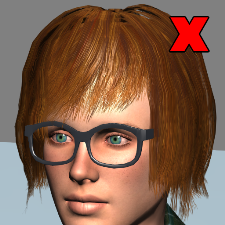 ✘ Wrong: If the soft-cloth weight map is too bright the hair can go limp.
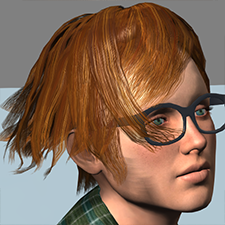 Keep tweaking the soft-cloth weight map to perfect the hair physics.
The myriad of settings and their usage for Hair AE is beyond the scope of this guide. Developers are encouraged to experiment with all aspects of the editor to get a handle on all its offerings.