Difference between revisions of "Content Dev:CC 3.4 Hair Mesh Production"
Chuck (RL) (Talk | contribs) m (→Creating CC Hair) |
Chuck (RL) (Talk | contribs) m (→Binding Hair Mesh in 3rd Party Software) |
||
| (4 intermediate revisions by the same user not shown) | |||
| Line 96: | Line 96: | ||
[[File:cc34_hair_uv_mirroring.png]] | [[File:cc34_hair_uv_mirroring.png]] | ||
| + | |||
| + | UV mirroring is an expert feature, and should be avoided in most cases as the unpredictable nature of asset creation generally means that it can do more harm than good. | ||
==== Normal Orientation ==== | ==== Normal Orientation ==== | ||
| Line 368: | Line 370: | ||
If you need to modify the skin weights of the hair mesh, then binding the hair beforehand in another 3D application is recommended. Furthermore, this will give you more control over the skin weighting as opposed to performing the hair conversion in CC. | If you need to modify the skin weights of the hair mesh, then binding the hair beforehand in another 3D application is recommended. Furthermore, this will give you more control over the skin weighting as opposed to performing the hair conversion in CC. | ||
| + | |||
| + | If the skin weights are edited in 3rd party application then the entire character needs to be exported and imported back into CC with its FBX key. | ||
{{clear}} | {{clear}} | ||
Latest revision as of 23:10, 3 June 2021
Contents
- 1 Hair Card Production
- 1.1 Hair Card Distribution
- 1.2 Hair Card Layering
- 1.3 Precautions for Mesh Production
- 1.3.1 Keep the Hair Cards Close to the Scalp
- 1.3.2 Efficient Use of Hair Transparency
- 1.3.3 Avoid Vertical Divisions in the Geometry
- 1.3.4 Make Good Use of Advanced Hair Shapes
- 1.3.5 Avoid Horizontal Intersections
- 1.3.6 Notes on UV Mirroring
- 1.3.7 Normal Orientation
- 1.3.8 Avoid Ngons
- 1.3.9 Making the Scalp
- 1.3.10 Keep Mesh Distance
- 1.3.11 External Pipeline Shader Adjustments
- 1.3.12 Accessory Import
- 1.3.13 Avoid Over-reliance on Hair Card Generators
- 1.3.14 Beard and Eyebrows Should be Arranged by Hand
- 1.3.15 Tips for Making Braids ( Hollow Mesh Method )
- 2 Vertex Coloring
- 3 Creating CC Hair
- Main article: CC Asset Production.
Hair Card Production
Hair Card Distribution
Although hair card arrangement has very little direct impact on the hair shader inside Character Creator, the arrangement process is still the most important step. Compared with the large hair cards with rough layout recommended by the old process, users should pay attention to realism and increased layering. Therefore, try to avoid using many large hair cards to reduce the polygonal look (jaggedness of the hair). For next-generation visuals, see the works done by Naughty Dog: Artstation Link
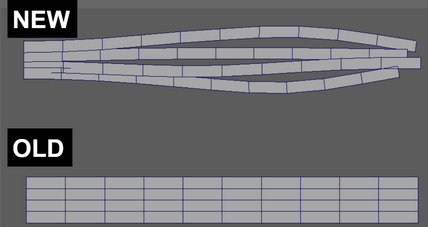
You can still use large hair cards that resemble those used in the old process, however, do consider the amount used.
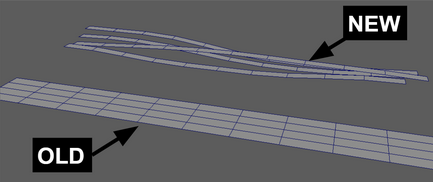
You can consider splitting large hair cards into individual pieces to improve the look of the hair strands:
Hair Card Layering
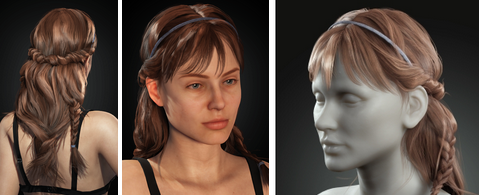
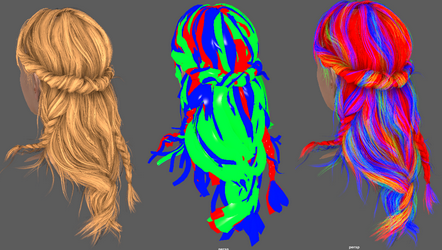
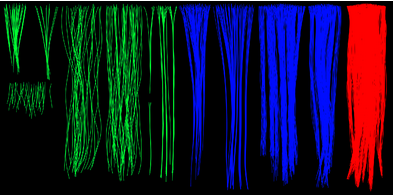
As mentioned earlier, we should strive to increase the layering of the hair by dividing the hair into three levels or more. Roughly speaking, the three levels are: dense, abundant, and sparse hair. Take the following Reallusion hair content as an example:
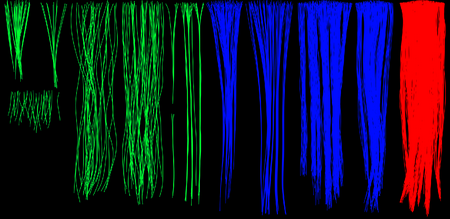
This is the texture layout for the hair. The strands in red stand for dense areas, blue for abundant, and green for sparse:
One can tell that the base of the hair is comprised of mostly dense strands, while it is essential to layer abundant and sparse hair cards on top to achieve a layering effect.
Precautions for Mesh Production
The following are some common mistakes made by developers and some points to pay attention to, in order to increase productivity.
Keep the Hair Cards Close to the Scalp
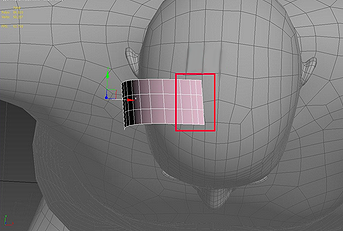
Regardless of where the hair card is located, make sure that it originates from the scalp. Do not float the hair cards in mid-air and do not insert the hair cards right into the scalp mesh.
Efficient Use of Hair Transparency
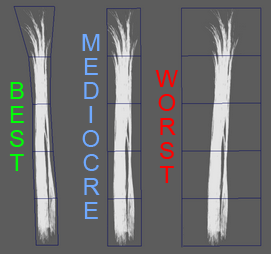
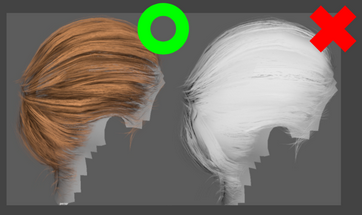
More transparent pixels equate to more load on the system resources and cause problems with physics simulations (collision testing). According to Reallusion standards, the mesh should hug the contours of the non-transparent areas (left-most hair card).
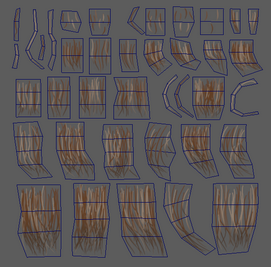
"Contour tracing" for the hair cards is also recommended for fine hair such as eyebrows and beards because, due to their stubbiness, they are often manually arranged en mass. Therefore, it is critical to create the hair cards using the texture as a reference, while matching the geometry with the UVs.
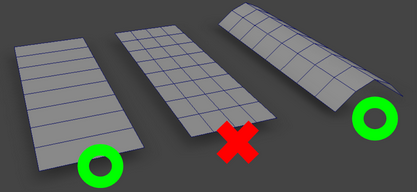
Avoid Vertical Divisions in the Geometry
Use of vertical/longitudinal divisions should be for specific purposes only. Reallusion software can support up to 40,000 faces, therefore, control over the reasonable poly count is paramount. Adding "body" to the hair cards is a good reason to use vertical/longitudinal divisions:
Vertical/longitudinal divisions can be quite wasteful if the extra geometry does not contribute to the shape of the hair strands.
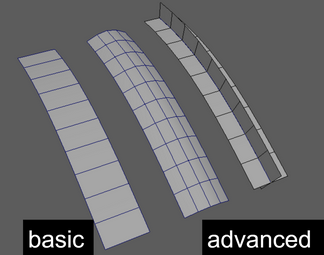
Make Good Use of Advanced Hair Shapes
If the entire hair is comprised of flat hair cards, then the hairstyle may appear dull. According to the desired hairstyle, one can work in advanced hair geometry to reduce the plated look of the hair and reduce poly count. Advanced hair cards are usually made up of two intersecting pieces that form a cross. Vertically subdivided hair cards are suitable for large or wavy hair clumps, and the cross configuration is suitable for hairs facing a vertical direction or stray hairs.
Three-dimensional hair pieces are mainly used to deal with braids and buns:
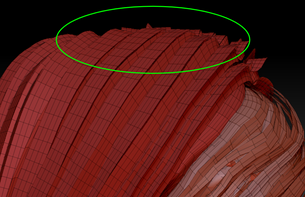
Avoid Horizontal Intersections
Geometry intersection is inevitable when arranging hair. One should focus on avoiding perpendicular mesh intersection, because it can easily become a visual sore spot, while parallel interleaving is less noticeable. Therefore one should always prioritize the fixing of perpendicular intersection over parallel.
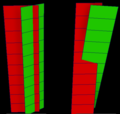
Notes on UV Mirroring
UV mirroring can be very convenient for some situations, but you should be aware of the possible issues:
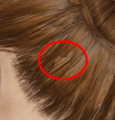
- The root coloring can conflict with the surrounding hair (left-most illustration).
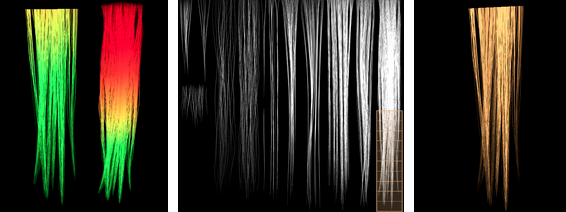
- Might interfere with the production of physics weight maps (center illustration).
- Unnatural fold can be hard to hide (right-most illustration).
If any of the aforementioned issues do occur, you should reconsider whether or not it is appropriate to use mirrored UVs.
UV mirroring is an expert feature, and should be avoided in most cases as the unpredictable nature of asset creation generally means that it can do more harm than good.
Normal Orientation
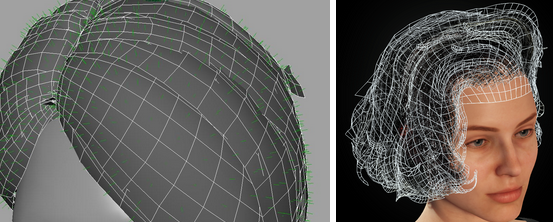
For uniformity, please make sure that the normals are outward facing, even though there is no visual difference between the front and the back of the normal in the hair shader. Normal check can be turned on in Maya or Max (picture left), and it can also be checked in CC (picture right).
Avoid Ngons
Although mesh faces are converted to triangles for real-time rendering, production should still be conducted in quads, with triangular faces as acceptable by-products. However, face with 5 or more sides should be avoided as makes the mesh incapable of being sent to Zbrush (with GoZ).
An ngon is a face or polygon that is made up of five or more sides or edges connected by five or more vertices. Anything over a quad (4 sides) is considered an ngon.
Making the Scalp
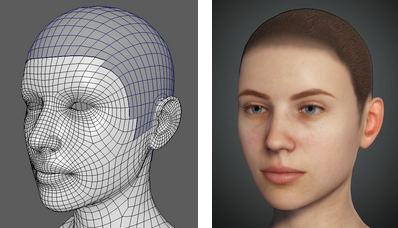
Suggested method for scalp production: Directly extract the scalp mesh from the character's head. You can also manually create the mesh for special requirements.
Keep Mesh Distance
Keep dynamic parts of the hair (Soft Cloth) as far away as possible from the body to avoid mesh intersections and collision calculation errors.
External Pipeline Shader Adjustments
Adjust toward an ideal environment as much as possible when arranging the hair cards, otherwise it may not be easy to see the flaws in the overall layout of the hair, such as mesh intersections and bald spots. Some recommended adjustments include:
- Adding the vertex color.
- Increasing the transparency and shadow quality, to the highest if possible.
- Adding a diffuse map.
- Turn on the environment AO settings and maximize its quality parameters.
Accessory Import
Compared with the old process, it is no longer necessary to import the finished product via FBX import. Now only the Create Accessory function is needed to import the model. The positioning should match those of Maya or Max. If you experience any kind of unexpected offsetting, then contact our technical support or file a bug report on our website.
Avoid Over-reliance on Hair Card Generators
Automatic generation usually entails making hair cards out of a number of randomly selected Groom hairs. At the present, there are many available tools on the market. For example, Ornatrix, Yeti, Xgen, all have this capability. The speed of generation is almost instantaneous, but it can be difficult to edit. The following is a table of analysis of the three popular production methods:
| Method | Advantage | Disadvantage | Suitable Application | Overall Recommendation |
|---|---|---|---|---|
| Automatic generated (Example link) | The production speed is extremely fast, you can use some comb tools to sort out the flow direction of the guide lines (this method has some limitations). | It is very troublesome to adjust the minute details, easy to crash, the number of faces can easily exceed the maximum allowance, intersections can get out of control, etc. | It is suitable for finished products with low quality standards or neat hairstyles that are highly repetitive. It can also be used as a starting point, but it is not recommended for fine-tuning finished products. | ⭐⭐ |
| Curve Tool (Example link) | The transition method between automatic generation and pure manual generation retains the advantages of both, and the adjustment tools available are plentiful and can boost productivity compared to manual methods. | The classification will be more cumbersome when there are more films released, the tool is also more difficult to use, and the production process is also more difficult. | At present, RL believes that it is the best way to have both quality and efficiency. It can cope with various styles, especially large-volume hairstyles, and it is also convenient for subsequent staff to modify works. | ⭐⭐⭐⭐⭐ |
| Handmade (Example link) | The only way to optimize the highest visual quality and resources, the number of faces can be very precisely controlled and saved, and the production is also the most flexible. | The production is very time-consuming. Although the degree of freedom of editing is high, the flexibility of file utilization or modification is very low, and the production difficulty is also very, very high. | disordered hairstyles. | ⭐⭐⭐ |
Beard and Eyebrows Should be Arranged by Hand
It is totally legitimate to create the aforementioned hairs with the Curve Tool, however, after a few internal testing, we have deemed it best that beards and eyebrows are best done manually due to it's high visual quality requirements and lower poly-count. Please consider unwrapping UVs and arranging hair cards by hand. Unconventional eyebrows and big beards are not discussed in this article.
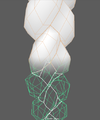
Tips for Making Braids ( Hollow Mesh Method )
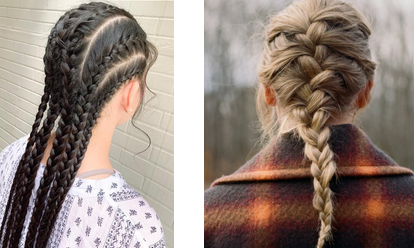
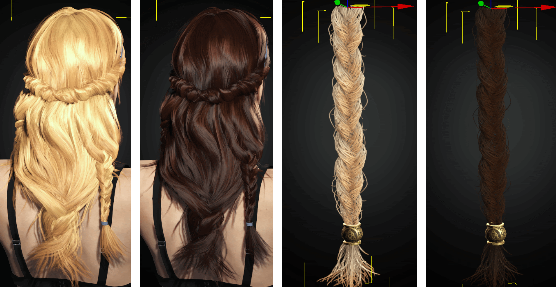
The production process of braids is relatively unique. Here is a brief description of the production points:
- The UV should be split at the intersection of the braid, which will help distribute the UV and cover blemishes.
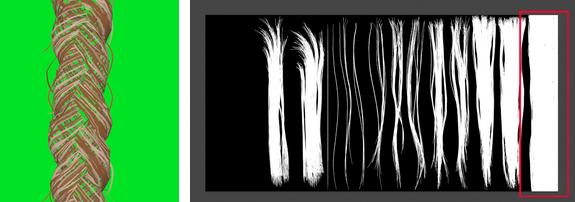
- Use denser hair textures as much as possible to arrange the main body of the braid to prevent overly transparent look (picture left). Try to choose heavily dense textures (picture right). One can conveniently arrange the UVs and view the visual results at the same time.
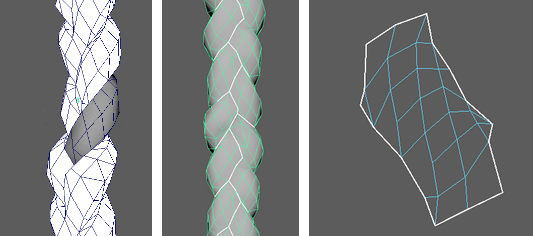
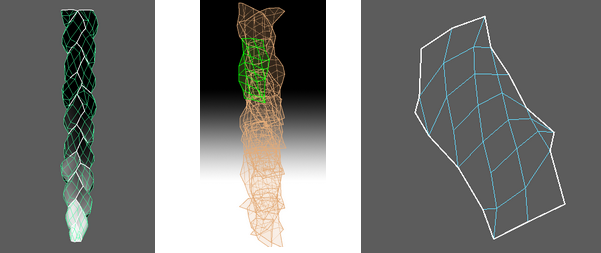
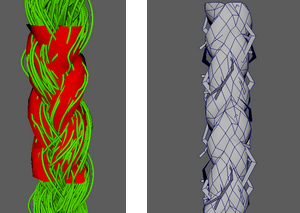
- It is best to keep the braid geometry hollow, because braid generators usually has wasted, extra geometry in the core of the cord. Not only is this occluded geometry difficult to remove, but its UVs are also difficult to unwrap. Therefore, we recommend manual deletion of the hidden faces within the braid, but because this process can be time-consuming, we also recommend creating one section and duplicating it to make a chain.
- It is very important to match the root map when splitting the UVs. Improperly placed UV positions will result in visual defects when root coloration is adjusted.
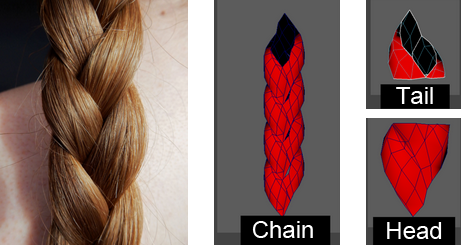
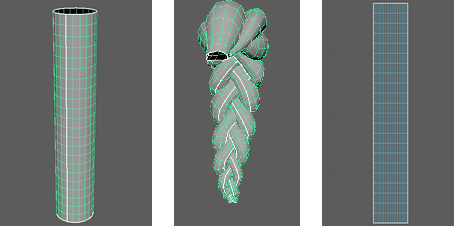
- Disassemble the braid into parts for easy assembly (picture below). After a repeatable section is assembled, you can theoretically extend the length of the braid infinitely and improve production efficiency.
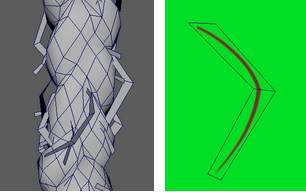
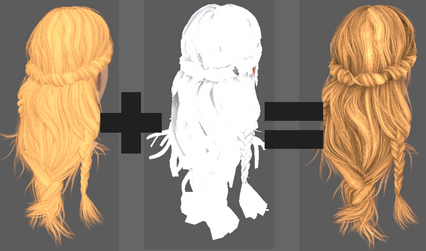
A simple way to make stray hairs is illustrated to the right, which is very low-poly and is well-suited for relatively small and regularly sized braids.
Baking High to Low Poly
Use high-poly geometry for baking (highlighted in green, picture below): Another method for generating textures is to use xNormal to bake information from high-poly to the low-poly model. This method can theoretically achieve better quality and more realistic results. However, this comes at the cost of increased production time and more wasted UV space, therefore, use proper discretion when employing this method for small sized braids. For large, very visible braids, this method can be your sole solution.
Braid Production (Direct Interlacing)
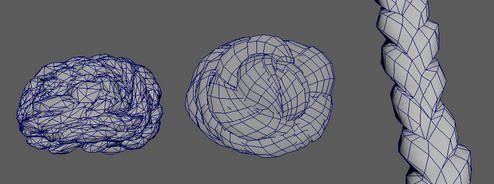
Another method which is the most primitive and simplest for producing braids, is to intertwine two columns together without hollowing the geometry and re-topology. This is the fastest method and produces the most natural hair interweaving, which makes it the most practical solution for three to four strand braids.
In view of the fact that there are two kinds of braid manufacturing processes, both can be used in combination, but here is an table of analysis of the advantages and disadvantages:
| Method | Advantage | Disadvantage | Recommended Usage |
|---|---|---|---|
| Hollow Mesh | The most efficient way to conserve polygons, and can avoid over-stretched UVs. | Can be slow to start and subsequent editing will be more troublesome. | Suitable for regular braids, and the number of sides saved can be considerable (bottom left picture). |
| Direct Interlacing | The fastest solution, easy to edit, and can cope with all kinds of complex shapes. | The number of segments will increase poly-count quickly, and if the length of the braid is long, UV stretching and deformation can become a very obvious issue. | Suitable for braids with more complicated shapes, but try to keep the braid short, otherwise the poly-count can increase significantly (bottom right picture). |
Vertex Coloring
Vertex coloring is very important part of the final visual quality for the finished product, and is mainly responsible for increasing the three-dimensional aspect of the model. The painting methodology is very similar to the production of the ambient occlusion map, and likewise, should be in grey-scale.
Since hair production relies on re-using the same UV space, traditional AO texturing can be quite limited. Therefore, we will need to consult the Unreal tutorial websites on baking AO information onto the vertex colors. In the picture to the right, you'll notice that the vertex coloring method is a huge improvement in visual quality.
Traditional ambient occlusion maps are made according to the UV layout, whereas, vertex colored ambient occlusion is baked directly onto the mesh vertex points.
Vertex Coloring Procedure
- Bake vertex color to mesh in a 3rd party software.
- Use modify to adjust the overall result.
- Use brush to refine the final result.
- Import to the application to observe the results.
- Go back to the first three steps and modify repeatedly (if necessary).
Compilation of Vertex Coloring Tools
Vertex painting is divided into two generation methods: baking and painting, among which baking is divided into AO bake and prelight bake (explained in detail below):
AO Bake (Mental Ray & Turtle Renderer)
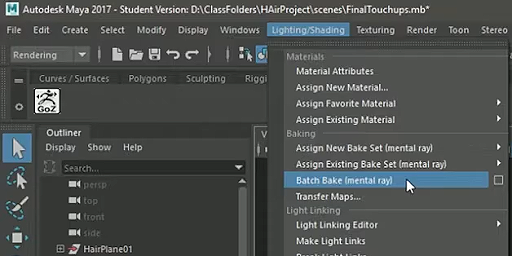
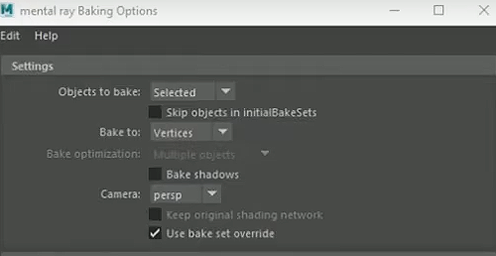
Mental Ray can only be used with Maya versions prior to 2017. You can replace the renderer with Turtle which comes with subsequent editions of Maya. Both can calculate ambient occlusion data based on mesh proximity and bake the results to the vertices. You can access Mental Ray by switching Maya to Render Mode then perform Lighting/Shading > Batch Bake (mental ray):
Mental Ray tutorial video:
Turtle Renderer tutorial video:
Prelight Bake
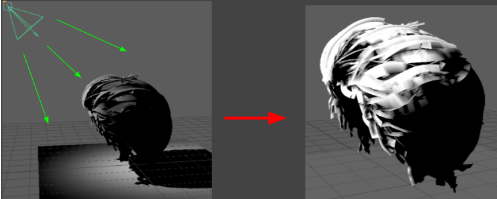
This is currently the only built-in method for vertex bake with new versions of Maya. This method bakes lighting data onto the vertices and will require carefully prepared lighting for best results. You can access prelight baking by switching Maya to Modeling Mode then perform Mesh Display > Prelight (maya):
Paint Vertex Color Tool
This is the most direct method, just like painting weights and relies on Maya's built-in brushes to paint directly onto the vertices. No matter which method you choose to deploy, you'll need to use vertex painting to achieve the best possible result. You can access vertex painting by switching Maya to Modeling Mode then perform mesh display > paint vertex color tool.
Vertex Coloring Precautions
Although vertex coloring is not as hard as creating hair cards, there are still some production concepts one will need to pay attention to:
Applying a Lighter Color for Visual Inspection
You are better off making adjustments to the hair with a lighter tone applied for accurate visual inspection. The following depiction is the same hair with vertex color strength adjusted from 0 (none) to 1 (full).
Contrast and Brightness Should be More Moderate
The biggest focus of vertex color production is to set the area that will be affected by AO. The most common mistake is that the area affected by the vertex color is too wide, and the contrast is too heavy (or light) and usually bake out.
As a result, only about 70~80% will be completed. The rest will require the producer to use his understanding of AO to make modifications. The following examples illustrate the various degrees of brightness and contrast.
The following pictures are the results of vertex color 0~1 When the slider strength is 1, it is still necessary to maintain the structure of the original color, like (pictured right one) after adding some color, it has changed from light yellow to dark brown. Such drastic changes should be avoided. (pictured right second) is the internal visual standard of this RL. It will almost be slightly heavier at the intensity of 0.8, but (the second from the left) becomes too light, and no obvious effect can be seen.
Use FBX Format
OBJ can not store vertex color data, instead, you'll need to export an FBX file and import it as an accessory (ACC).
Using Color Set Editor
Make good use of the color set editor in Maya. Selecting color display, editing, prelight, and blend mode can all be operated from here, which can greatly reduce the production time. Access Color Set Editor by switching Maya to Modeling Mode and accessing Mesh Display > Color Set Editor.
Take Advantage of Blend Mode
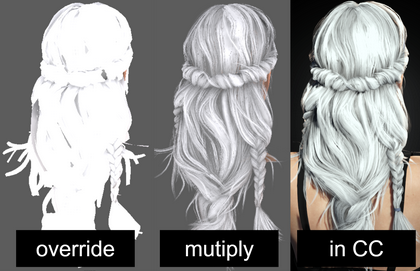
The original look of the hair is overwritten after a bake is complete because the default blend mode is set to "override". Make sure to change the blend mode to "multiply" instead to view the correct effect.
Layered Baking Concept
The ideal result for a proper bake is to have the dense clumps of hair be dark, with the lush regions shaded, and thin regions light. This is very similar to the layering method mentioned in the [Content_Dev:CC_3.4_Hair_Creation_Process Hair Creation Process article] (also pictured below). So it is recommended to bake each layer separately so that the bottom layers (dense and lush) are not occluded by the layers above and become too dark as a result. Another words, each layer separated by density should be isolated and baked individually to ease post-processing in an image editor. For more information, watch the instructional video below:
Material Blend Settings
As the material mode is set to "override" by default, one must set the mode to "multiply" after each successive bake. This will give you an accurate representation of the final result in Character Creator. You can access the material mode by switching Maya to Modeling Mode and select Mesh Display > Material Blend Setting > Multiply.
Creating CC Hair
For the latest version of Character Creator, the hair mesh will no longer be required to be bound to the skeleton joints to be recognized as hair. Instead, one will just need to bring the hair mesh into the application as an accessory and convert it to hair.
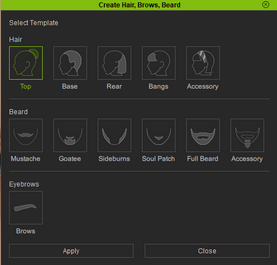
Access Modify > Create Hair, Brows, Beard to convert an accessory to hair.
Select the appropriate hair category in the following dialog window:
The latest version of CC has the ability to apply real-time conformation, which lets the facial hair contort with changing facial expressions. The following table illustrates the different conformation methods applied to different types of body hair:
| Hair Types | Beard | Scalp Hair | Eyebrows |
|---|---|---|---|
| Conform Methodology | Real-time | Regular | Real-time |
As you can see, facial hair including beards and eyebrows utilize real-time conformation. As a result, beards and eyebrows are affected by the 65 expression morphs available for the face, while scalp hairs are not. Keep in mind that real-time conformation will need additional adjustments in CC for the best results.
Assigning Texture Maps in CC
Make sure to use all 6 texture maps mentioned in Hair Creation Process article and don't forget to adjust the Diffuse Color and Ambient Color according to your needs (under Modify > Material > Material Settings). In most circumstances the Diffuse color should be set to pure white with Ambient Color set to pure black.
Binding Hair Mesh in 3rd Party Software
If you need to modify the skin weights of the hair mesh, then binding the hair beforehand in another 3D application is recommended. Furthermore, this will give you more control over the skin weighting as opposed to performing the hair conversion in CC.
If the skin weights are edited in 3rd party application then the entire character needs to be exported and imported back into CC with its FBX key.
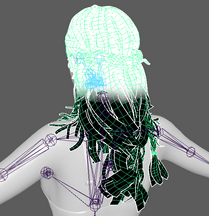
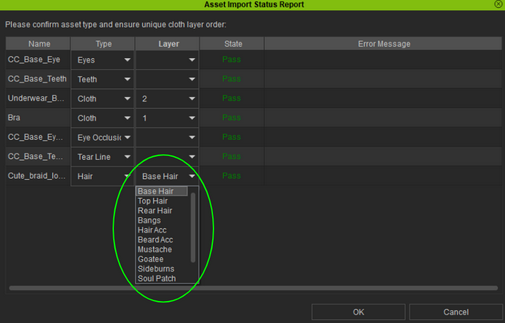
As long as the hair has been bound to the bones of the skeleton, CC will be able to recognize it as hair. You can then designate the hair as a certain type in the import dialog window under Layer.
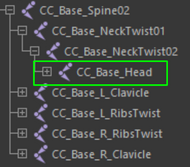
Non-conforming short hair can be bound to the head, while long hair should be bound to the following skeleton joints:
- • CC_Base_head
- • CC_Base_NeckTwist02
- • CC_Base_NeckTwist01
- • CC_Base_Spine02
- • CC_Base_L_Clavicle
- • CC_Base_R_Clavicle
