Difference between revisions of "Content Dev:CTA Submission Checklist"
Chuck (RL) (Talk | contribs) m (→Joint Rotation Previewing) |
Chuck (RL) (Talk | contribs) m (→Miscellaneous Layers) |
||
| Line 138: | Line 138: | ||
=== Miscellaneous Layers === | === Miscellaneous Layers === | ||
| + | |||
| + | {{Text_Block|If the female character is wearing a skirt, then adjust the layers by putting the feet layers below the hip.}} | ||
{{Duo_Illustration | {{Duo_Illustration | ||
Revision as of 18:56, 6 March 2018
- Main article: CTA Asset Creation.
Size Comparison
Scale Problems
Make sure that the size of the characters are within the normal range. Typically, this means that an adult character is about 2 squares tall. The size of your character can be determined by its role and type but try not to deviate too much from the norm.
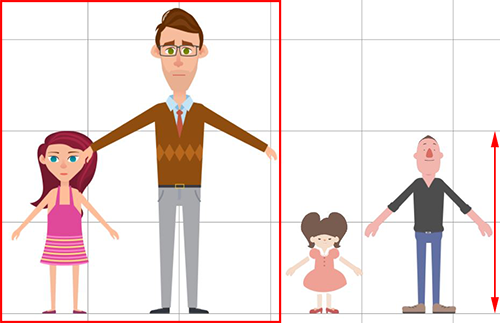 Characters can seem like giants if their heights exceed 2 squares.
Scale Adjustments
Steps:
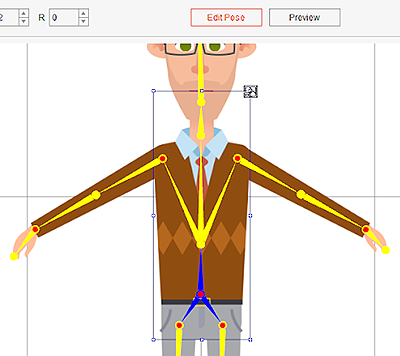
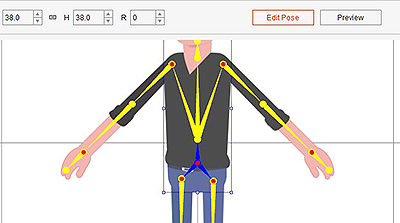
- Enter the Composer and click on Edit Pose.
- Select the character's hip and resize the character accordingly.
Check the Position
After scaling the entire character make sure:
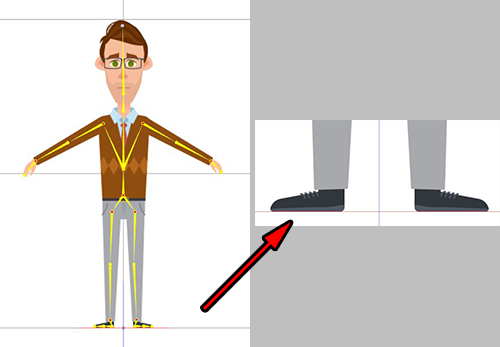
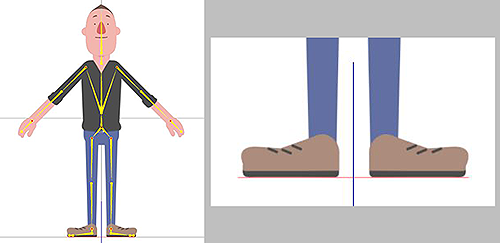
- The bottom of the feet is placed on the red floor line.
- The center of the character is aligned to the blue symmetry line.
Default Positioning
Frontal Positioning in the Composer
Make sure the bottom of the feet are touching the top of the red line. Make sure the character is centered on the blue line.
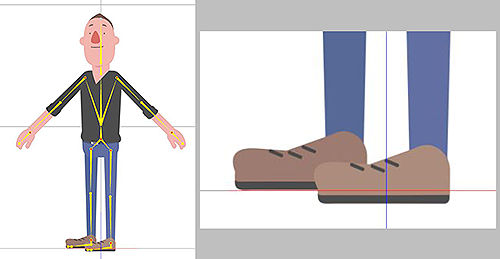
Side Positioning in the Composer
The bottom of the right foot should be on top of the red line while the entire character should be centered on the blue line.
Repositioning
Steps:
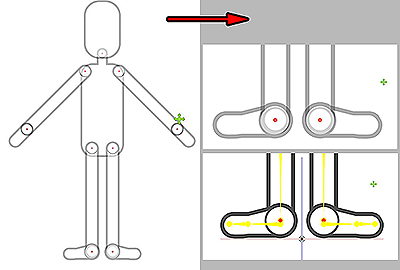
Skeletal Structure
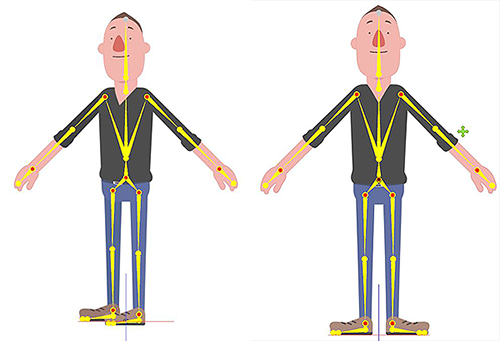 The basic skeleton structure.
Limitations
The skeleton can stretch and shrink to accommodate the proportions of the character's limbs. This applies to legs, hands, neck, etc... but the bone angles should not be adjusted.
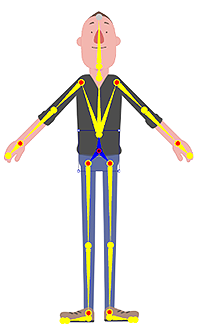 ✔ Right: Symmetrical and correctly aligned.
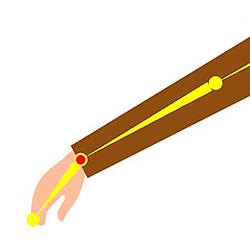 ✘ Wrong: The wrist should not be pre-angled.
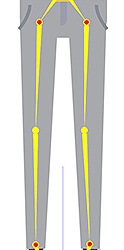 ✘ Wrong: The knees should not be pre-angled.
 ✘ Wrong: The ankles should not be pre-angled.
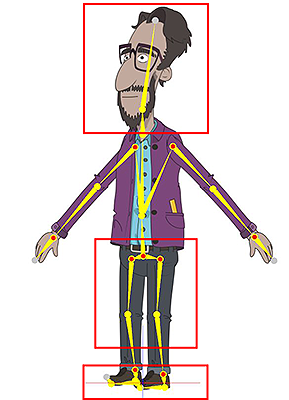 ✘ Wrong: Undesirable bending are highlighted in red.
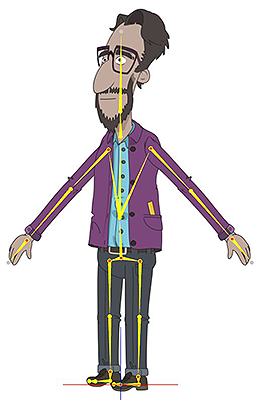 ✔ Right: Make sure the bones are aligned.
Joint Rotations
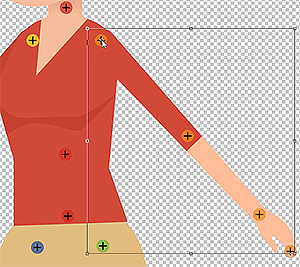
The bone joint should be located at the junction between adjoining images of the limbs.
Possible Joint Issues
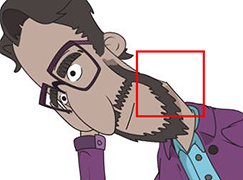 Be aware of the neck joint.
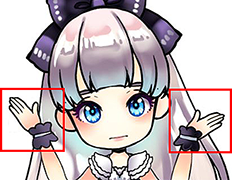 Be aware of the wrist joints.
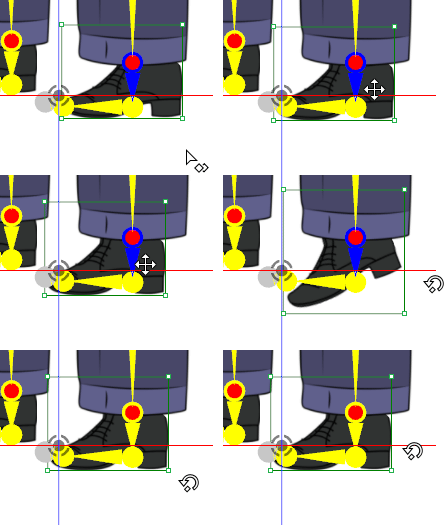
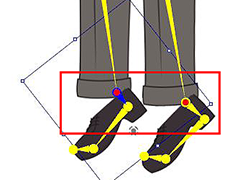 Be aware of the ankle joints.
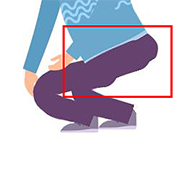 Be aware of the thigh joints.
Joint Rotation Previewing
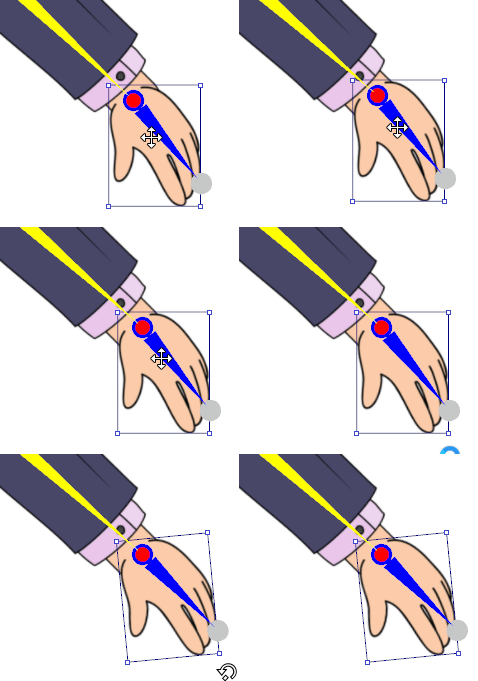
One can utilize the transform tool inside Photoshop to check for possible joint rotation defects. This can save time later diagnosing the issue.
Take the elbow as an example:
- Select the LArm image.
- Move the pivot of the transform to the pivot point of the elbow.
- Rotate the image to preview the elbow bend.
If there are any visual defects, move the bone pivot and test again. Repeat these steps until the issue is fixed.
Body Part Layer Ordering
Basic Body Layers
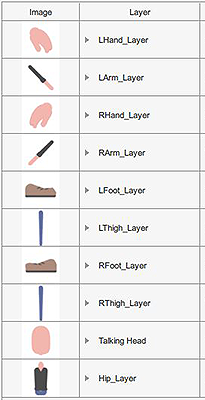 Body parts rotation at 0°
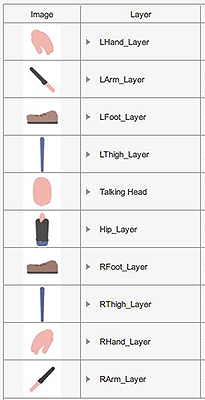 Body parts rotation at 45°
Basic Face Layers
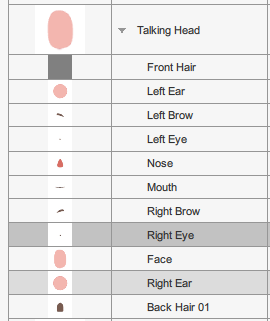 Face parts rotation at 0°
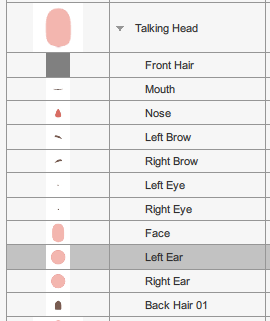 Face parts rotation at 45°
Miscellaneous Layers
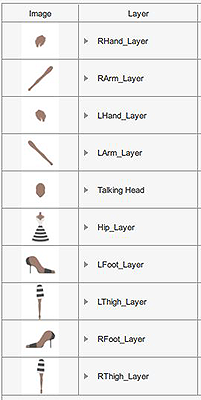 Miscellaneous parts rotation at 0°
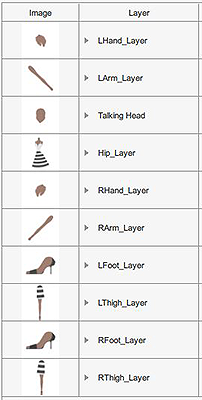 Miscellaneous parts rotation at 45°
Making Adjustments
Besides fixing the bone defects with Photoshop, one can also use the Composer by
selecting Transform Bone ![]() to move the bone about.
to move the bone about.
The source image along with its bone can be transformed together by using Transform Part ![]() in conjunction with Edit Pose
in conjunction with Edit Pose ![]() mode.
mode.
