Content Dev:CTA Dynamic Composite Prop
- Main article: CTA Asset Creation.
Introduction
In the past, compound props can be composed of several images but any animation acted upon the whole. Now in CTA 3.2, dynamic compound props are allowed wherefore, separate animated props can be put together. Therefore, the production objectives are separated into two distinct phases:
- The production of dynamic assembly parts.
- The combination of the assembly parts into the assembled product.
Simple Production Summary
Steps:
- Assembly structure design.
- Prepare the assembly part images and saving them as (*.swf) files.
- Create animations for the assembly parts and save them as Motion Clips.
- Save the Motion Clips into the assembly parts Action Menu.
- Save the assembly parts as (*.ctProp).
- Save the assembled product as (*.ctProp).
- If the assembled product is an accessory, set the anchor point and save it as (*.ctAcc) instead.
Production Tools
Related Tools
| Software | Version | Range of Usage |
|---|---|---|
| Adobe Illustrator | Animate CC | CTA3 |
| CC and up | ~ | 3.2 and up |
| Drawing source images. | Turning the source images into (*swf) files. | Creation of Dynamic Composite Props and setting of Accessory attachment points. |
Useful Examples
The following files are provided for your preparation.
You can also download the hair (*ctProp) sample files here.
Source Image Production
Drawing Precautions
- Before drawing make sure that the final assembly is both feasible and flexible.
- Think about the feasibility of applying motion to the final assembly.
- Before drawing designate a style and color pallet for the entire assembly.
Assembly Parts
After CTA 3.2, one can create dynamic composite prop with every component carrying it's own Action Menu. The composite Action Menu for the assembled product will tie together motions with the same name, letting them fire off simultaneously. The specification for the motion naming structure is as follows:
- Linked motions should carry the same name.
- Linked motions size should be the same.
- Linked motions should have the same length, otherwise there will be gaps in the animation.
- Unlinked motions will be listed in the bottom rows which can fire off individually.
| Reallusion Power Tools 4 & 5 Motion Specification | |||
|---|---|---|---|
| Motion Name | Frames | Motion Name | Frames |
| Walking | 19 | Breeze | 20 |
| Running | 20 | Frustration_Start | 16 |
| StrongWind_Start | 10 | Frustration_End | 16 |
| StrongWind_Loop | 10 | Exclamation_Start | 14 |
| StrongWind_End | 10 | Exclamation_End | 12 |
Assembled Product
For the final assembly, designate a parent for the components to attach to.
- Check if it is feasible to apply motion.
- Check if the composite Action Menu is working as expected.
Production Workflow
The procedure for creating the components for the assembled product is the same as for creating the prop, see CTA Prop.
Parts Assembly Workflow
Simple Workflow Summary
- Design the component structure.
- Draw the component parts.
- Bring the drawings into Flash and export them in (*.swf) format.
- Bring the (*.swf) files into CTA and save them as Props.
- Create motions for the props based on your needs.
- Save the animations into the Action Menu.
- Save the animated props and apply thumbnail images.
Component Structure Example
You have the freedom to create your system for accessories, houses, automobiles, etc. The following is an example of the hat and belt systems for CTA 3.0 Power Tool 4 & 5.
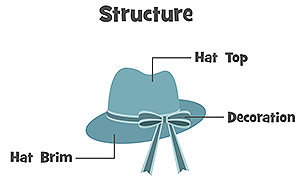 Hat system.
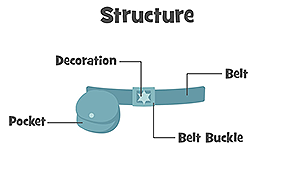 Belt system.
Important Considerations for Component Animations
- Currently, the size of object do not affect the scale of its motion. Therefore it's best to avoid the use of Translate, otherwise sizing the object can affect motion in unexpected ways. Use Deform instead to size and rotate the object.
- Examine the feasibility of composing the parts together. Make sure the motion around the connection points are not too exaggerated otherwise the components might separate during animation.
- There is currently no mirroring ability in the Composer mode. Therefore, symmetrical objects must be made separately.
- Motions that need to fire off at the same time must share the same names.
- Motions that need to fire off at the same time are recommended to have the same frame lengths.
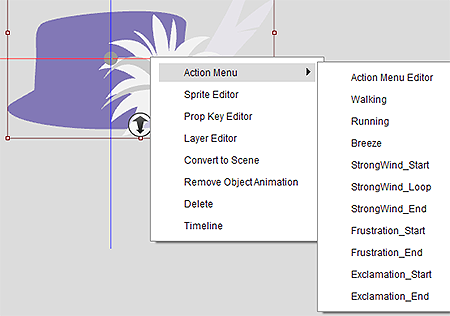
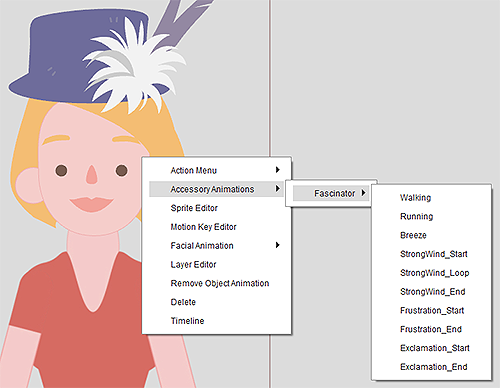 Action Menu for dynamic composite prop.
Assembled Product Workflow
Step 1
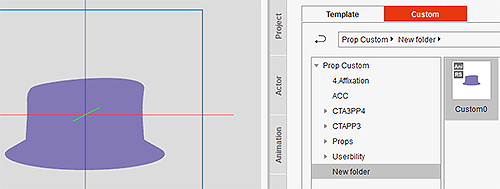
Drag a prop component onto the Stage to become the parent object. Or use a transparent PNG as a Dummy object. The parenting method must be carefully selected for subsequent editing.
Step 2
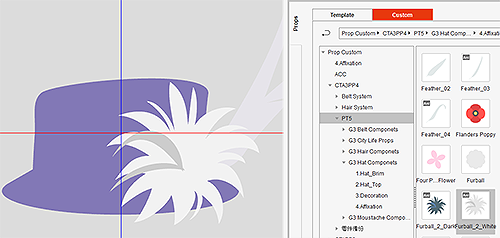
Enter the Prop Composer, add all of the composer parts, adjust the sizes, and layer the components properly (depth sorting).
Step 3
Return to the Stage and check if the Action Menu is behaving correctly.
Step 4
Select each and every motion to check if the composited result is behaving normally.
Step 5
Use Content Manager > Prop to save the file.
If the prop is an Accessory:
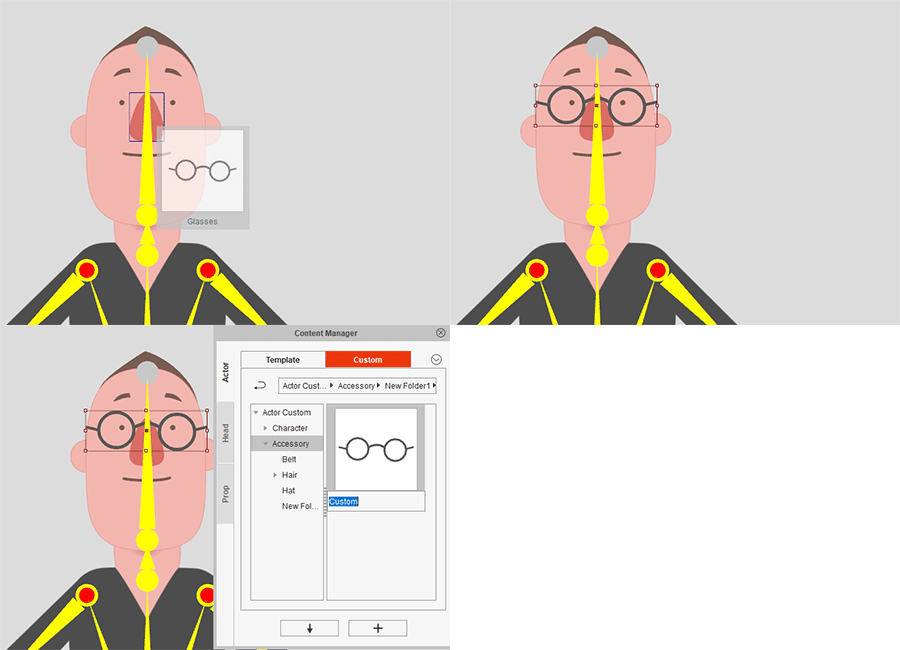
- Enter the Actor Composer and drag the prop onto the character.
- Adjust the location and size in proportion to the character.
- Save the file under Content Manager > Actor > Accessory to create an affixed accessory.
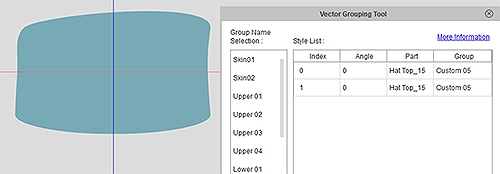 You can use Composer > Vector Grouping Tool to set Color IDs.
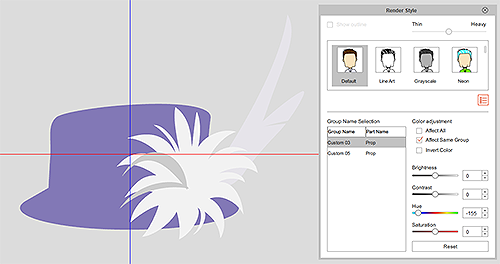 Then you use Render Style to adjust the coloring.
Submission and Verification
Standard File Formats
Asset creators need to save files in the following formats to expedite future modifications and facilitate file backup.
| Saved Project | Description | File Format |
|---|---|---|
| Source Artwork | The final work file for the artwork. | *.ai |
| Flash File | The Flash file used to export the artwork in (*.swf) format. | *.fla |
| Artwork File | The final verified and exported artwork. | *.swf |
| Motion prop | The file used to create the motion -containing animation keys. | *.ctProject |
| Motion Clip | Motion clip file for every single animation. | *.ctAnim |
| Component Prop | The final component prop file(s). | *ctProp |
| Dynamic Composite Prop | The final assembled product. | *ctProp |
