Content Dev:CTA Submission Checklist
- Main article: CTA Asset Creation.
Size Comparison
Scale Problems
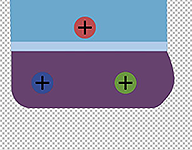
Make sure that the size of the characters are within the normal range. Typically, this means that an adult character is about 2 squares tall. The size of your character can be determined by its role and type but try not to deviate too much from the norm.
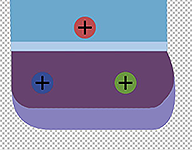
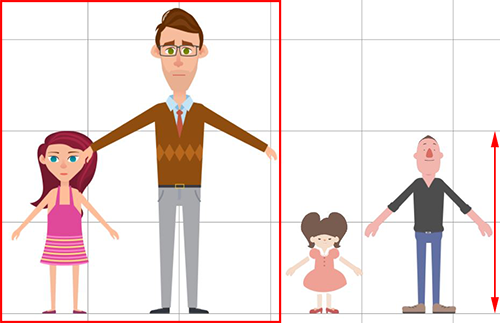 Characters can seem like giants if their heights exceed 2 squares.
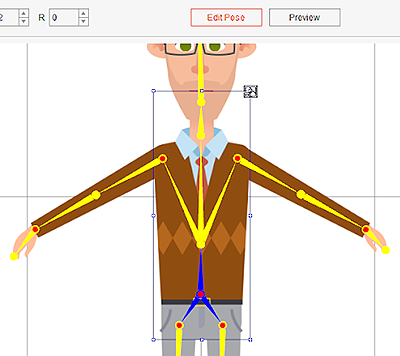
Scale Adjustments
Steps:
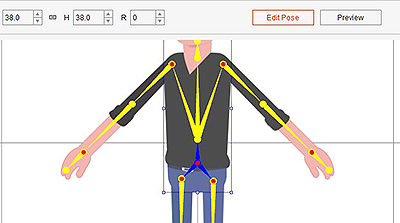
- Enter the Composer and click on Edit Pose.
- Select the character's hip and resize the character accordingly.
Check the Position
After scaling the entire character make sure:
- The bottom of the feet is placed on the red floor line.
- The center of the character is aligned to the blue symmetry line.
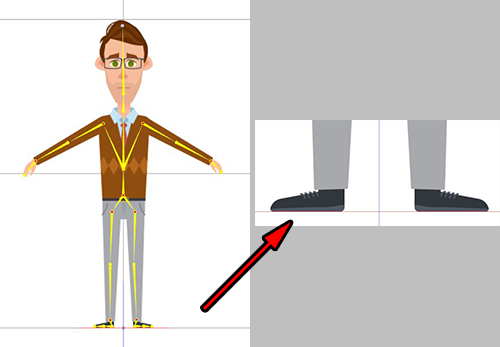
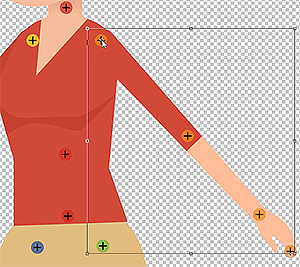
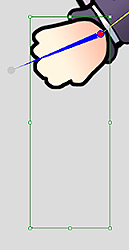
Default Positioning
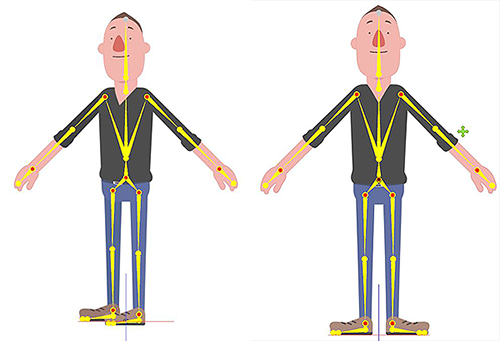
Frontal Positioning in the Composer
Make sure the bottom of the feet are touching the top of the red line. Make sure the character is centered on the blue line.
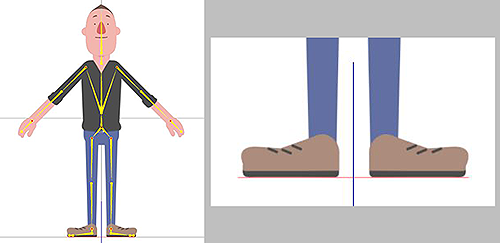
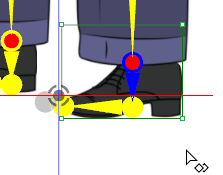
Side Positioning in the Composer
The bottom of the right foot should be on top of the red line while the entire character should be centered on the blue line.
Repositioning
Steps:
- Choose Transform Part tool
 in the composer.
 - Open Edit Pose.
- Select the hip bone to move the character about.
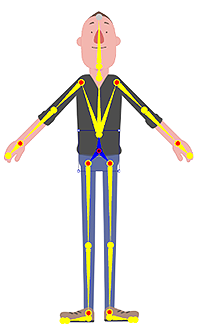
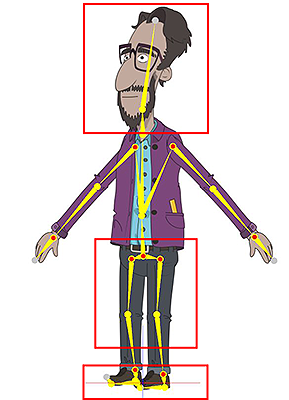
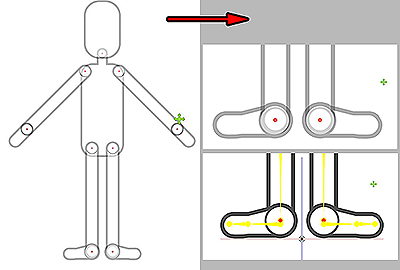
Skeletal Structure
 The basic skeleton structure.
Limitations
The skeleton can stretch and shrink to accommodate the proportions of the character's limbs. This applies to legs, hands, neck, etc... but the bone angles should not be adjusted.
 ✔ Right: Symmetrical and correctly aligned.
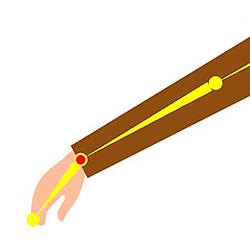 ✘ Wrong: The wrist should not be pre-angled.
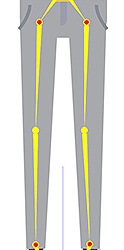 ✘ Wrong: The knees should not be pre-angled.
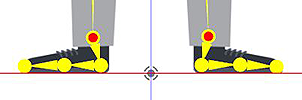 ✘ Wrong: The ankles should not be pre-angled.
 ✘ Wrong: Undesirable bending are highlighted in red.
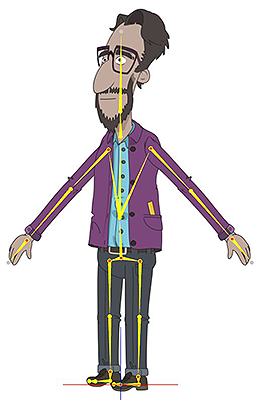 ✔ Right: Make sure the bones are aligned.
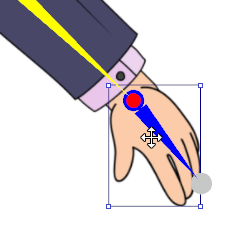
Joint Rotations
The bone joint should be located at the junction between adjoining images of the limbs.
Possible Joint Issues
 Be aware of the neck joint.
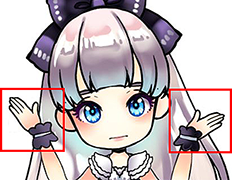 Be aware of the wrist joints.
 Be aware of the ankle joints.
 Be aware of the thigh joints.
Joint Rotation Previewing
One can utilize the transform tool inside Photoshop to check for possible joint rotation defects. This can save time later diagnosing the issue.
Take the elbow as an example:
- Select the LArm image.
- Move the pivot of the transform to the pivot point of the elbow.
- Rotate the image to preview the elbow bend.
If there are any visual defects, move the bone pivot and test again. Repeat these steps until the issue is fixed.
Making Adjustments
Besides fixing the bone defects with Photoshop, one can also use the Composer by
selecting Transform Bone ![]() to move the bone about.
to move the bone about.

Adjusting the source image position and rotation by using the Transform Sprite ![]() tool.
tool.
The source image along with its bone can be transformed together by using Transform Part ![]() in conjunction with Edit Pose
in conjunction with Edit Pose ![]() mode.
mode.
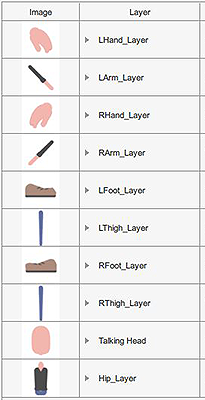
Body Part Layer Ordering
Basic Body Layers
- Body part layering can be adjusted on a character to character basis.
- Hand at 0° angle should be set to a layer above the Body.
 Body parts rotation at 0°
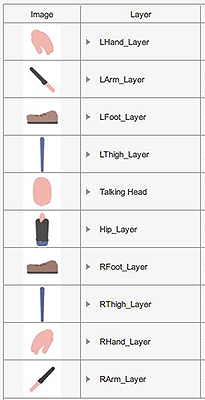 Body parts rotation at 45°
Basic Face Layers
Face part layering can be adjust on a character to character basis.
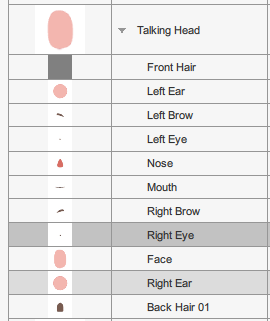 Face parts rotation at 0°
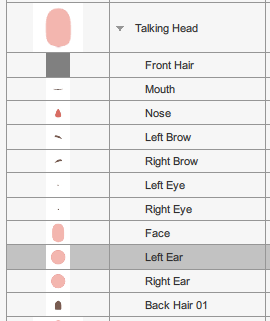 Face parts rotation at 45°
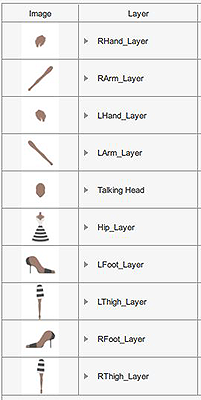
Miscellaneous Layers
If the female character is wearing a skirt, then adjust the layers by putting the feet layers below the hip.
 Miscellaneous parts rotation at 0°
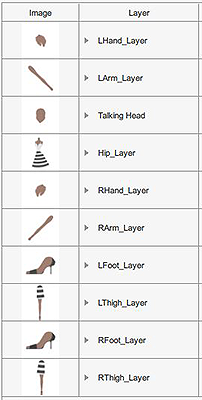 Miscellaneous parts rotation at 45°
Facial Features
Possible Issues
First make sure that CTA is up to date (ver 3.21)
Taking the mouth as an example:
- Select the character and enter the Composer.
- Select the mouth and open the Bone Editor.
- Adjust the sliders to fix visual defects.
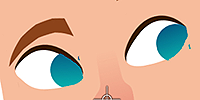
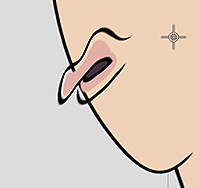
Eye Masking
Pay special attention to clean up the edges and areas around the eye mask so as to not leave floating specks. Otherwise, the eye will "leak" pixels around its periphery during puppeteering.


Face Key Editor
While using Face Key Editor ![]() , pay special attention to the following sliders:
, pay special attention to the following sliders:
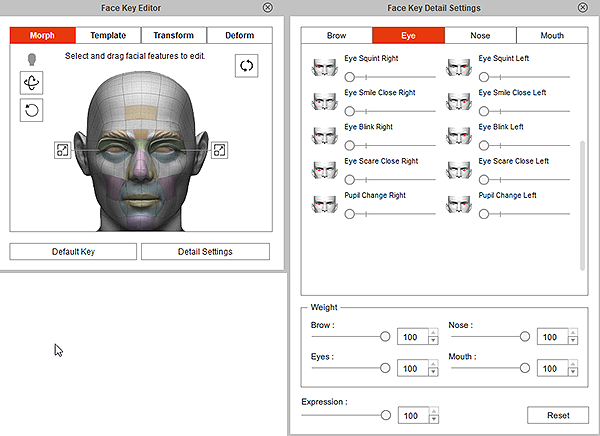
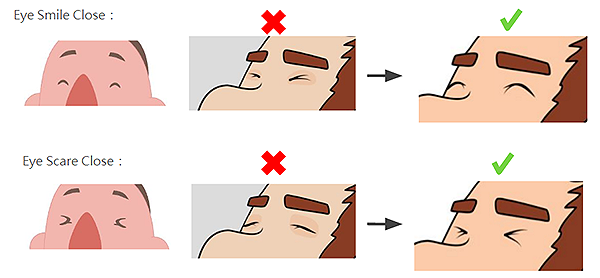
 Squint
 Smile Close
 Blink
Blink Scare Close
 Pupil Change
Shape Relations
Make sure that the images for the facial features switched out do not deviate too much from the originals. You can pull on the Face Key Editor sliders to test out the results.
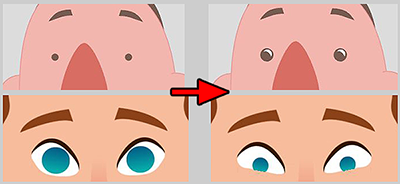 Pupil change.
It is recommended to fix images that deviate too much from what was intended.
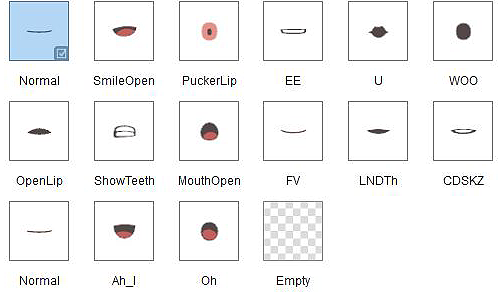
Mouth
- The number of mouth shapes should total 15.
- The mouth shape and its corresponding sound should be compatible.
- Make sure the image names are correct according to guidelines.
- Pay special attention to the phoneme sounds: EE and U.
- Verify the integrity of the visuals (section below).
Visuals
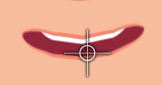
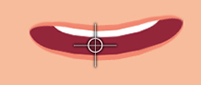
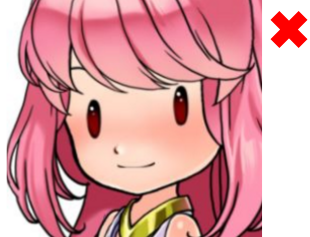
The outlines of the mouth must be filled in with color, otherwise visual defects will occur during puppeting.
 ✘ Wrong: Puppeting can reveal unforeseen issues.
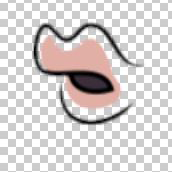 ✘ Wrong: The issue is cause by unfilled outlines.
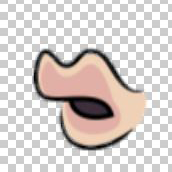 ✔ Right: Make sure the mouth is completely opaque.
 ✘ Wrong: Example of unfilled mouth drawings.
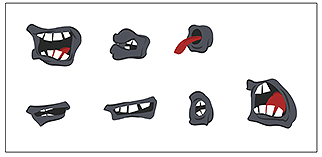 ✔ Right: Mouth drawings should be filled to the edges.
Applying Motion
Use the test files mentioned below to verify the character's compatibility with RL motion:
- BodyTest_F: for front facing characters.
- BodyTest_S: for side facing character.
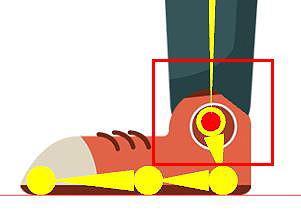
Joint Pinching and Jagged Edges
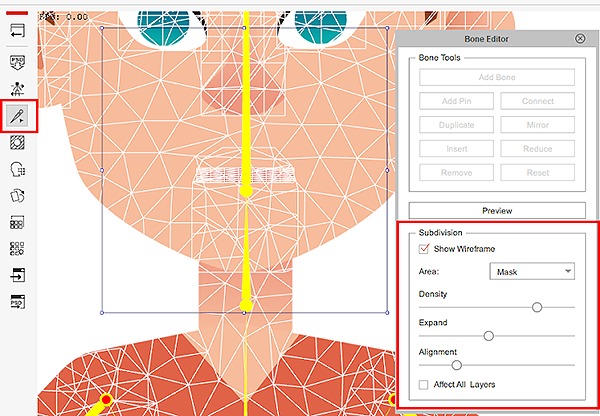
Once a motion is applied, issues with pinching and jagged edges can become apparent. Fix this by selecting the bone of the problem area with Composer > Bone Editor and increase the mesh subdivisions.
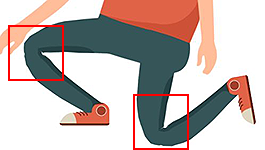 Pinching often occurs in the knees.
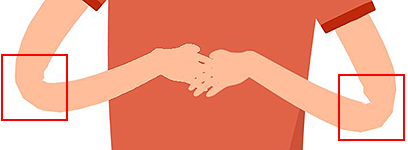 Pinching often occurs in the elbows.
- Increasing the subdivision is not a matter of more the better. A balance of optimal parameters should be achieved with a bit of experimentation.
- Density parameter has the biggest performance impact, therefore it is usually set to 0.
- In the case that visual defects are obvious with pinching and jagged edges then adjust Density accordingly.
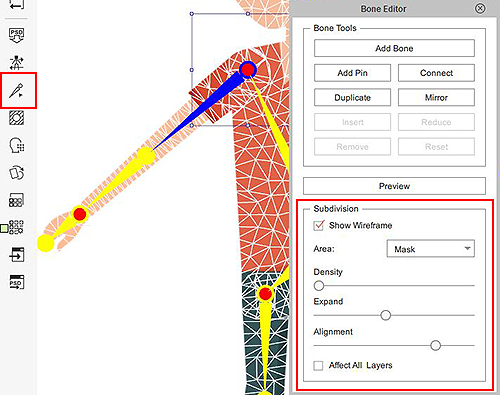
| Parameters | Description |
|---|---|
| Density | Increasing this parameter also increase the load on the system resource. It is recommend to default this parameter to 0. |
| Expand | The distance between the mesh and the image which has an effect on the edge smoothness. Increasing this parameter has very little performance impact. |
| Alignment | The density of the mesh around the edges of the image. This parameter should be high for long shapes. Increasing this parameter has very little performance impact. |
Miscellaneous Issues
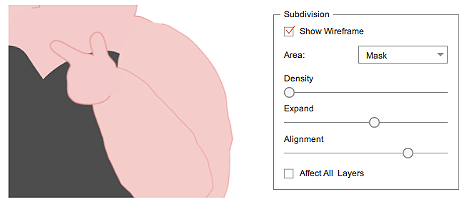
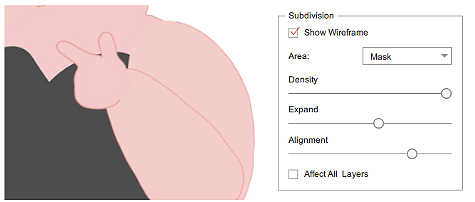
 Use Composer>Bone Editor to add subdivisions to rough angular edges.
Besides adjusting the bone, one should also consider fixing the source images. For example, expanding the buttocks (from dark purple to light purple area) can fix the unevenness of the thighs by covering over the disjointed areas.

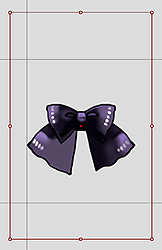
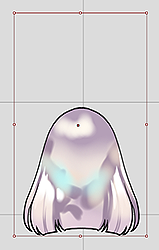
Size and Proportions
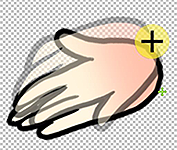
Image Size and Bounds
If the bounds of the image do not line up with the edges of the image then make sure to erase all of the floating pixels around image in an image editing software.
 ✔ Right: The size of the image matches with its bounds.
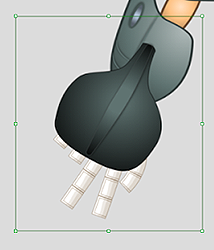 ✘ Wrong: The bounds of the image is oversized.
Examples of wrongfully sized bounds:
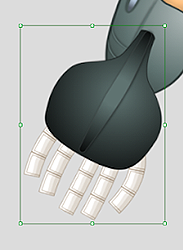
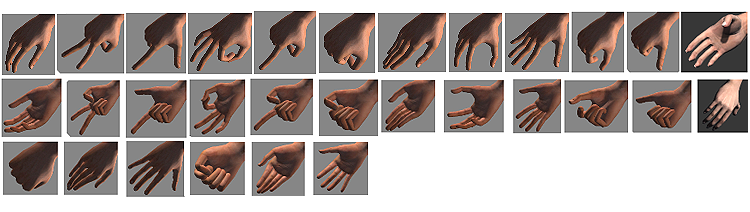
Hand Sprites
Hand Gestures
Important items:
- 30 gestures in total.
- Check if the gestures are correct according to the illustrations below.
- Make sure the names follow the guidelines.
- Make sure the perspective, frame size, and style is the same.
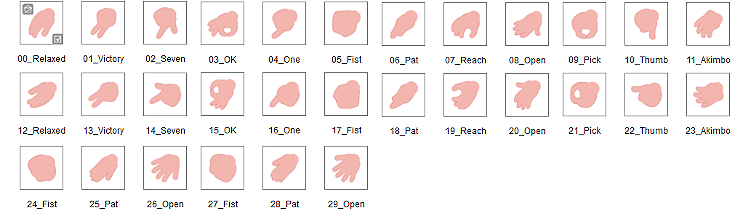
Pay special attention to the following gestures:
- 11_Akimbo, 23_Akimbo
- 24_Fist, 27_Fist
- 25_Pat, 28_Pat
- 26_Open, 29_Open
Hand Positioning
All of the hand gestures should match at the pivot of the wrist which can be verified with Photoshop. Visual defects arising from mismatched hand pivots will become apparent when motion is applied.
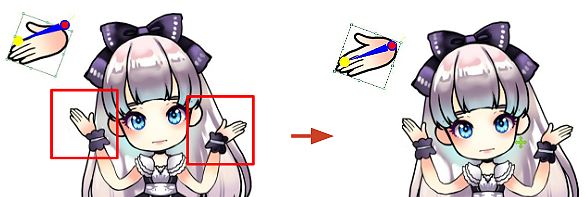
 ✘ Wrong: Mismatched hand pivots.
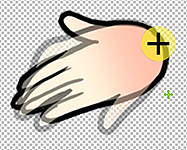 ✔ Right: The hand pivots should match up.
Miscellaneous Precautions
Nomenclature for the Content Manager
Let's say a piece of content is made for sale in the Marketplace or Content Store, make sure the naming of which do not contain foreign characters or numbered suffixes created during editing. Otherwise, it would be difficult for the user to make out what the object is at first glance. The name of the object in the Scene Manager and its filename should also match.
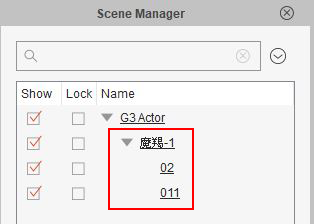 ✘ Wrong: It's not apparent what the child accessories are due to their vague and incomprehensible names.
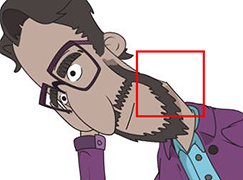
Accessory Items
Any accessory for the head or the face should be parented to the face so that it can move along with the head when it is animated. Do this by dragging the accessory onto the face in the Composer and then adjusting its positioning.
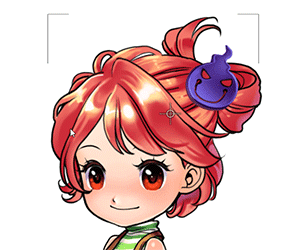 ✘ Wrong: Unattached accessories can look as though they are floating in mid-air.
 ✔ Right: The accessory is attached to the face, therefore, can move along with it.
| Facial Part | Accessory |
|---|---|
| Face | Hair, hair accessories, hat, earrings |
| Nose | Glasses, Mustache |
| Mouth | Beard |
Examining the puppeting results will make it clear whether or not the accessory is attached to the right spot.
 Attachment to the face.
 Attachment to the mouth.
 Attachment to the face.
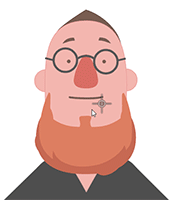 Attachment to the mouth.
Miscellaneous Visuals
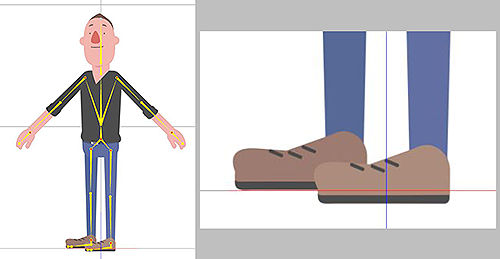
Feet for the front facing character should be splayed pointing apart. Otherwise the angle of the of the ankle bones will be affected which will animate strangely when motion is applied.
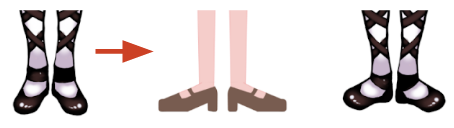 Duck feet is the proper default orientation for front facing characters.