Content Dev:CC Import Process
Developers can decide to export each asset individually or batch export a set of diverse assets at the same time. Whichever way one decides, always export the base body along with its skeleton and the bound or parented asset(s) into a FBX file. Any missing items from the base body will cause a critical error and failure to import.
CC Base Body includes:
- CC_Base_Body (Mesh)
- CC_Base_Tongue (Mesh)
- CC_Base_Teeth (Mesh)
- CC_Base_Base_Eyes (Mesh)
- CC_Base_BoneRoot (Skeleton)
General Workflow
- After the garment is made, select the it along with the entire character.
- Perform a (*.fbx) export with FBX API 2012 version (if possible).
- Make sure (*.FbxKey) file is exported along with the character.
- Import the character into Character Creator and fill in the Decrypt Key File with the (*.FbxKey).
- Complete the layer order assignments according to Collision Layer Assignments.
- Complete the visibility assignement according to Auto Hide Model Polygons (AHMP) Methods.
- Select the garment and save it as an asset.
Import Dialogues
Once an FBX file is imported or dragged into CC, a couple of dialog windows will pop up one after another:
Creating Assets
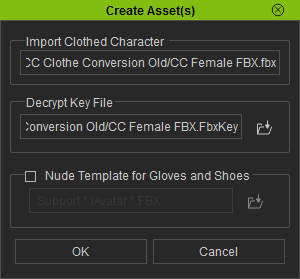
The first Create Asset(s) window requires the Decrypt Key File. This (*.FbxKey) file will contain DRM information along with bone transformation related data.
If the imported character is wearing gloves or shoes then CC needs the base body template to calculate the contact point offsets and retain them with the saved assets. There are 3 body template options:
Default Character- if the male/female default character was used as the template for asset creation. Current Character- if the base used for asset creation is identical to the character in the current scene but not to the default template. File- if the base used for asset creation differs from the one currently in the scene and the default template. This will require the developer to supply the template file in it's original pristine condition (before any changes to its posture and hierarchy and without the addition of other assets on the character). </span>
Error Handling
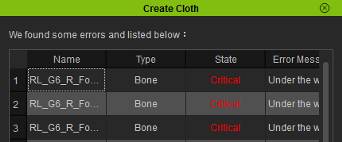 CC status report.
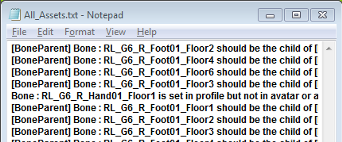 External error log file.
CC import dialog has 3 degrees of status report:
Error Type Result Possible causes Pass The asset is compatible. No errors were found, the asset is inline with the import parameters. Warning Passable but may have issues. The item is skinned to the wrong bone, etc. Critical The asset has failed, a log is filled. Tampered hierarchy, missing bones and meshes, etc.
If there are no critical errors then one can start to set the asset Type, and collision Level. CC will automatically assign a Type while the Level will default to “1”. Always double check the Type because auto-detection in CC can make mistakes. Do set the Level so that cloth ordering does not clash, more details are available in the next section.
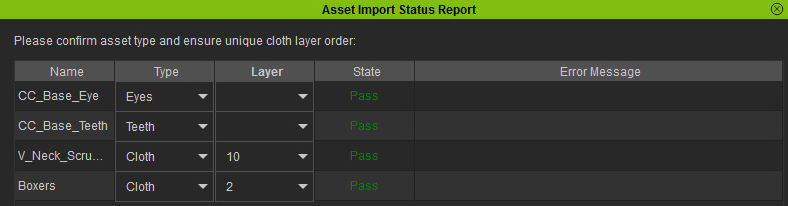 Assets with passing states.
Collision Layer Assignments
Collision layer ordering is required for the correct sorting of garments when the Conform feature is performed.
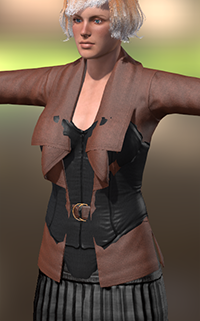 The tanktop underneath is set to a higher layer than the coat.
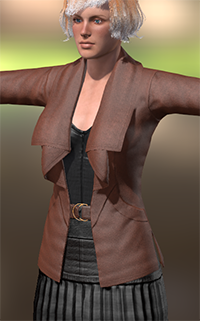 The coat and the tanktop are reordered for the right result.
- ⚠ A clash on same type clothing collision layer will result in the replacement of the previous garment.
CC supports upwards of 24 layers of clothing. Broadly speaking there are 3 main categories: Cloth, Gloves, and Shoes. Cloth has 3 subcategories: Upper Body, Lower Body, and Accessories. Collision layer assignment will not fix intersecting geometry at the default state. It does however, come into effect when calculating collisions with the Conform Clothing tool and upon loading. Use the type and layer table below for your reference:
Garment Type Total Layers Classification Lower Body (LOWER) 7 Cloth 2, 5, 8, 9, 11, 12, 14 Footwear (SHOES) 2 Shoes 1, 2 Upper Body (UPPER) 9 Cloth 1, 4, 7, 10, 13, 15, 18,19, 20 Extras (ACESSORY) 4 Cloth 3, 6, 16, 17 Handwear (GLOVES) 2 Gloves 1, 2
Layering of the garment is not an exact science as it depends largely on how it relates to the other layers surrounding it. Even though CC allows you to change the layer order on the fly, you will still need to set a default layer value for production as a factory preset. The following reference table demonstrates the relationship between the layers as well as the factory suggested presets:
Layer Purpose Category Intended Usage CC Default 1 1st layer of clothing Underwear, Shirt, Piecemeal For underwears, lingerie, leotards, swimsuit, and tights. Cloth 01 2 1st layer gloves Gloves Gloves that lay under the sleaves. Gloves 01 3 1st lower lower body Underwear, Pants, Skirt For undies, swimshorts, and leggings. Cloth 02 4 1st layer accessories Accessories and other items For socks, headband, and other personal accessories. Cloth 03 5 1st layer shoes Shoes For ordinary shoes. Shoes 01 6 2nd layer of clothing Shirt, Leotard For clothing that needs to be tucked into tight fitting pants or tight dresses. Cloth 04 7 2nd layer lower body Pants, skirt Tight fitting lower wear such as narrow skirts. Cloth 05 8 2nd layer accessories Accessories and other items Arm sleeves and other similar sized accessories. Cloth 06 9 3rd layer clothing Shirt, Piecemeal Garment that is layered under the tight fitting Cloth 5, also includes ordinary dresses. Cloth 07 10 3rd layer lower body Pants, Skirt For ordinary pants and skirts. Cloth 08 11 4th layer lower body Pants, Skirt For wider and losser pants or skirts. Cloth 09 12 2nd layer shoes Boots Boots and boots for bunched trousers Shoes 02 13 4th layer clothing Shirt, Piecemeal For looser, baggier clothing and dresses that touch the floor. Cloth 10 14 5th layer lower body Pants, Skirt For looser pants and skirts that lay on top of Coth 5. Cloth 11 15 6th layer lower body Placeholder Unassigned placeholder layer. Cloth 12 16 5th layer clothing Coat, Others Light, thin coats and vests. Cloth 13 17 7th layer lower body Placeholder Unassigned placeholder layer. Cloth 14 18 6th layer clothing Coat, Others Light, thin coats and vests. Cloth 15 19 2nd layer gloves Gloves Handwear that is layerd on top of the sleaves. Gloves 2 20 3rd layer accessory Accessories and other items For cloaks and clothing tied to the waist, etc. Cloth 16 21 4th layer accessory Accessories and other items Placeholder layer Cloth 17 22 7th layer clothing Coat For suits, coats, and jackets. Cloth 18 23 8th layer clothing Cloak For cloaks, smocks, gowns, overalls, and frocks. Cloth 19 24 9th layer clothing Placeholder Unassigned placeholder layer. Cloth 20
Testing Skin Weights
Character Creator does not support animations, however it does support single frame poses, useful for testing skin weights. One does not have to be a perfectionist, just make sure the asset conforms well to gestures related to its intended purpose and it should be sufficient. Nonetheless, one should not rely on CC to perform a comprehensive skin weight test, instead, one should already have performed a complete test inside one's choice 3D tool. There are 3 ways to apply poses:
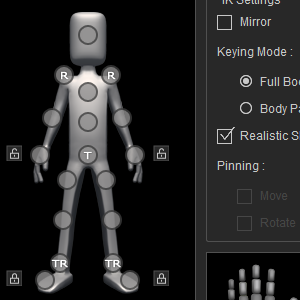 Use the Edit > Edit Pose tool to adjust the FK / IK controls.
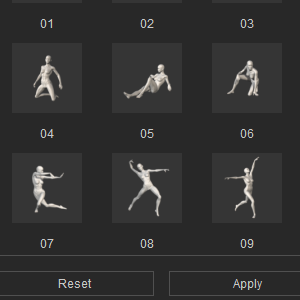 Use the Calibrate menu to apply an instant pose from its library.
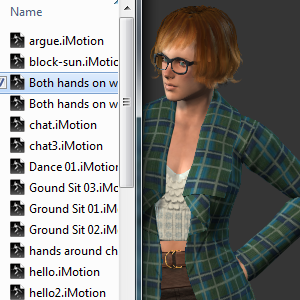 Drag & drop an (*.iMotion) file. Only the first frame will be used.
Saving Content
The base body serves only as an import facilitator. Follow the steps below to store an asset:
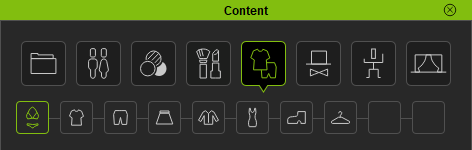
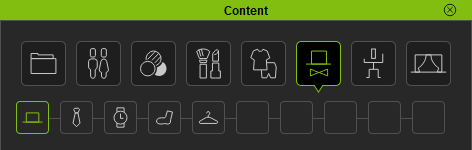
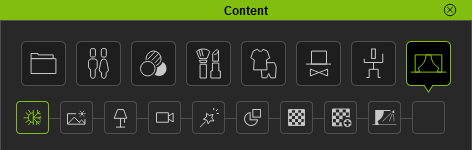
- Browse to the appropriate content category by using the Quick Selection Panel.
- Select the asset in the 3D viewport.
- Press the + button under the Content Panel to save out the content and name the asset.
Technically, content can be saved under any category, however for the sake of organization, developers should be familiar with the Quick Selection Panel. The selected item in the 3D viewport will save to the Custom section of the active category.
- Project:
 Skin & Morph - Project - Character - Stage
 - Base:
 Skin & Morph - Full Body Morph - Body Morph - Head Morph - Hair - Teeth - Eyeball - Eyelash - Nail
- Skin:
 Overall - Full Skin - Skin Base - Normal Effects - Skin Details - Blemish - Acquired - Body Hair - Nails - SkinGen Tools
 - Makeup:
 Full Makeup - Foundation - Makeup - Eye Makeup - Eyelash - Lip Makeup - Eyebrow - Miscellaneous - SkinGen Tools
- Cloth:
 Underwear - Shirts - Pants - Skirts - Coats - Full-Character - Shoes - Others
 - Accessory:
 Head - Torso - Arm - Leg - Others
- Pose:
 Face & Body - Body - Expression - Gesture
 - Stage Elements:
 Atmosphere - IBL - Light - Camera - Effect - Prop - Material - Material+ - IES
- ⚠ The imported Base Body should be discarded once the assets have been saved.
Once a CC asset is saved, the textures are embedded with the asset. If one creating an entire character, it is best to create or reload a new character in CC, reapply the clothing and accessories, and save it out in (*.iAvatar) format or save a (*.ccProject) file.
For more details about content publishing, see CC Asset Publication.