Content Dev:CC Garment Creation Guide
- Main article: CC Asset Development.
Garments are a significant portion of the Character Creator (CC) asset creation universe. Items that are bound to the bone weights, usable with Appearance Editor, influenced by Conform Clothing, and saved in the (*.ccCloth) format fall under the Cloth category.
General Workflow
- Select a gender among the templates provided or export directly from CC for a body template.
- Create a new or fit an existing low poly garment based on the body template.
- Bind and modify / transfer skin weights from the body to the garment.
- Export the garment along with the base body as a FBX file.
- Load the FBX file into CC and select the appropriate Source Character.
- Adjust the layer ordering (refer to the chart in sec. 8.02 Collision Level Assignment).
- Apply custom textures to the Appearance Editor and adjust its settings.
- Store the garment as a separate object in (*.ccCloth) format.
Low Poly Topology
Edgeloop and Edge Flow
Attempt to mirror the edge flow of the body mesh for the breasts, crotch, shoulders, elbows, knees, and armpits because these areas are very malleable when animated. Cloth that will have soft-cloth applications do well with evenly spaced grid-like mesh and generally have higher mesh density than their stiff counterparts.
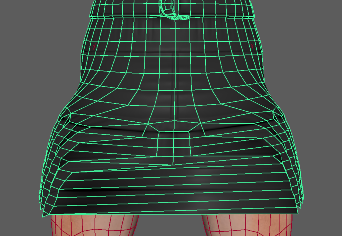
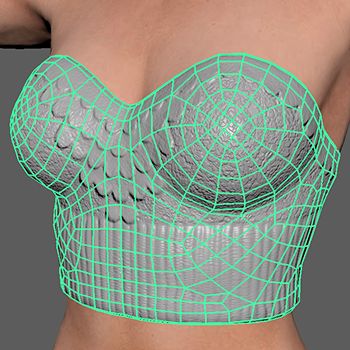 Skin tight clothing, such as this tube top, should have similar edge flow to the underlying body.
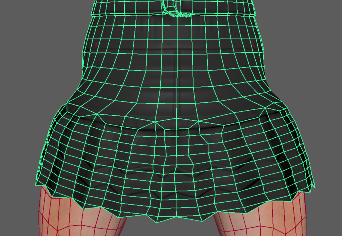
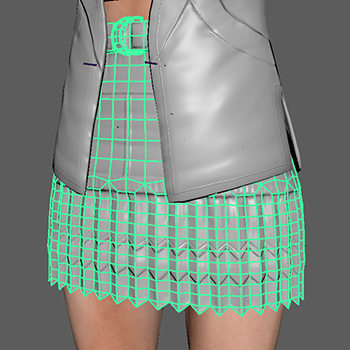 The bottom of the this skirt has more grid-like, denser mesh which is suitable for soft-cloth physics.
Keep the following tips in mind when creating the low poly mesh:
- When making a set of outfit make sure the meshes do not intersect at the static model level.
- Tight fitting clothing should have similar topology flow to the body to support deformations.
- Attaching the suffix “Mesh” to every asset name is recommended for prevent naming conflicts.
Thin and Thick Edges
The open borders of a garment (collar, hem, cuff, etc.) need to have a slight thickness and, may at times, need a double sided thickness. Soft-cloth portions of a cloth should only have one-sided geometry and its rendering method set to double-sided inside iClone.
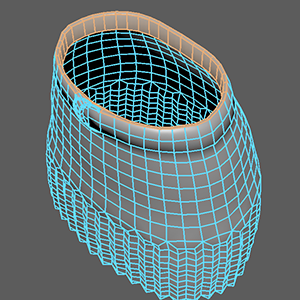 The waist of the skirt is double sided thick in case there is spacing between it and the body.
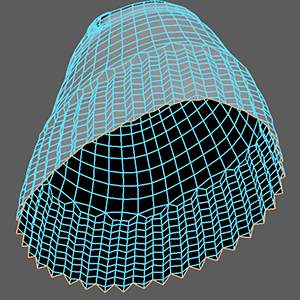 The hem of this skirt is single-sided thin, ideal for soft-cloth settings.
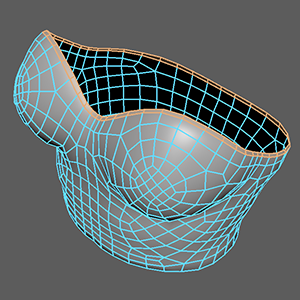 Form fitting clothing, like this tube top, needs only a single-sided thickness that hugs the body.
A Soft-cloth portion of a geometry with thickness will tend to unfold creating an “inside out” effect.
Buffer Space
Try to leave a bit of distance between the garment and the skin surface to prevent mesh penetration caused by morphing.
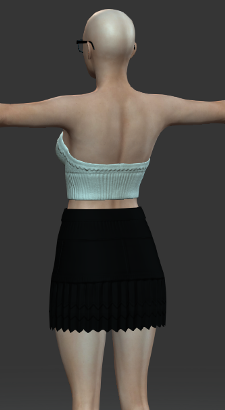 At default proportions everything looks fine.
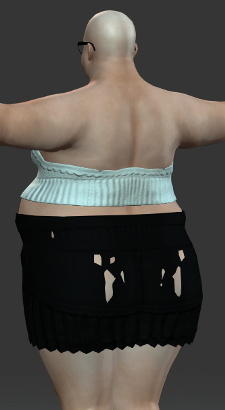 Problems appear when the “Heavy” morph is maxed.
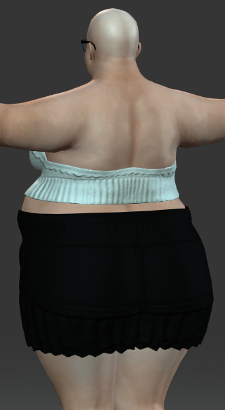 Areas with penetration problems need to have a buffer distance.
Developers can choose to use the Mesh Edit Mode under the Modify panel inside CC to pull out problematic areas of the mesh. However do not rely on this technique for drastic changes to the shape of the clothing as drastic edits can lead to problems with the skinning and animation.
UV Mapping
UV spacing will always be re-sized to a square format, however the aspect ratio of the texture maps can either be 1:1 or 2:1. The maximum, preferred size for texture maps are 2048x2048 or 2048x1024.
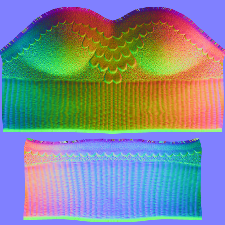 Always strive to use 1:1 aspect ratio texture maps.
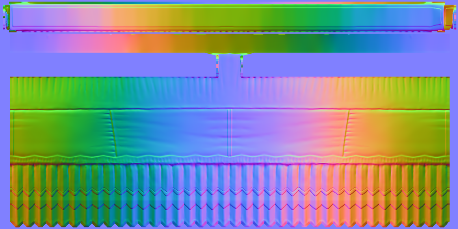 2:1 aspect ratio maps are suitable for instances where the UVs do not pack tightly into a 1:1 aspect ratio space.
Strive to match UV seams with physical seams for better visual quality. When generating the normals map, pick one side of the UV seam and avoid crossing over multiple UV islands.
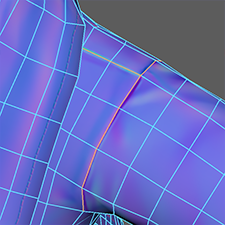 Shoulder seam on the jacket.
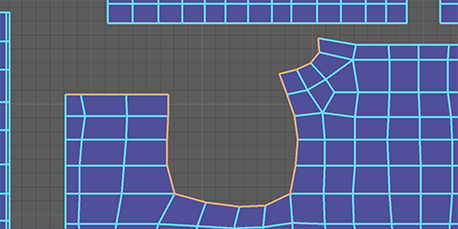 UV seam matches the shoulder seam of the jacket normals map.
Garments inside CC use the Dynamic Appearance system powered by Allegorithmic Substance material. This procedural generation system have strict UV requirements. Developers should use a variety of texture maps to test for UV layout compatibility.
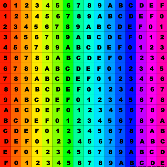 Comprehensive UV checker for general purpose applications.
 Horizontal stripes used for testing Substance horizontal plaid layout.
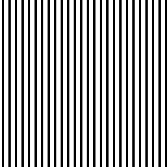 Vertical stripes used for testing Substance vertical plaid layout.
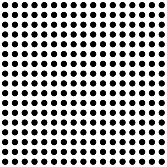 Polka dots used for testing Substance pattern uniformity and layout.
The UV orientation should be upright and uniform when the garment is viewed from the front. Slanted and/or warped UVs should be avoided.
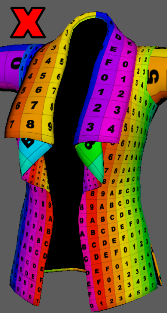 Avoid divergent UV density and scale.
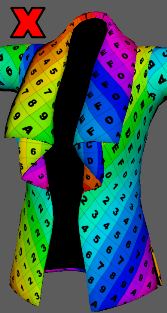 Avoid slanted or angled UV Islands.
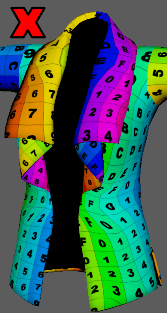 Avoid warped, disorderly UVs.
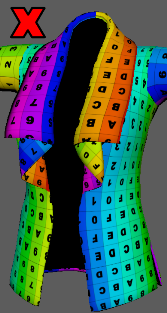 Make sure UVs are correctly oriented.
UV mapping must pass several tests to be compatible with CC Appearance Editor.
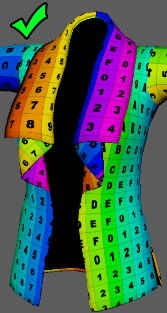 Strive for upright, uniform UVs.
 Make sure to test for horizontal stripes.
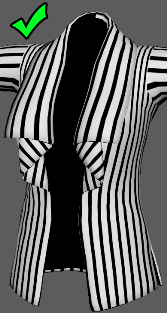 Make sure to test for vertical stripes.
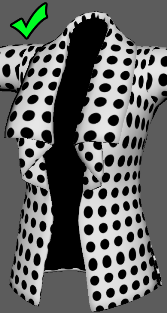 Make sure to test for repeat patterns.
Mesh Data Maps
To understand Mesh Data one must have experience with using some kind of texture baking tool such as Substance Painter, Substance Designer, xNormal, Zbrush, and so forth. Simply put, a texture baker takes a high resolution mesh and uses an algorithm to project its details onto a low resolution mesh and bakes the recorded data in a series of texture maps. It is with the use of these maps in combination with the low-poly mesh that a real-time engine can derive much enhanced visual fidelity and affects. Since the baked maps all describe some aspect of the model and have a very specific use case, they are collectively called Mesh Data.
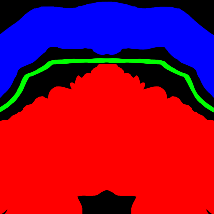
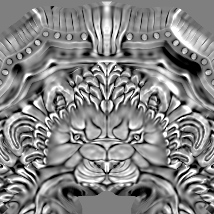
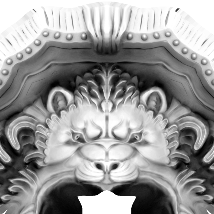
Mesh Data maps can either be in 1:1 or 2:1 aspect ratios, must be in power of 2 (64, 128, 256, 512, etc.), and may not exceed 2048x2048 in resolution. CC Cloth dynamic materials use 5 types of mesh data textures to generate a myriad of visual possibilities, they are the following:
| Mesh Data Map | Colorspace | Usage in Appearance Editor Cloth |
|---|---|---|
| Normal | 8-bit RGB | Abrasion effect and normals amplification. |
| Worldspace Normal | 8-bit RGB | Edge wear effect. |
| Color ID | 4-bit RGB | Seams, fabric holes effect, and material distribution. |
| Height | 8-bit Grayscale | Abrasion effect and height amplification. |
| Ambient Occlusion | 8-bit Grayscale | Dirtiness and dust effect and ambient occlusion amplification. |
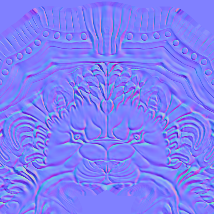 Normal
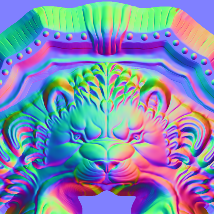 World Space Normal
 Color ID
 Height
 Ambient Occlusion
Color ID
While all Mesh Data can be derived from a texture baker, Color ID is most likely to be made manually. Color ID is used to portion out a single mesh into segments of different materials. For this to work properly, one must input a Color ID map into Mesh Data following strict color code guidelines. That means the colors must have exact values and non-partial borders. Colors off by a single digit value will cause it to be counted as a Base color. AE Cloth supports up to 7 material partitions.
| ID Name | Black | Red | Green | Blue | Cyan | Yellow | Magenta |
|---|---|---|---|---|---|---|---|
| Color | |||||||
| RGB Value | (0,0,0) | (255,0,0) | (0,255,0) | (0,0,255) | (0,255,255) | (255,255,0) | (255,0,255) |
| HEX Value | #000000 | #FF0000 | #00FF00 | #0000FF | #00FFFF | #FFFF00 | #FF00FF |
| HSL Value | (0,0,0) | (0,100,100) | (120,100,100) | (240,100,100) | (180,100,100) | (60,100,100) | (300,100,100) |
Color ID maps should have pure colors with clean and crisp edges and kept within the bounds of the seven designated options. Keep the following points in mind when creating the Color ID map:
 ✔ A good Color ID map.
 ✘ Don't have blurry edges.
 ✘ Avoid shifts in hue.
 ✘ Avoid off-limit colors.
 ✘ Don't include alpha.
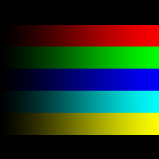 ✘ Don't have gradients.
 ✘ Don't desaturation.
 ✘ Don't blend the colors.
Materials are the meat and bones of AE Cloth, which are portioned out by Color ID. As such, Materials sport the largest range of material affects. Without a Color ID map, the AE Cloth resorts to the Base Material. It is recommended to use pure black to designate areas of the Base material.
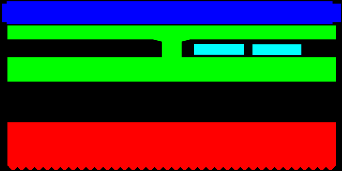 Color ID map for the skirt's AE Cloth material.
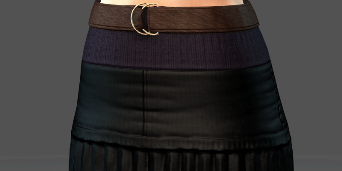 Color ID allows for multiple materials.
Texturing
Texture Resolution
Try to use the lowest acceptable resolution settings for the texture maps. At its essence, iClone is a realtime animation software where frames per second should be given special consideration.
Note: this does not apply to working resolutions, where the texture creation files should be saved at much higher pixel resolution like 1024x1024 or 2048x2048.
| Texture Type | Color Space | Resolution |
|---|---|---|
| Diffuse & Base Color | RGB | 512x512 to 2048x2048 |
| Specular | Grayscale | 512x512 to 1024x1024 |
| Normal | RGB | 256x256 to 2048x2048 |
| Roughness | Linear | 512x512 to 1024x1024 |
| Metallic | Linear | 512x512 to 1024x1024 |
| Opacity | Grayscale | 512x512 to 1024x1024 |
| Physics mask | Grayscale | 512x512 to 1024x1024 |
Handling of Opacity Maps
CC and iClone's opacity map channel will take into account the texture's alpha channel and have it override the color data of the map. This can be especially confusing when the texture is a mono-channel gray-scale image where the alpha channel is non-existent, so the opacity will be entirely white and opaque.
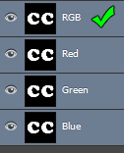 CC will extract the alpha data from RGB channels.
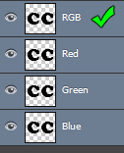 Each channel can carry it's own alpha bits.
 Images in index color mode can carry an alpha layer.
 The alpha for gray-scale images are non-existent.
Embedding Textures
Character Creator will link external textures whenever possible, for instance, when it's not being generated procedurally by Appearance Editor. Make sure to embed the external textures to ensure maximum interoperability.
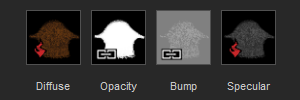 The link icon represents a read-in texture.
 Embed Texture →
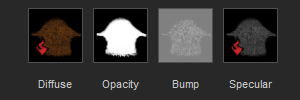 The maps are now embedded in the project.
Skin Weights
Copy Skin Weights
For the best results, copy the skin weights from the base body to the garment as a good starting point (like Maya Copy Skin Weights or 3ds Max Skin Wrap). Keep the following points in mind when copying skin weights:
- Bind the garment to the skeleton at frame 0 and make sure to bind the entire skeleton hierarchy before copying the weights.
- Always max skin influences and copy weights by name association for best results.
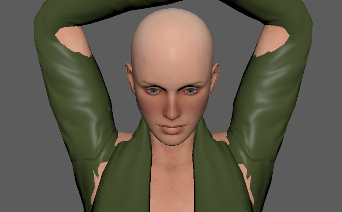 Simple skin weight applications have many intersection issues at default settings.
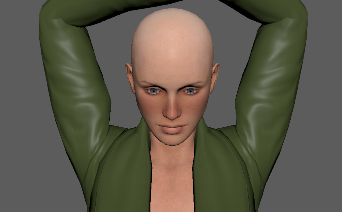 Copying skin weights can provide a fast and satisfactory solution.
 Copying weights can also cause other issues such as the stretching in middle of this skirt.
 The copied skin weights will sometimes need manual readjustments.
When modifying skin weights, it is paramount to exclude all “Nub” bones from the influence list.
- ⚠ Copy skin weights is just a starting point. You'll need to fix skin defects manually after its application.
High Poly Sculpting Considerations
Projecting detail from a high poly to its low poly version is the preferred method for generating texture maps. In-depth knowledge of high poly sculpting is required. Avoid modeling fabric details into the high poly sculpt, instead adjust the Appearance Editor inside CC to generate this level of detail procedurally. Sculpting broad wrinkles, embroidery, and seams is encouraged. One should heed the following dos and don'ts of high-poly sculpting:
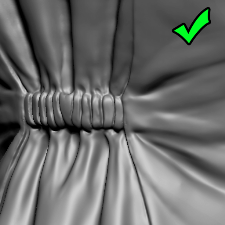 ✔ Do sculpt in broad wrinkles.
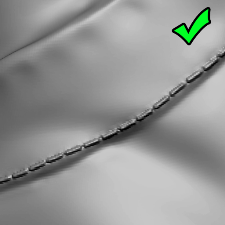 ✔ Do sculpt stitches and seams.
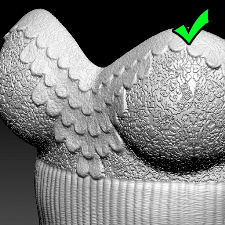 ✔ Do sculpt in embroidery.
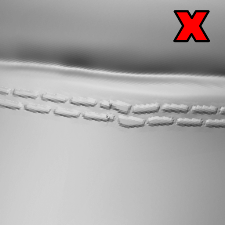 ✘ Avoid distortions.
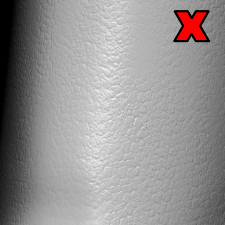 ✘ Do not sculpt fabric details
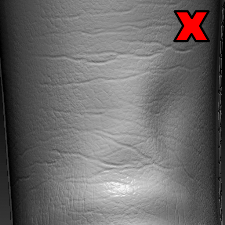 ✘ Do not sculpt micro wrinkles.
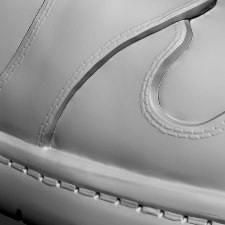 O Strive for accurate bevels.
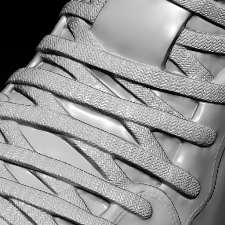 O It's okay to sculpt macro details.
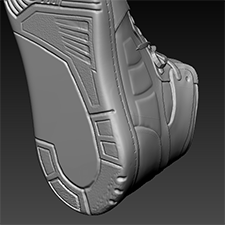 O Try to cover all angles.
- ⚠ Never use a high-poly mesh inside CC or iClone. Use a low-poly retopology instead.
Soft-Cloth Physics
Weighted Spectrum
A garment can have both bound stiff and soft-cloth dynamic portions modulated by gray-scale maps.
| Skin weight influence at 100%. | Spectrum Range | Cloth dynamic strength at 100%. |
| Great for preserving the original shape. | Shape Integrity | Mesh is likely to soften or even "melt". |
| Possible mesh penetration near grey areas. | Mesh Penetration | Not likely with collision detection. |
| No extra calculation necessary. | Performance | Frame-rate may suffer depending on polycount. |
Soft-cloth texture maps must have pure black areas (RGB 0-0-0) assigned to areas within the UV regions of the body to prevent it from falling down onto or through the floor.
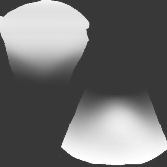 When the Soft-cloth map lacks pure black areas, it also lacks places to “pin” it to the body. Therefore the cloth, subjected to gravity, will simply fall downward through the body.
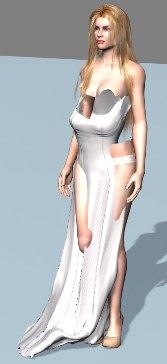
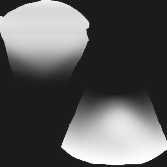 Areas of pure black with RGB 0-0-0 will have no soft-cloth physics, instead will move according to the way it is skinned. Typically the areas should be somewhere in the upper region of the garment to “hang” it on the body.
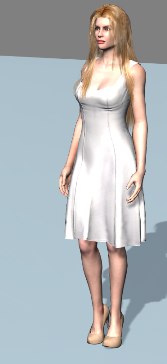
Some mesh shapes will have structural integrity issues with soft-cloth physics, below are some examples:
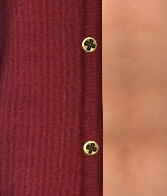 Hard surfaces such as buttons will 'melt' and mire their form.
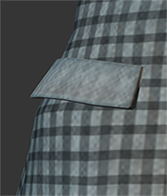 Separated but combined surfaces will surely intersect or fall apart.
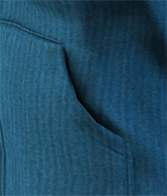 Concave shapes such as this coat pocket will turn inside out.
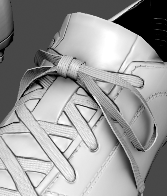 Tubular shapes such as laces, ropes, etc. will 'deflate' and flatten out.
General Workflow
- Apply the newly created clothing to a character and apply a cloth physics weight map.
- Export the whole character into iClone and adjust the cloth physics settings.
- Apply a test motion and adjust the physics collision settings on the character wherever needed.
- ⚠ Soft-cloth intersections can be fixed by adjusting the collision shapes of the body.