Content Dev:CTA Prop
- Main article: Reallusion Content Development.
Before You Begin
Simple Workflow Overview
- Prepare the source material
- Make animations
- Save animations in the Action Menu
- Save the file
- Apply a thumbnail
Related Software & Tools
| Software | Version | Usage |
|---|---|---|
| Adobe Illustrator | CC above above | Primary drawing tool |
| Animate CC | Compose the art asset into SWF format | |
| CTA3 | 3.0 and above | Prop creation |
Provided Material
| File | Description & Usage | Notes |
|---|---|---|
| Dummy.png | Used as an alternative control element when creating motion enabled prop. | Used when motion is needed |
Source Material Creation
Things to Look Out for
- The overall style and color tones should be determined before each production.
- CTA does not support image blur and other special effects from Photoshop or Illustrator. However, it does support simple material transparency.
- As much as possible, use the Illustrator's Pathfinder or the Shape Builder Tool to merge the shapes of identical colors, so that problems don't arise when a Render Style is applied to the prop.
- Once the prop is drawn, convert all paths to shapes. For example, via Illustrator's Object > Path > Outline Stroke function.
- Once the image for the prop is complete, make sure the naming convention for it along with its parts are correct.
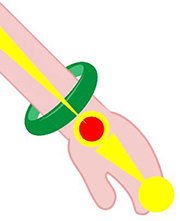
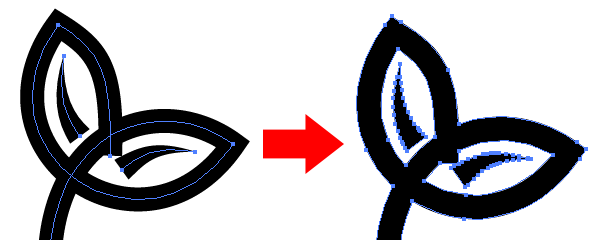 Illustrator can turn line strokes to vector shapes.
Source Material Preparation
Static Objects
(1) Create a single image for static props and backdrops: static accessories, chairs, tables, etc.
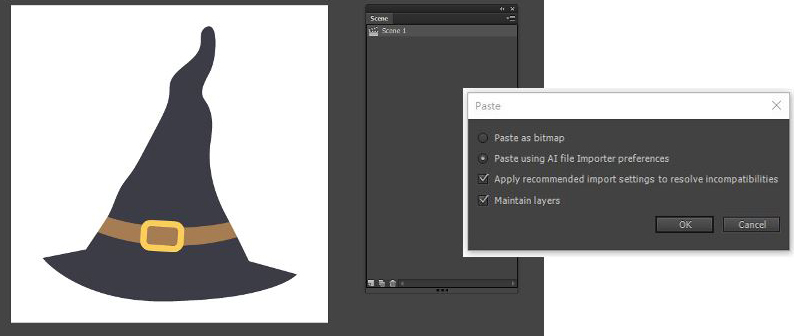
(2) Copy and paste the image into Flash after it is complete in Illustrator.
- Open Flash and select ActionScript 3.0
- Copy and paste the image from Illustrator (You don't need to adjust the canvas size)
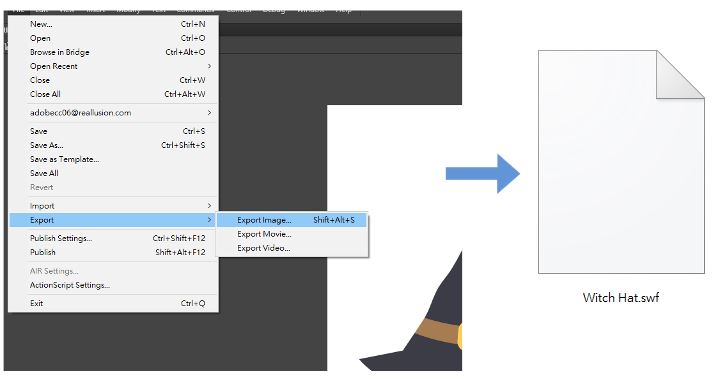
(3) Export a SWF file with a capitalized English name.
Animated Compound Objects
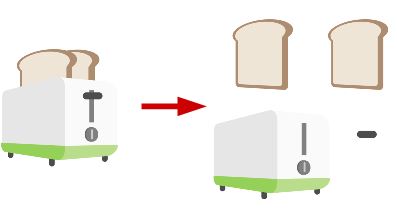
(1) Make one or more images to create motion. For example: dynamic accessories, blowing kisses, floating balloons, etc.
(2) Take the following toaster as an example; Separate the prop according to the needs of the animation and save each one as an individual SWF file.
Prop Creation Process
Static Objects
(1) Drag and drop the SWF file into CTA.
(2) Make sure the position is set to X:0 / Y:0 / Z:0.
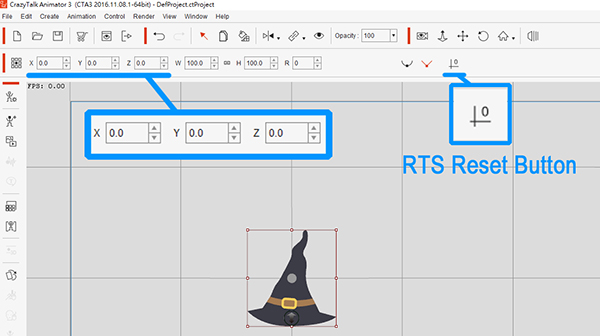 Enter the Composer to adjust the size of the prop.
The position of the prop can be reset by using the RTS reset button.
(3) Once the settings are done, save the prop in the Content Manager:
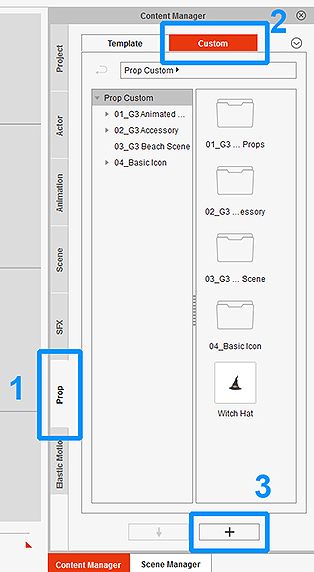 In order to save, select Prop and Custom section then press the plus button.
Animated Compound Objects
(1) Drag and drop the object into CTA and save it with the Content Manager:
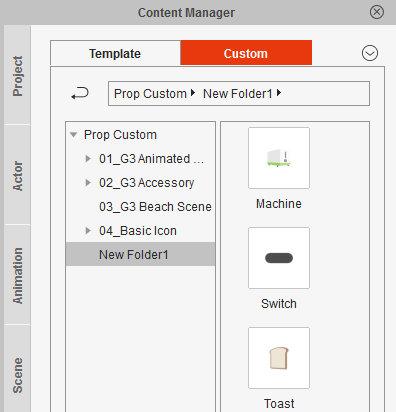 A folder contains all of the components of the compound object
(2) Add a Dummy according to the needs of the motion: under Create Media > Props select a transparent Dummy PNG image or drag it into the scene.
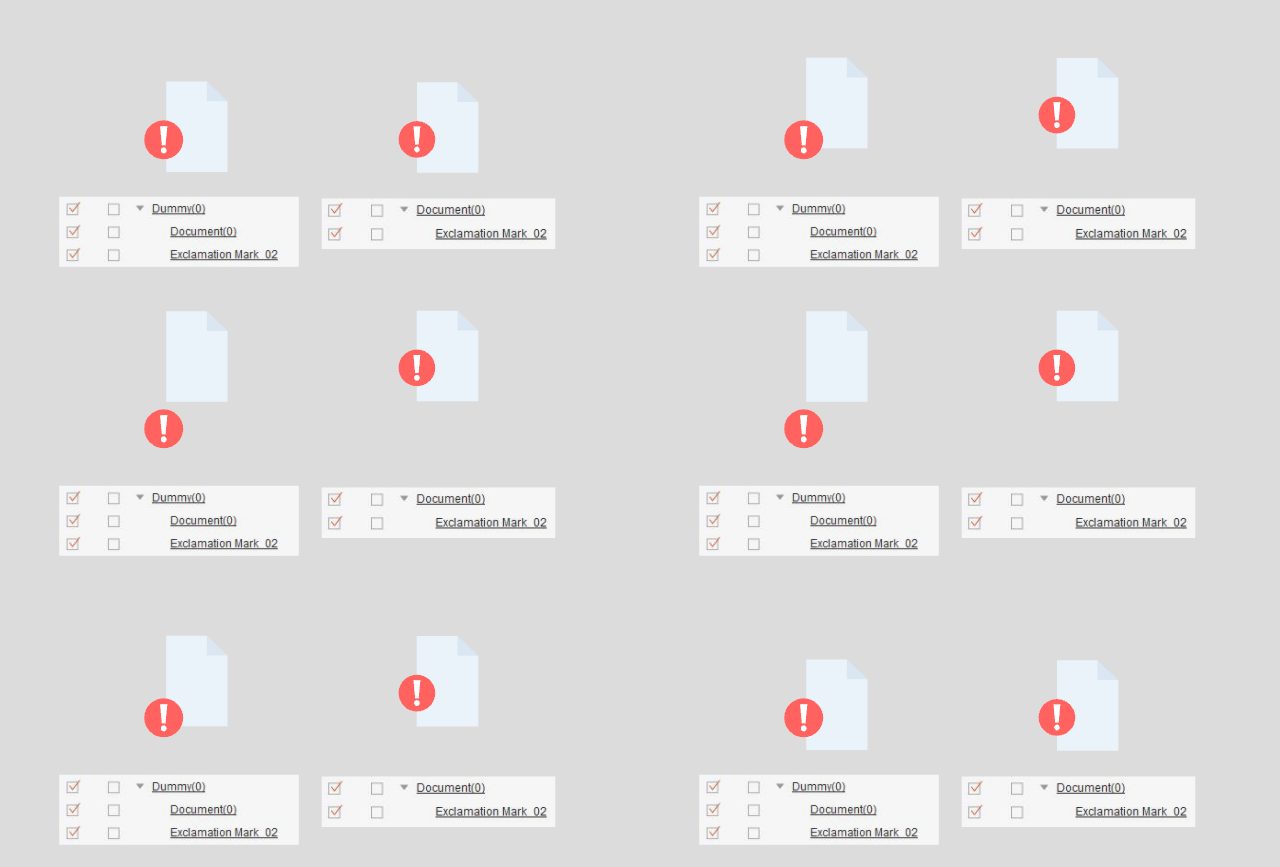 The first image brought into CTA will become the parent of the subsequent images.
This is to say that the first image also dictates the position of the subsequent child images.
Left: images reside under a Dummy parent, so when the paper is moved the symbol does not follow along.
Right: the symbol is attached to the paper image. When the document is moved, so does the symbol.
(3) Select the Dummy object and enter Composer.
- 1) Assemble the prop.
- When nothing is select: double-click on an item to bring it in from the Content Manager.
- If something is already selected: double-clicking an item in the Content Manager replaces the original image.
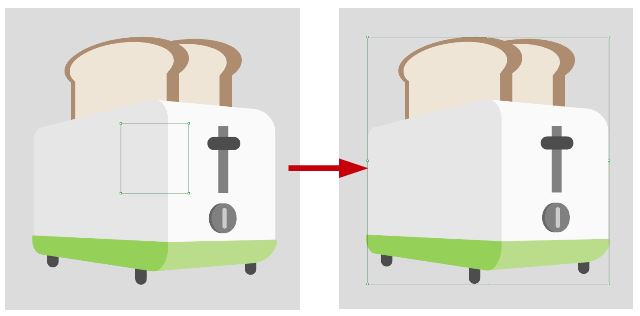
- 2) Once the assembly is complete, pick the Dummy and enter the Sprite Editor to adjust the size of the Dummy to the size of the object.
- 3) Once the compound prop is complete, exit the Composer.
(4) Position the object at X:0 / Y:0 / Z:0.
(5) Start to work on the motion:
- 1) Select a motion key and open its Transition Curve under the context menu to access the individual axes.
- 2) Press F3 to open the Timeline Window.
- 3) Select the prop and press K to open the Prop Key Editor.
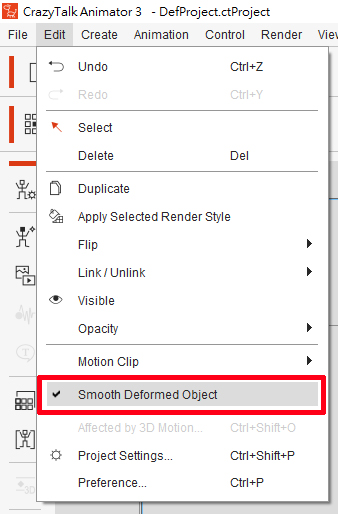
- 4) Enable Smooth Deformed Object in order to start using the Deform function.
(6) Store the motion (There are two ways of doing this).
- a) Add to Action Menu (Suitable when the name of the motion is already decided)
- 1) Select a motion segment on the Collect Clip track.
- 2) Right click and Add to Action Menu.
- 3) Name the Action according to the type of motion.
- b) Add to Action Menu upon export (Suitable when unsure about the name of the motion, which can easily be changed at this point).
- 1) Select a motion segment on the Collect Clip track.
- 2) Right click and Export.
- 3) Name the Action according to the type of motion.
- 4) Right click on the prop and perform Action Menu > Action Menu Editor to bring in the exported motion files.
- 5) Once the motions are stored, access the Action Menu to view the motion list.
(7) Remove all keys (Make sure to backup the file at this point).
- 1) Select all of the motion keys in the Collect Clip track.
- 2) Right Click > Delete Range > Delete Data (Once deleted, the prop should return to its initial state).
(8) Check and verify:
- Make sure the position is zeroed out: X:0 / Y:0 / Z:0.
- Make sure the size of the prop is set to 100.
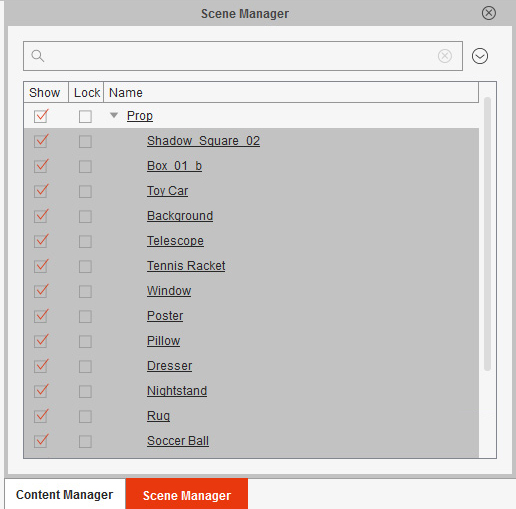
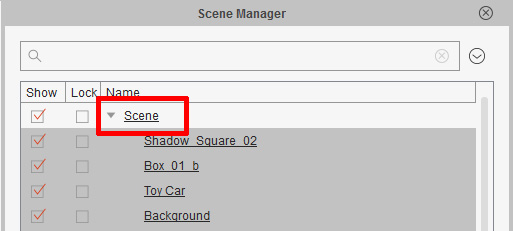
- Check if the names of the prop in the Stage and Composer's Scene Manager are the same.
- Make sure very motion has an appropriate name and is saved in the Action Menu.
(9) Save the prop into the Content Manager.
(10) Apply the thumbnail. For more information, look at ThumbN.
Scenes
(1) Once the backdrop props are complete in Illustrator and Flash, make sure both the prop names and prop file names are appropriate.
(2) Drag and drop the SWF files into CTA to assemble the environment. Make sure that the Z-depth ordering is different for all of the props to prevent flickering when the camera is moved.
(3) Animate props according to the needs of the environment.
(4) Once the scene is assembled, save the project and every individual prop as its own file.
- 1) Zero out the position of the prop and set its scale to 100.
- 2) Check the naming of the prop in the Stage and the Composer's Scene Manager.
- 3) Save the prop into the Content Manager.
(5) Save out the scene:
- 1) Check for missing or locked props and select all of the props in the scene.
- 2) Right click on the scene and perform Convert to Scene.
(6) Finish by saving the scene in the Content Manager.
Wearable Accessories
Accessories are categorized as dynamic (carrying motion) and static. The processing of which is the same as processing a prop. However, there are some important things to consider when making accessories:
(1) In order to fit most characters, the accessory can be composed of parts that make it easy to adjust in the Composer.
(2) Accessories with front and back layers need to be saved as separate SWF files and put together in the Composer.
Submission & Verification
Output Standard Formats
File Save Overview
Developers should save the following files for saving and editing if required.
| File | Description | Type |
|---|---|---|
| Source material file | The final version of the image files made in Adobe Illustrator. | *.ai |
| Flash file | The Flash file used for exporting the images in SWF format. | *.fla |
| SWF file | The final images exported from Flash. | *.swf |
| Dynamic prop creation file | The production files for the prop with motion keys. | *.ctProject |
| Scene assembly file | The project where the scene elements are assembled in. | *.ctProject |
| Scene file | The environment file exported from the scene project. | *.ctScene |
Final File Formats & Naming Conventions
Prop and motion names:
(1) Please follow the naming conventions set by the Project Manager. (2) Use your best judgement when coming up with suitable names.
Points and Process for Verification
Verification Process
The verification process is separated into two phases: graphics and motion.
Stage by Stage Inspection List and Description
(1) Whether or not the style and color tone is consistent for the entire image.
(2) Check the rhythm and the performance of the motion.
(3) Whether or not the prop names match in the Stage and the Composer's Scene Manager.
(4) Whether or not the prop still carries motion keys.
(5) Check for missing motion in the Action Menu or motion names that have not been updated.
(6) Make sure the position is zeroed out and the scale is set to 100.
(7) Move the camera around to check for defects and flickering in the backdrop image.
