Content Dev:CTA5 G3 Character Addendum
- Main article: Content Dev: CTA Actor.
Program-Specific Operations
Embedding Images
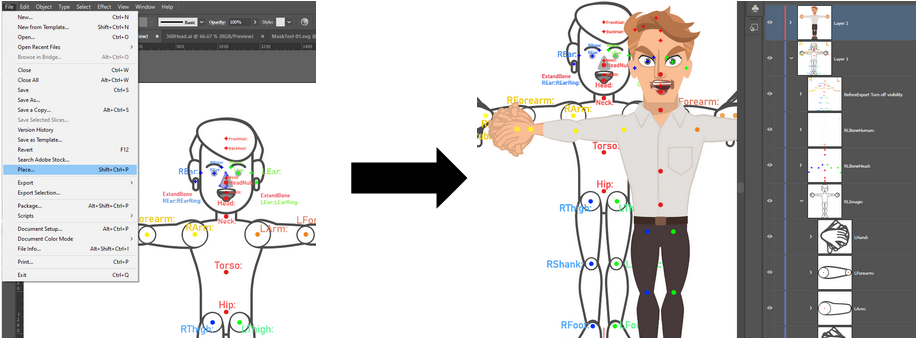
Illustrator (SVG)
Perform File > Place and import an image.
CorelDraw
Drag and drop to the template file.
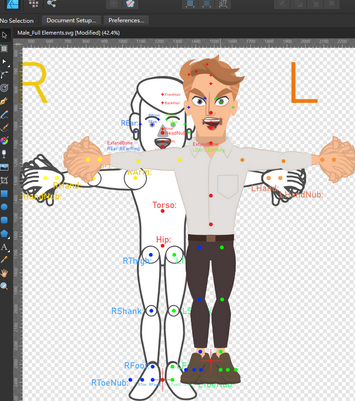
Affinity Designer
- Open your vector character file and copy it.
- Open the template file.
- Paste your character to the template file.
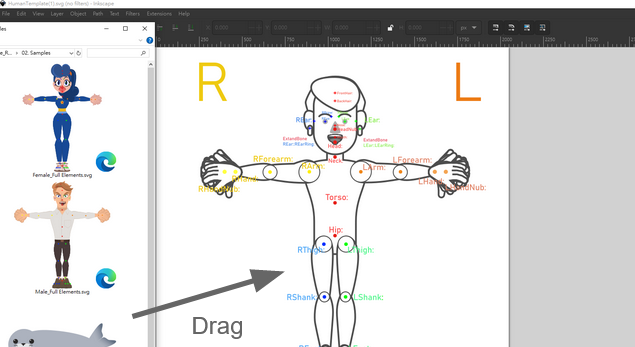
Inkscape
Drag your character onto the template file in Inkscape and choose Include SVG images as editable object(s) in the current file.
Custom Skeleton Creation (including Extendbone)
In order to add extra bones to the default templates:
Duplicate any bone layer under RLBone and name it according to its functionality. ExtendBone naming convention is “Bone::ExtendBone:” the prefix is the parent layer while the suffix is the child layer. For example, if you want to add an earring (REarRing:) to the ear (REar:), you'll need to change its name to REar::REarRing:.
Workspace Settings
Template files are designed with the best settings in mind. Even so, you'll need to give precaution to the following settings.
Illustrator
Keep in mind that only English version of Adobe Illustrator and SVG 1.1 are currently supported. Use the following software settings:
| Menu Item | Settings |
|---|---|
| File > Document Color Mode | Enable RGB Color. |
| File > Document Setup | Select 'Pixels'. |
| File > Preferences > Unit | Switch to 'Pixels' for General, Stroke, and Type. |
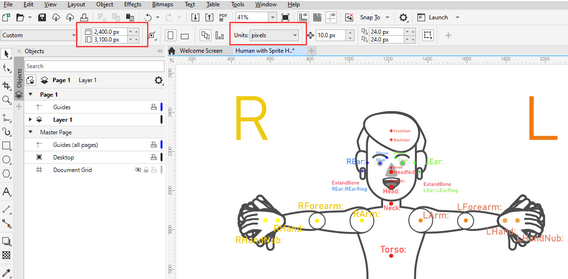
CorelDraw
Use the following settings:
Affinity Designer
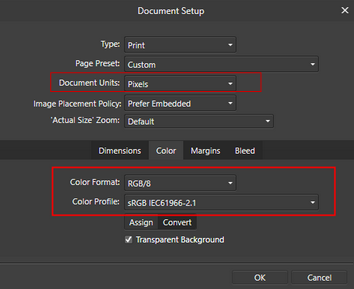
Adjust the 'Pixels' and 'sRGB' settings.
Photopea
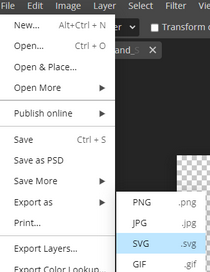
Perform Open > Svg.
Export Procedure
Illustrator
Use SVG1.1 for export:
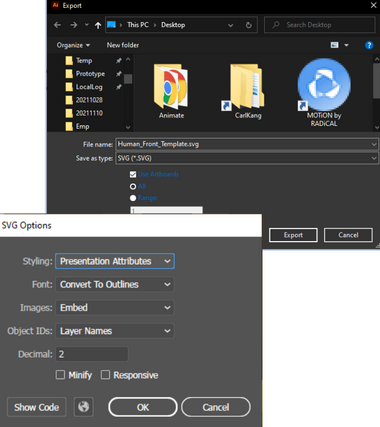
- Perform File > Export > Export As to export SVG.
- Activate Use ArtBoards to select all elements.
- Use the following SVG Options configuration:
| Menu Item | Settings |
|---|---|
| Styling | 'Presentation Attributes' |
| Images | 'Embed' |
| Object IDs | 'Layer Names' |
| Decimal | 2 |
| Minify | Disabled |
| Reponsive | Disabled |
CorelDraw
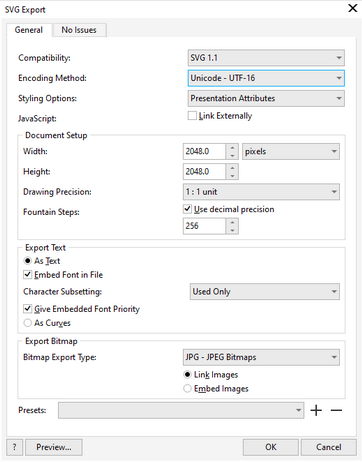
- Perform Export > Export as > SVG.
- Use the following SVG export options:
- SVG 1.1
- Unicode - UTF 16
- Presentation Attributes
Affinity Designer
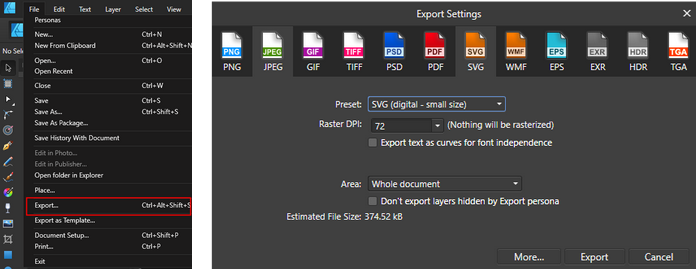
- Perform Export… > SVG.
- Set Preset: to its default: 'SVG(digital - small size)'.
- Set Raster DPI: to 72.
Inkscap
You have two options:
- Open Svg in Inkscape.
- Import Svg in Inkscape.
Select Open SVG image directly using its path.
Perform Export as > SVG. Do not use Save to replace the SVG as it will corrupt the file structure.
Troubleshooting
In the later stage of production, there may be opportunities to readjust the character for various reasons. Some ways to quickly adjust the character are mentioned in this section.
Object Profile
Suitable for minor adjustments to the character's appearance but with the head turn, spring bone, and Color Groups settings already applied. After applying the OBJ profile, select the parts you want to restore the bone structure or choose to restore the entire character.
360 Head
Save the head turns (in facial profile) and apply them back to the character. It's best applied when the whole character is reassembled from the SVG file (before the head has changed and the Spring settings configured) in order to skip one step in the process.
Color Group
Save a Color Group Profile for reapplication. Usually, the front profile is saved and applied to the side view or for making small adjustments; so you don't need to set up a Color Group folder from scratch. The same circumstances apply to props.
Replacing Parts
Modify only a single feature of the face/hair, or replace the entire head. Import the modified character SVG into CTA then save the graphics or head turns and other settings as a part and then put it on the character. This type of modification is the fastest and most minimal. Almost all CTA5 characters save their heads and put them back into shape. Because not all original SVGs of characters are modified and assembled in CTA, it is recommended to keep track of the individual items used for assembly. The Color Groups need to be properly named in order to properly apply.
Limitations
SVGs that contain pixel images and fonts will not appear. It's recommended to perform Convert to Outline to turn strokes into fills before exporting.
Pitfalls
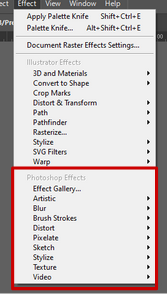
In Illustrator, Photoshop Effects, Pattern Brushes, and Free Gradients will cause Illustration to export a raster image.
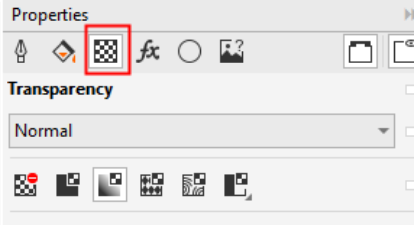
In CorelDraw, transparency tools will cause Illustration to export a raster image.
Design Suggestions
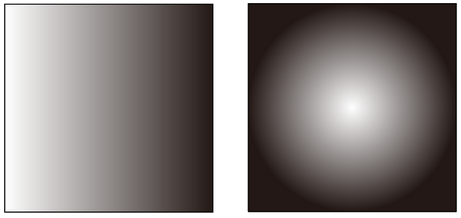
Only linear and radial gradients are supported. Freeform gradients brought into CTA are unsupported and will be converted to raster.
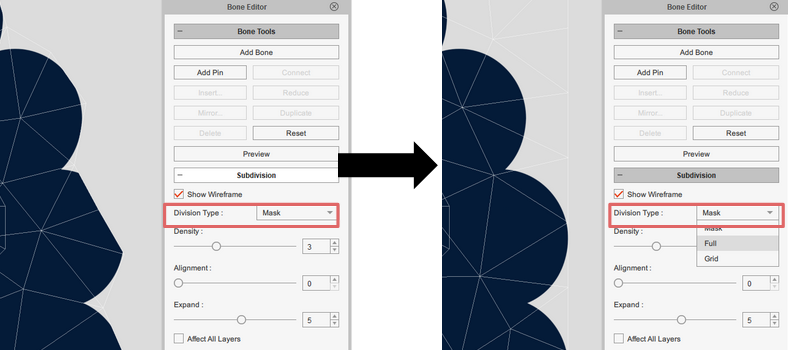
If the image is cropped once it is imported, you can change Composer > Bone Editor > Mask Shape to “Full Image” to uncrop it or increase Expand.
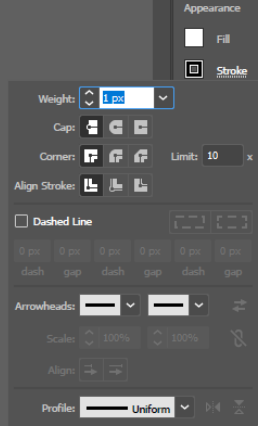
Change Weight: to '1 px'. Design-wise, line and stroke should not be lower than 1 pixel.
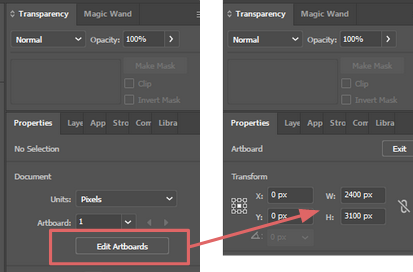
Even though SVG does not lose quality with scaling, CTA subdivides meshes based on pixel width and height. Too few pixels may result in inadequate subdivision for the mesh; too many pixels will create overly dense subdivisions. It's recommended to just use the Artboard template. For manual setting, use the following values (in pixels):
- Actor recommended size: 2400 x 3100
- Scene recommended size: 5100 x 3400
- There is no recommended size for props. Start with the minimum 400 x 400 and adjust according to your needs.
